在芯片制造中,即使是同一设计图纸生产的芯片,其性能也可能千差万别——有的能稳定超频运行,有的却只能在低频下工作。这种差异的根源,正是制造工艺中不可避免的波动性。为了系统化描述和应对这种波动,工程师们提出了**Corner(工艺角)**的概念,并通过SS/TT/FF等关键工艺条件来量化芯片的性能边界。一、什么是工艺角(Corner)? 工艺角 是芯片制造中对工艺参数波动的极端模拟场景。由于制造过程中掺杂浓度、刻蚀精度、材料厚度等参数的微小偏差,每个芯片的晶体管特性都会存在差异。这种差异会导致同一型号芯片的速度、功耗等性能指标出现显著分化。
工艺角的本质是通过极端参数组合,覆盖芯片可能遇到的所有性能场景 ,从而在设计阶段验证芯片的鲁棒性。它通常与**PVT(Process-Voltage-Temperature)**模型结合使用,其中:
Process :工艺参数波动(即工艺角)Voltage :供电电压变化(如±10%)Temperature :工作温度范围(如-40°C~125°C)二、SS/TT/FF工艺角的核心特点 1. TT(Typical-Typical) 定义 :NMOS和PMOS晶体管的工艺参数均处于典型值。性能表现 :速度和功耗均为设计预期值,代表芯片的“平均性能”。应用场景 :标称工作频率的基准值(如CPU的基频标注)。2. FF(Fast-Fast) 定义 :NMOS和PMOS均处于“快速”工艺角,载流子迁移率高。性能表现 :晶体管开关速度最快 (高频潜力大) 漏电流增加,功耗最高 可能因信号过于敏感导致稳定性下降 应用场景 :超频芯片筛选、高性能计算场景。3. SS(Slow-Slow) 定义 :NMOS和PMOS均处于“缓慢”工艺角,载流子迁移率低。性能表现 :晶体管速度最慢 (极限频率低) 漏电流最小,功耗最低 信号延迟大,但抗干扰能力强 应用场景 :低功耗设备、工控级高可靠性需求场景。4. FS(Fast-Slow)与SF(Slow-Fast) 不对称工艺角 :模拟NMOS与PMOS速度不匹配的极端情况。典型问题 :FS:NMOS快、PMOS慢 → 可能导致逻辑门输出电平异常 SF:NMOS慢、PMOS快 → 增大时序路径竞争风险 应用场景 :验证电路对工艺偏差的容忍度。三、工艺角的四大应用价值 设计验证
在SS工艺角下,需确保关键路径延迟不超过时钟周期。 在FF工艺角下,需验证电源网络能否承受峰值电流。 性能分级与筛选
FF偏向的芯片:标为高频版本(如CPU的“K”系列) SS偏向的芯片:用于低功耗嵌入式场景 超出SS/FF边界的芯片:可能被降级或报废 良率提升
若SS角良率低,可能需调整掺杂工艺。 若FF角功耗超标,需优化电源管理电路。 超频潜力评估
标称频率基于TT角,但FF角仿真显示可提升30% → 预留超频空间。 四、工艺角的现实影响:以CPU为例 同一型号的性能差异 :
“灰烬版”芯片的由来 :
低功耗设备的秘密 :
五、未来挑战:先进工艺下的Corner风暴 随着工艺进入3nm以下节点,工艺角的影响更加复杂:
新工艺角增加 :FinFET的鳍片高度、GAA晶体管的纳米片数量等新参数引入更多工艺角组合。动态电压温度补偿 :芯片需实时感知自身工艺角特性,动态调整电压频率(如苹果M系列芯片的自主功耗管理)。AI辅助Corner仿真 :机器学习被用于预测工艺角分布,替代传统蒙特卡洛仿真,加速设计周期。结语 工艺角是芯片性能的“基因检测报告”,SS/TT/FF则是这份报告中的关键指标。理解这些概念,不仅能解释“同型号芯片为何性能不同”,更能让我们看清半导体行业如何在纳米级的波动中,驾驭不确定性,缔造出兼顾性能与可靠性的计算奇迹。下一次当你超频CPU时,或许会想起:这背后是一场与工艺角的精密博弈。
]]>
https://gloomyghost.com/live/2025-02-04-20250204.aspx
2025-02-03T16:00:00.000Z
在芯片制造中,即使是同一设计图纸生产的芯片,其性能也可能千差万别——有的能稳定超频运行,有的却只能在低频下工作。这种差异的根源,正是制造工艺中不可避免的波动性。为了系统化描述和应对这种波动,工程师们提出了**Corner(工艺角)**的概念,并通过SS/TT/FF等关键工艺]]>
芯片制造的Corner与SS/TT/FF工艺角:性能差异的核心密码
2026-04-25T03:17:29.451Z
柚木 鉉
HIFI 4 简介如下Cadence® Tensilica® HiFi 4 DSP是一款32位固定点和浮点处理器,专为智能音箱、家庭娱乐和汽车信息娱乐等要求高的DSP应用而设计。它为复杂的多麦克风远场处理、使用神经网络技术的唤醒词检测提供了改进的性能,并支持最新的基于对象的编解码器,适用于机顶盒,音响和电视产品。
主要优势:
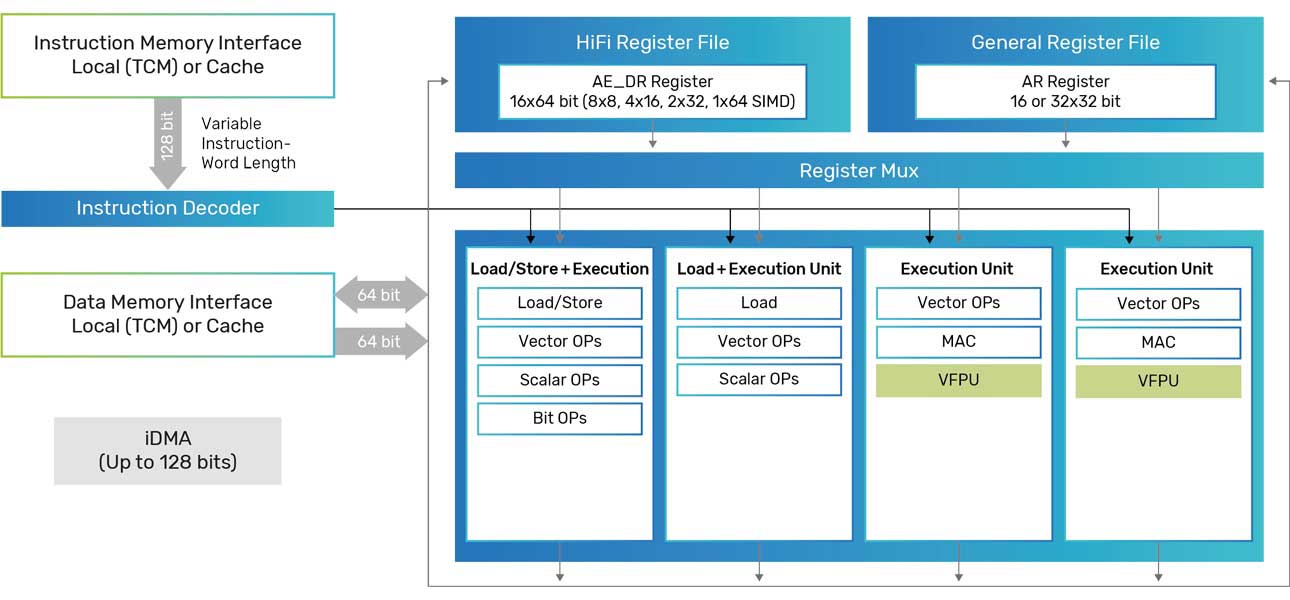
复杂的面向对象编解码器:有效执行复杂的音频编解码器,适用于电视、机顶盒和音响。 高性能的DSP:在FFT和FIR等计算密集型函数方面,HiFi 4 DSP的性能比HiFi 3z DSP提高了一倍,支持ANC、降噪和声音分析等占用性能的算法。 基于神经网络的语音助手:结合高性能的DSP和增强的NN性能,可靠地用于电视、机顶盒、音箱和智能音箱的远场语音助手功能。 ISO 26262:具有硬件和软件安全机制,符合ASIL标准。 主要特点:
在特定条件下支持每个周期8个32x16位MAC。 四个VLIW槽体结构,每个周期可发出两个64位加载。 可选向量浮点单元,提供每个周期最多四个单精度IEEE浮点MAC。 软件兼容完整的HiFi DSP产品线,提供超过300种HiFi优化的音频和语音编解码器和音频增强软件包。 HiFi NN库提供了经过优化的常用NN处理函数集,可轻松集成到流行的机器学习框架中。
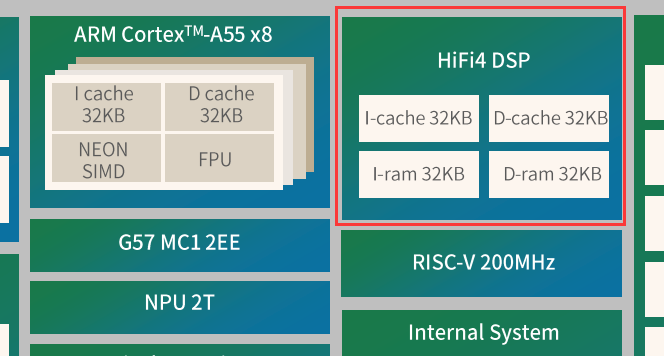
在 D1-H T113 A523 系列芯片中可以发现 HIFI4 的踪影
HIFI 4 启动流程 先看时钟初始化流程
void sunxi_hifi4_clock_init (uint32_t addr) {uint32_t reg_val = 0 ;1 );2 );1 << CCU_BIT_DSP_SCLK_GATING);1 << CCU_BIT_DSP0_CFG_GATING);1 << CCU_BIT_DSP0_CFG_RST);1 << CCU_BIT_DSP0_DBG_RST);if (addr != DSP_DEFAULT_RST_VEC) {1 << BIT_START_VEC_SEL);1 );1 << BIT_DSP_CLKEN);1 << CCU_BIT_DSP0_RST);0 );0 );
通过sram_remap_set(1)函数设置SRAM映射,确保存储器映射正确。
配置DSP的时钟源为PERI2X,并将时钟倍频因子设置为2,同时打开DSP的时钟门控功能,以确保时钟信号正常传输到DSP。
进行时钟门控设置,将DSP0的配置部分时钟门控位置为1,以确保配置部分的时钟信号可用。
进行复位操作,首先对DSP0进行配置复位,然后对DSP0进行调试复位,以确保DSP在初始化过程中处于良好的初始状态。
如果需要设置外部复位向量,将指定的地址写入相应的寄存器,同时设置启动向量选择。我们在这里设置 HIFI4 的程序启动地址。
设置运行暂停标志,以确保DSP在初始化完成后进入正常的工作状态。
打开DSP时钟使能,以确保DSP的时钟信号正常启动。
取消对DSP0的复位,使得DSP可以开始正常的运行。
通过以上初始化流程的操作,可以确保DSP在初始化后可以正常工作,并准备好接收和处理相应的任务和指令。
编译 HIFI 4 固件 由于 HIFI 4 使用的是 Xtensa Xplorer 套件,这个套件需要购买。但是没钱,所以需要手搓一个,手搓方法参考之前写的 HIFI5 即可。
既然有了编译器,那就适配一个 FreeRTOS,链接:https://github.com/YuzukiHD/FreeRTOS-HIFI4-DSP
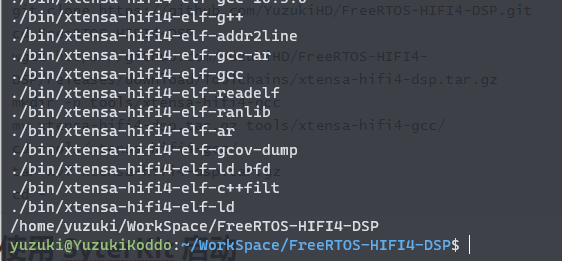
搭建环境 用下面的命令克隆代码并搭建环境
git clone https://github.com/YuzukiHD/FreeRTOS-HIFI4-DSP.git
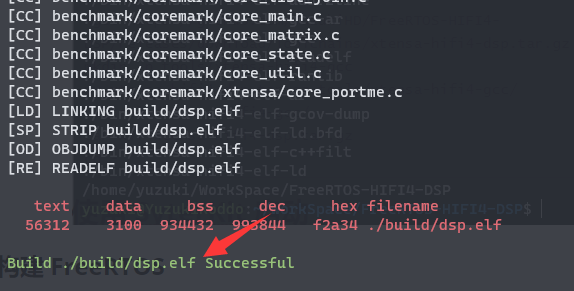
构建 FreeRTOS 构建固件非常简单,执行 make 即可,生成的固件在 ./build/dsp.elf 下
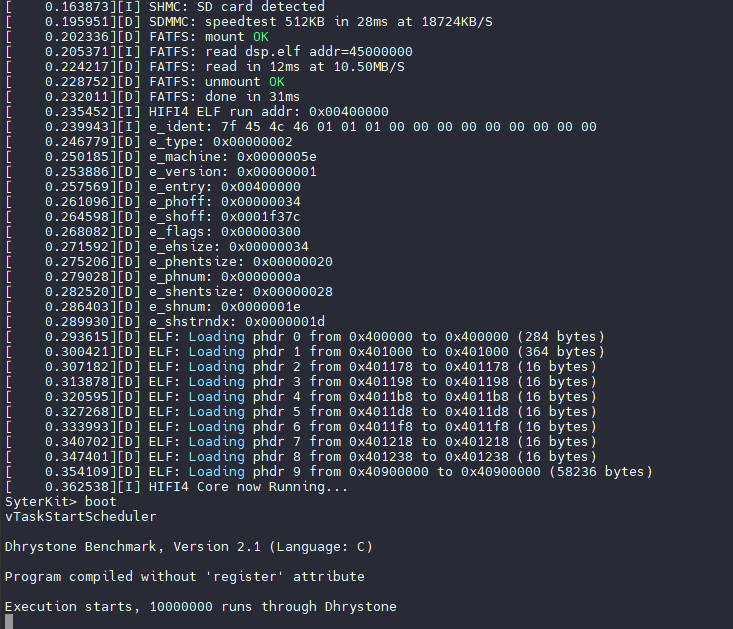
使用 SyterKit 启动 SyterKit 是一个纯裸机框架,用于 TinyVision 或者其他 v851se/v851s/v851s3/v853 等芯片的开发板,SyterKit 使用 CMake 作为构建系统构建,支持多种应用与多种外设驱动。同时 SyterKit 也具有启动引导的功能,可以替代 U-Boot 实现快速启动
获取 SyterKit 源码 SyterKit 源码位于GitHub,可以前往下载。
git clone https://github.com/YuzukiHD/SyterKit.git
从零构建 SyterKit 构建 SyterKit 非常简单,只需要在 Linux 操作系统中安装配置环境即可编译。SyterKit 需要的软件包有:
对于常用的 Ubuntu 系统,可以通过如下命令安装
sudo apt-get update
然后新建一个文件夹存放编译的输出文件,并且进入这个文件夹
然后运行命令编译 SyterKit
编译后的可执行文件位于 build/app 中,这里包括 SyterKit 的多种APP可供使用。
进入 load_hifi4
按照需求选择,这里我们使用卡启动,所以使用 load_hifi4_bin_card.bin
使用 genimage 打包固件 编写 genimage.cfg 作为打包的配置
image boot.vfat {
由于genimage的脚本比较复杂,所以编写一个 genimage.sh 作为简易使用的工具
#!/usr/bin/env bash die cat <<EOF >&2 Error: $@ Usage: ${0} -c GENIMAGE_CONFIG_FILE EOF exit 1"$(getopt -n "${0##*/} " -o c: -- "$@ " ) " || exit $?eval set -- "$opts " "${BUILD_DIR} /genimage.tmp" while true ; do case "$1 " in "${2} " ;shift 2 ;;shift 1;break ;;"unknown option '${1} '" ;;esac done "${GENIMAGE_CFG} " ] || die "Missing argument" trap 'rm -rf "${ROOTPATH_TMP}"' EXIT"$(mktemp -d) " "$(mktemp -d) " rm -rf "${GENIMAGE_TMP} " "${ROOTPATH_TMP} " \"${GENIMAGE_TMP} " \"${BINARIES_DIR} " \"${BINARIES_DIR} " \"${GENIMAGE_CFG} "
准备完成,运行打包即可
./genimage.sh -c genimage.cfg
性能对比 官方 XCC 编译器
2K performance run parameters for coremark.
GCC
Dhrystone Benchmark, Version 2.1 (Language: C)
https://gloomyghost.com/live/2024-02-22-20240222.aspx
2024-02-21T16:00:00.000Z
HIFI 4 简介如下
Cadence® Tensilica® HiFi 4 DSP是一款32位固定点和浮点处理器,专为智能音箱、家庭娱乐和汽车信息娱乐等要求高的DSP应用而设计。它为复杂的多麦克风远场处理、使用神经网络技术的唤醒词检测提供了改进的性能,并支持]]>
T527 T113-S3 使用 SyterKit + 自制编译器开发 HIFI4 DSP
2026-04-25T03:17:29.451Z
柚木 鉉
TinyVision V851s 使用 OpenCV + NPU 实现 Mobilenet v2 物体识别。上一篇已经介绍了如何使用 TinyVision 与 OpenCV 开摄像头,本篇将使用已经训练完成并且转换后的模型来介绍对接 NPU 实现物体识别的功能。MobileNet V2 MobileNet V2是一种轻量级的卷积神经网络(CNN)架构,专门设计用于在移动设备和嵌入式设备上进行计算资源受限的实时图像分类和目标检测任务。
以下是MobileNet V2的一些关键特点和创新之处:
Depthwise Separable Convolution(深度可分离卷积):MobileNet V2使用了深度可分离卷积,将标准卷积分解为两个步骤:depthwise convolution(深度卷积)和pointwise convolution(逐点卷积)。这种分解方式可以显著减少计算量和参数数量,从而提高模型的轻量化程度。
Inverted Residuals with Linear Bottlenecks(带线性瓶颈的倒残差结构):MobileNet V2引入了带有线性瓶颈的倒残差结构,以增加模型的非线性表示能力。这种结构在每个残差块的中间层采用较低维度的逐点卷积来减少计算量,并使用扩张卷积来增加感受野,使网络能够更好地捕捉图像中的细节和全局信息。
Width Multiplier(宽度乘数):MobileNet V2提供了一个宽度乘数参数,可以根据计算资源的限制来调整模型的宽度。通过减少每个层的通道数,可以进一步减小模型的体积和计算量,适应不同的设备和应用场景。
Linear Bottlenecks(线性瓶颈):为了减少非线性激活函数对模型性能的影响,MobileNet V2使用线性激活函数来缓解梯度消失问题。这种线性激活函数在倒残差结构的中间层中使用,有助于提高模型的收敛速度和稳定性。
总体而言,MobileNet V2通过深度可分离卷积、倒残差结构和宽度乘数等技术,实现了较高的模型轻量化程度和计算效率,使其成为在资源受限的移动设备上进行实时图像分类和目标检测的理想选择。
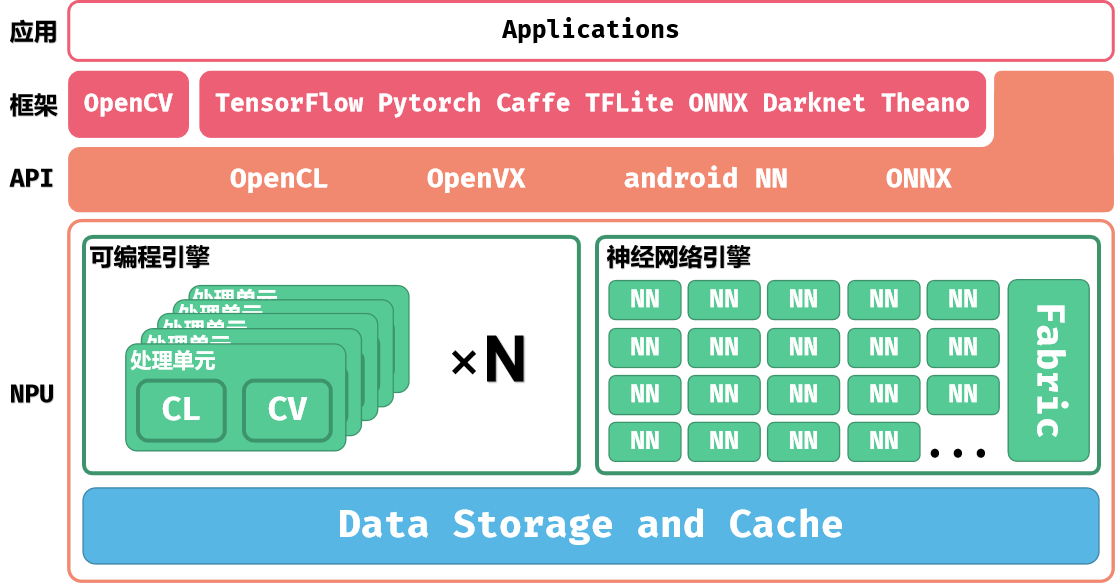
NPU V851s 芯片内置一颗 NPU,其处理性能为最大 0.5 TOPS 并有 128KB 内部高速缓存用于高速数据交换
NPU 系统架构 NPU 的系统架构如下图所示:
上层的应用程序可以通过加载模型与数据到 NPU 进行计算,也可以使用 NPU 提供的软件 API 操作 NPU 执行计算。
NPU包括三个部分:可编程引擎(Programmable Engines,PPU)、神经网络引擎(Neural Network Engine,NN)和各级缓存。
可编程引擎可以使用 EVIS 硬件加速指令与 Shader 语言进行编程,也可以实现激活函数等操作。
神经网络引擎包含 NN 核心与 Tensor Process Fabric(TPF,图中简写为 Fabric) 两个部分。NN核心一般计算卷积操作, Tensor Process Fabric 则是作为 NN 核心中的高速数据交换的通路。算子是由可编程引擎与神经网络引擎共同实现的。
NPU 支持 UINT8,INT8,INT16 三种数据格式。
NPU 模型转换 NPU 使用的模型是 NPU 自定义的一类模型结构,不能直接将网络训练出的模型直接导入 NPU 进行计算。这就需要将网络训练出的转换模型到 NPU 的模型上。
NPU 的模型转换步骤如下图所示:
NPU 模型转换包括准备阶段、量化阶段与验证阶段。
准备阶段 首先我们把准备好模型使用工具导入,并创建配置文件。
这时候工具会把模型导入并转换为 NPU 所使用的网络模型、权重模型与配置文件。
配置文件用于对网络的输入和输出的参数进行描述以及配置。这些参数包括输入/输出 tensor 的形状、归一化系数 (均值/零点)、图像格式、tensor 的输出格式、后处理方式等等。
量化阶段 由于训练好的神经网络对数据精度以及噪声的不敏感,因此可以通过量化将参数从浮点数转换为定点数。这样做有两个优点:
(1)减少了数据量,进而可以使用容量更小的存储设备,节省了成本;
(2)由于数据量减少,浮点转化为定点数也大大降低了系统的计算量,也提高了计算的速度。
但是量化也有一个致命缺陷——会导致精度的丢失。
由于浮点数转换为定点数时会大大降低数据量,导致实际的权重参数准确度降低。在简单的网络里这不是什么大问题,但是如果是复杂的多层多模型的网络,每一层微小的误差都会导致最终数据的错误。
那么,可以不量化直接使用原来的数据吗?当然是可以的。
但是由于使用的是浮点数,无法将数据导入到只支持定点运算的 NN 核心进行计算,这就需要可编程引擎来代替 NN 核进行计算,这样可以大大降低运算效率。
另外,在进行量化过程时,不仅对参数进行了量化,也会对输入输出的数据进行量化。如果模型没有输入数据,就不知道输入输出的数据范围。这时候我们就需要准备一些具有代表性的输入来参与量化。这些输入数据一般从训练模型的数据集里获得,例如图片数据集里的图片。
另外选择的数据集不一定要把所有训练数据全部加入量化,通常我们选择几百张能够代表所有场景的输入数据就即可。理论上说,量化数据放入得越多,量化后精度可能更好,但是到达一定阈值后效果增长将会非常缓慢甚至不再增长。
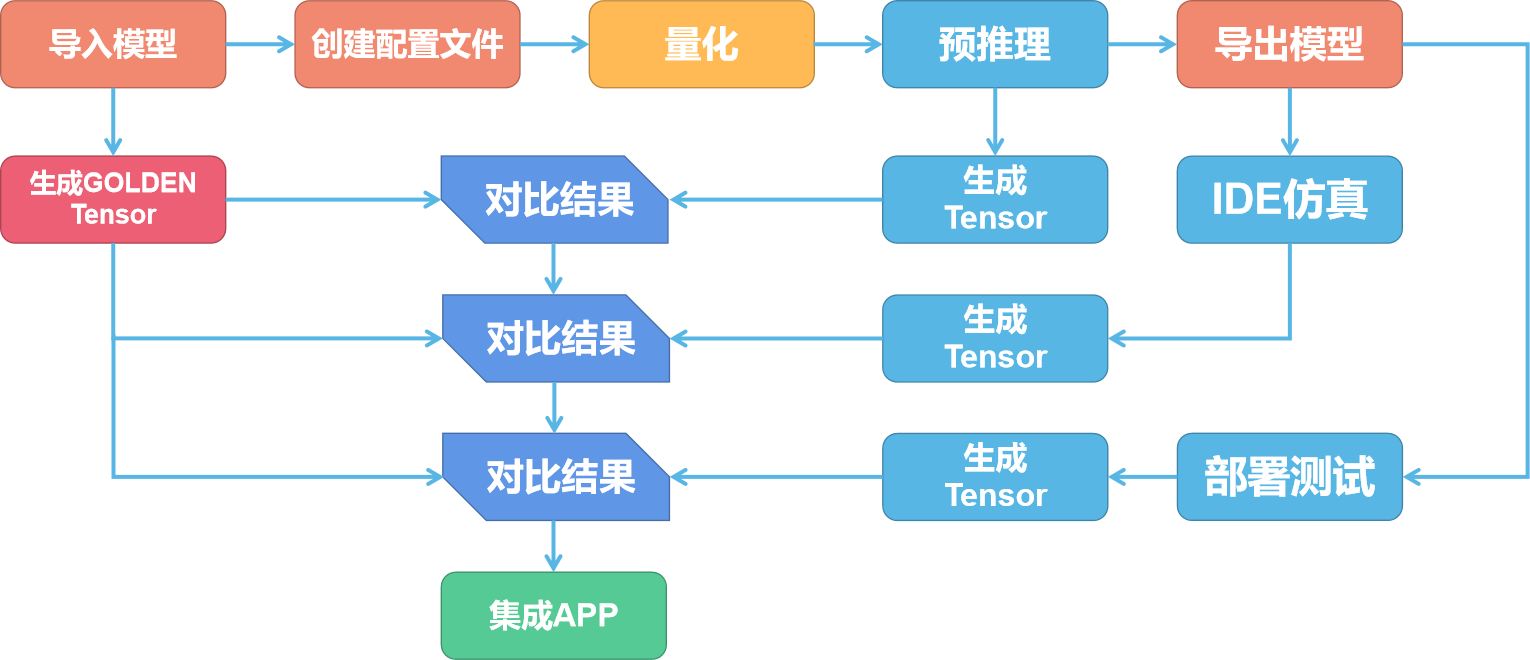
验证阶段 由于上一阶段对模型进行了量化导致了精度的丢失,就需要对每个阶段的模型进行验证,对比结果是否一致。
首先我们需要使用非量化情况下的模型运行生成每一层的 tensor 作为 Golden tensor。输入的数据可以是数据集中的任意一个数据。然后量化后使用预推理相同的数据再次输出一次 tensor,对比这一次输出的每一层的 tensor 与 Golden tensor 的差别。
如果差别较大可以尝试更换量化模型和量化方式。差别不大即可使用 IDE 进行仿真。也可以直接部署到 V851s 上进行测试。
此时测试同样会输出 tensor 数据,对比这一次输出的每一层的 tensor 与 Golden tensor 的差别,差别不大即可集成到 APP 中了。
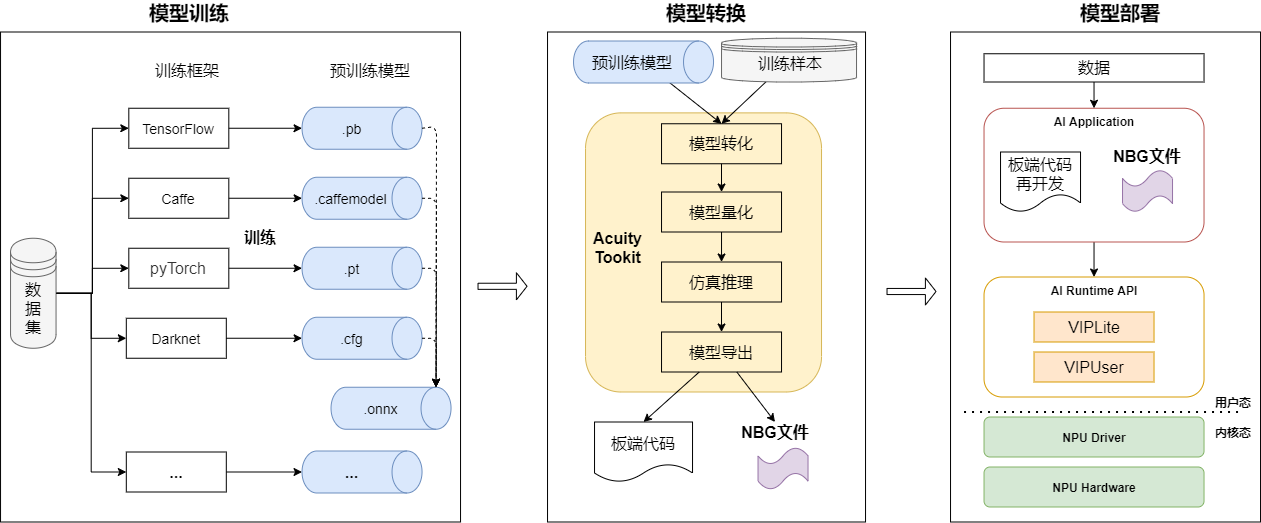
NPU 的开发流程 NPU 开发完整的流程如下图所示:
模型训练 在模型训练阶段,用户根据需求和实际情况选择合适的框架(如Caffe、TensorFlow 等)使用数据集进行训练得到符合需求的模型,此模型可称为预训练模型。也可直接使用已经训练好的模型。V851s 的 NPU 支持包括分类、检测、跟踪、人脸、姿态估计、分割、深度、语音、像素处理等各个场景90 多个公开模型。
模型转换 在模型转化阶段,通过Acuity Toolkit 把预训练模型和少量训练数据转换为NPU 可用的模型NBG文件。
模型导入,生成网络结构文件、网络权重文件、输入描述文件和输出描述文件。 模型量化,生成量化描述文件和熵值文件,可改用不同的量化方式。 仿真推理,可逐一对比float 和其他量化精度的仿真结果的相似度,评估量化后的精度是否满足要求。 模型导出,生成端侧代码和*.nb 文件,可编辑输出描述文件的配置,配置是否添加后处理节点等。 模型部署及应用开发 在模型部署阶段,就是基于VIPLite API 开发应用程序实现业务逻辑。
源码解析 完整的代码已经上传Github开源,前往以下地址:https://github.com/YuzukiHD/TinyVision/tree/main/tina/openwrt/package/thirdparty/vision/opencv_camera_mobilenet_v2_ssd/src
Mobilenet v2 前处理 void get_input_data (const cv::Mat& sample, uint8_t * input_data, int input_h, int input_w, const float * mean, const float * scale) {if (sample.channels() == 1 )else uint8_t * img_data = img.data;for (int h = 0 ; h < input_h; h++) {for (int w = 0 ; w < input_w; w++) {for (int c = 0 ; c < 3 ; c++) {int in_index = h * input_w * 3 + w * 3 + c;int out_index = c * input_h * input_w + h * input_w + w;uint8_t )(img_data[in_index]);uint8_t *mbv2_ssd_preprocess (const cv::Mat& sample, int input_size, int img_channel) {const float mean[3 ] = {127 , 127 , 127 };const float scale[3 ] = {0.0078125 , 0.0078125 , 0.0078125 };int img_size = input_size * input_size * img_channel;uint8_t *tensor_data = NULL ;uint8_t *)malloc (1 * img_size * sizeof (uint8_t ));return tensor_data;
这段C++代码是用于对输入图像进行预处理,以便输入到MobileNet V2 SSD模型中进行目标检测。
get_input_data函数:
该函数对输入的图像进行预处理,将其转换为适合MobileNet V2 SSD模型输入的格式。 首先,对输入图像进行通道格式的转换,确保图像通道顺序符合模型要求(RGB格式)。 然后,将图像大小调整为指定的输入尺寸(input_h * input_w)。 最后,将处理后的图像数据按照特定顺序(NCHW格式)填充到input_data数组中,以便作为模型的输入数据使用。 mbv2_ssd_preprocess函数:
该函数是对输入图像进行 MobileNet V2 SSD 模型的预处理,并返回处理后的数据。 在函数内部,首先定义了图像各通道的均值(mean)和缩放比例(scale)。 然后计算了输入图像的总大小,并分配了相应大小的内存空间用于存储预处理后的数据。 调用了get_input_data函数对输入图像进行预处理,将处理后的数据存储在tensor_data中,并最终返回该数据指针。 总的来说,这段代码的功能是将输入图像进行预处理,以适应MobileNet V2 SSD模型的输入要求,并返回预处理后的数据供模型使用。同时需要注意,在使用完tensor_data后,需要在适当的时候释放相应的内存空间,以避免内存泄漏问题。
Mobilenet v2 后处理 这部分分为来讲:
bool comp (const Bbox_t &a, const Bbox_t &b) return a.score > b.score;static inline float intersection_area (const Bbox_t& a, const Bbox_t& b) cv::Rect_<float > rect_a (a.xmin, a.ymin, a.xmax-a.xmin, a.ymax-a.ymin) ;cv::Rect_<float > rect_b (b.xmin, b.ymin, b.xmax-b.xmin, b.ymax-b.ymin) ;float > inter = rect_a & rect_b;return inter.area ();static void nms_sorted_bboxes (const std::vector<Bbox_t>& bboxs, std::vector<int >& picked, float nms_threshold) clear ();const int n = bboxs.size ();std::vector<float > areas (n) ;for (int i = 0 ; i < n; i++){for (int i = 0 ; i < n; i++) {const Bbox_t& a = bboxs[i];int keep = 1 ;for (int j = 0 ; j < (int )picked.size (); j++) {const Bbox_t& b = bboxs[picked[j]];float inter_area = intersection_area (a, b);float union_area = areas[i] + areas[picked[j]] - inter_area;if (inter_area / union_area > nms_threshold)0 ; if (keep)push_back (i);
这段代码实现了目标检测中常用的非极大值抑制算法(NMS)。comp函数用于对Bbox_t对象按照分数进行降序排序。intersection_area函数用于计算两个框之间的交集面积。nms_sorted_bboxes函数是NMS算法的具体实现,它接受一个已经按照分数排序的框的向量bboxs,以及一个空的整数向量picked,用于存储保留下来的框的索引。nms_threshold是一个阈值,用于控制重叠度。
算法的步骤如下:
清空存储结果的picked向量。 获取框的个数n,创建一个用于存储每个框面积的向量areas。 遍历每个框,计算其面积并存储到areas向量中。 对每个框进行遍历,通过计算交并比来判断是否选择该框。如果交并比大于阈值,则不选择该框。 如果符合条件,则选择该框,将其索引加入到picked向量中。 完成非极大值抑制算法,picked向量中存储了保留下来的框的索引。 这个算法的作用是去除高度重叠的框,只保留得分最高的那个框,以减少冗余检测结果。
cv::Mat detect_ssd (const cv::Mat& bgr, float **output) {float iou_threshold = 0.45 ;float conf_threshold = 0.5 ;const int inputH = 300 ;const int inputW = 300 ;const int outputClsSize = 21 ;#if MBV2_SSD int output_dim_1 = 3000 ;#else int output_dim_1 = 8732 ;#endif int size0 = 1 * output_dim_1 * outputClsSize;int size1 = 1 * output_dim_1 * 4 ;std ::vector <float > scores_data (output[0 ], &output[0 ][size0-1 ]) ;std ::vector <float > boxes_data (output[1 ], &output[1 ][size1-1 ]) ;const float * scores = scores_data.data();const float * bboxes = boxes_data.data();float scale_w = bgr.cols / (float )inputW;float scale_h = bgr.rows / (float )inputH;bool pass = true ;std ::vector <Bbox_t> BBox;for (int i = 0 ; i < output_dim_1; i++) {std ::vector <float > conf;for (int j = 0 ; j < outputClsSize; j++) {int max_index = std ::max_element(conf.begin(), conf.end()) - conf.begin();if (max_index != 0 ) {if (conf[max_index] < conf_threshold)continue ;int left = bboxes[i * 4 ] * scale_w * 300 ;int top = bboxes[i * 4 + 1 ] * scale_h * 300 ;int right = bboxes[ i * 4 + 2 ] * scale_w * 300 ;int bottom = bboxes[i * 4 + 3 ] * scale_h * 300 ;std ::max(0 , left);std ::max(0 , top);std ::sort(BBox.begin(), BBox.end(), comp);std ::vector <int > keep_index;std ::vector <cv::Rect> bbox_per_frame;for (int i = 0 ; i < keep_index.size(); i++) {int left = BBox[keep_index[i]].xmin;int top = BBox[keep_index[i]].ymin;int right = BBox[keep_index[i]].xmax;int bottom = BBox[keep_index[i]].ymax;int width = right - left;int height = bottom - top;int center_x = left + width / 2 ;0 , 0 , 255 ), 1 );char text[256 ];sprintf (text, "%s %.1f%%" , class_names[BBox[keep_index[i]].cls_idx], BBox[keep_index[i]].score * 100 );1 , cv::Scalar(0 , 255 , 255 ), 1 , 8 , 0 );return bgr;
这段代码主要用于处理模型的输出结果,将输出数据转换为向量,并计算缩放比例,然后创建一个向量来存储检测结果。
具体步骤如下:
定义了一些阈值和常数,包括IOU阈值(iou_threshold)、置信度阈值(conf_threshold)、输入图像的高度和宽度(inputH和inputW)、输出类别数量(outputClsSize)、输出维度(output_dim_1)。 计算输出数据的大小,分别为类别得分数据的大小(size0)和边界框数据的大小(size1)。 将输出数据转换为向量,分别为类别得分数据向量(scores_data)和边界框数据向量(boxes_data)。 获取类别得分和边界框的指针,分别为scores和bboxes。 计算图像的缩放比例,根据输入图像的尺寸和模型输入尺寸之间的比例计算得到。 创建一个向量BBox,用于存储检测结果。该向量的类型为Bbox_t 遍历每一个框(共有output_dim_1个框)。 获取每一个框的各个类别的置信度,并将其存储在conf向量中。 找到置信度最大的类别,并记录其下标max_index。 如果最大置信度的类别不是背景类,并且置信度大于设定的阈值,则选中该框。 根据缩放比例计算框的坐标和尺寸,其中left、top、right和bottom分别表示框的左上角和右下角的坐标。 确保框的坐标不超出图像范围,并将目标框的信息(包括位置、置信度、类别等)存储在Bbox_t类型的变量b中。 将b加入到BBox向量中。 清空conf向量,为下一个框的检测做准备。 对所有检测到的目标框按照置信度从高到低排序; 应用非极大值抑制算法,筛选出重叠度较小的目标框,并将保留的目标框的索引存储在keep_index向量中; 遍历保留的目标框,对每个目标框进行绘制和标注; 在图像上用矩形框标出目标框的位置和大小,并在矩形框内添加目标类别和置信度; 将绘制好的目标框信息(包括左上角坐标、宽度和高度)存储在bbox_per_frame向量中; 返回绘制好的图像。 需要注意的是,该代码使用了OpenCV库中提供的绘制矩形框和添加文字的相关函数。其中cv::rectangle()函数用于绘制矩形框,cv::putText()函数用于在矩形框内添加目标类别和置信度。
获取显示屏的参数信息 struct framebuffer_info {uint32_t bits_per_pixel;uint32_t xres_virtual;struct framebuffer_info get_framebuffer_info (const char * framebuffer_device_path) struct framebuffer_info info ;struct fb_var_screeninfo screen_info ;int fd = -1 ;if (fd >= 0 ) {if (!ioctl(fd, FBIOGET_VSCREENINFO, &screen_info)) {return info;
这段代码的用途是获取帧缓冲器的信息。
具体来说:
framebuffer_info 是一个结构体,用于存储帧缓冲器的信息,包括每个像素的位数和虚拟分辨率。
get_framebuffer_info 是一个函数,用于获取帧缓冲器的信息。它接受帧缓冲器设备路径作为参数,打开设备文件并使用 ioctl 函数获取屏幕信息,然后将信息存储在 framebuffer_info 结构体中并返回。
信号处理函数 注册信号处理函数,用于 ctrl-c 之后关闭摄像头,防止下一次使用摄像头出现摄像头仍被占用的情况。
static void terminate (int sig_no) printf ("Got signal %d, exiting ...\n" , sig_no);release ();exit (1 );static void install_sig_handler (void ) signal (SIGBUS, terminate); signal (SIGFPE, terminate); signal (SIGHUP, terminate); signal (SIGILL, terminate); signal (SIGINT, terminate); signal (SIGIOT, terminate); signal (SIGPIPE, terminate); signal (SIGQUIT, terminate); signal (SIGSEGV, terminate); signal (SIGSYS, terminate); signal (SIGTERM, terminate); signal (SIGTRAP, terminate); signal (SIGUSR1, terminate); signal (SIGUSR2, terminate);
这段代码定义了两个函数,并给出了相应的注释说明。具体注释如下:
static void terminate(int sig_no):信号处理函数。int sig_no:接收到的信号编号。printf("Got signal %d, exiting ...\n", sig_no);:打印接收到的信号编号。cap.release();:释放视频流捕获对象。exit(1);:退出程序。static void install_sig_handler(void):安装信号处理函数。signal(SIGBUS, terminate);:为SIGBUS信号安装信号处理函数。signal(SIGFPE, terminate);:为SIGFPE信号安装信号处理函数。signal(SIGHUP, terminate);:为SIGHUP信号安装信号处理函数。signal(SIGILL, terminate);:为SIGILL信号安装信号处理函数。signal(SIGINT, terminate);:为SIGINT信号安装信号处理函数。signal(SIGIOT, terminate);:为SIGIOT信号安装信号处理函数。signal(SIGPIPE, terminate);:为SIGPIPE信号安装信号处理函数。signal(SIGQUIT, terminate);:为SIGQUIT信号安装信号处理函数。signal(SIGSEGV, terminate);:为SIGSEGV信号安装信号处理函数。signal(SIGSYS, terminate);:为SIGSYS信号安装信号处理函数。signal(SIGTERM, terminate);:为SIGTERM信号安装信号处理函数。signal(SIGTRAP, terminate);:为SIGTRAP信号安装信号处理函数。signal(SIGUSR1, terminate);:为SIGUSR1信号安装信号处理函数。signal(SIGUSR2, terminate);:为SIGUSR2信号安装信号处理函数。这段代码的功能是安装信号处理函数,用于捕获和处理不同类型的信号。当程序接收到指定的信号时,会调用terminate函数进行处理。
具体而言,terminate函数会打印接收到的信号编号,并释放视频流捕获对象cap,然后调用exit(1)退出程序。
install_sig_handler函数用于为多个信号注册同一个信号处理函数terminate,使得当这些信号触发时,都会执行相同的处理逻辑。
主循环 int main (int argc, char *argv[]) const int frame_width = 480 ; const int frame_height = 480 ; const int frame_rate = 30 ; char * nbg = "/usr/lib/model/mobilenet_v2_ssd.nb" ; install_sig_handler (); get_framebuffer_info ("/dev/fb0" ); open (0 ); if (!cap.isOpened ()) {"Could not open video device." << std::endl; return 1 ;"Successfully opened video device." << std::endl; set (cv::CAP_PROP_FRAME_WIDTH, frame_width); set (cv::CAP_PROP_FRAME_HEIGHT, frame_height); set (cv::CAP_PROP_FPS, frame_rate); std::ofstream ofs ("/dev/fb0" ) ; awnn_init (7 * 1024 * 1024 ); awnn_create (nbg); if (NULL == context){"fatal error, awnn_create failed." << std::endl; return -1 ;uint32_t input_width = 300 ; uint32_t input_height = 300 ; uint32_t input_depth = 3 ; uint32_t sz = input_width * input_height * input_depth; uint8_t * plant_data = NULL ; while (true ) {if (frame.depth () != CV_8U) {"不是8位每像素和通道。" << std::endl;else if (frame.channels () != 3 ) {"不是3个通道。" << std::endl;else {transpose (frame, frame);flip (frame, frame, 0 );resize (frame, frame, cv::Size (input_width, input_height));mbv2_ssd_preprocess (frame, input_width, input_depth);uint8_t *input_buffers[1 ] = {plant_data};awnn_set_input_buffers (context, input_buffers);awnn_run (context);float **results = awnn_get_output_buffers (context);detect_ssd (frame, results);resize (frame, frame, cv::Size (DISPLAY_X, DISPLAY_Y));int framebuffer_width = fb_info.xres_virtual;int framebuffer_depth = fb_info.bits_per_pixel;size ();switch (framebuffer_depth) {case 16 :cvtColor (frame, framebuffer_compat, cv::COLOR_BGR2BGR565);for (int y = 0 ; y < frame_size.height; y++) {seekp (y * framebuffer_width * 2 );write (reinterpret_cast <char *>(framebuffer_compat.ptr (y)), frame_size.width * 2 );break ;case 32 :split (frame, split_bgr);push_back (cv::Mat (frame_size, CV_8UC1, cv::Scalar (255 )));merge (split_bgr, framebuffer_compat);for (int y = 0 ; y < frame_size.height; y++) {seekp (y * framebuffer_width * 4 );write (reinterpret_cast <char *>(framebuffer_compat.ptr (y)), frame_size.width * 4 );break ;default :"不支持的帧缓冲区位深度。" << std::endl;free (plant_data);
这段代码主要实现了以下功能:
定义了视频帧的宽度、高度和帧率。
指定了模型文件的路径。
安装信号处理程序。
获取帧缓冲区的信息。
打开视频设备,并设置视频帧的宽度、高度和帧率。
打开帧缓冲区文件,用于后续操作。
初始化 AWNN 库,并分配一定大小的内存。
创建 AWNN 上下文。
定义输入图像的宽度、高度和通道数,并计算输入图像数据的总大小。
声明一个输入图像数据指针。
主循环函数,用于不断从视频设备中获取视频帧并进行处理和展示。
具体的步骤如下:
使用cap对象从视频设备中获取一帧图像,并将其存储在frame中。 检查图像的位深度是否为8位(CV_8U),如果不是,则输出错误信息。 检查图像的通道数是否为3,如果不是,则输出错误信息。 对图像进行转置和翻转操作,以调整图像的方向。 将图像的大小调整为设定的输入宽度和高度。 调用mbv2_ssd_preprocess函数对图像进行预处理,并将结果存储在plant_data中。 将plant_data设置为AWNN上下文的输入缓冲区。 运行AWNN上下文,执行模型推理。 使用detect_ssd函数对图像进行目标检测,得到检测结果的可视化图像。 将图像的大小调整为设定的显示宽度和高度。 根据帧缓冲区的位深度,将图像转换为与帧缓冲区兼容的格式,并写入帧缓冲区文件。 释放plant_data的内存空间。 循环回到第1步,继续获取和处理下一帧图像。 这段代码主要完成了从视频设备获取图像、预处理图像、执行模型推理、目标检测和将结果写入帧缓冲区文件等一系列操作,以实现实时目标检测并在显示设备上展示检测结果。
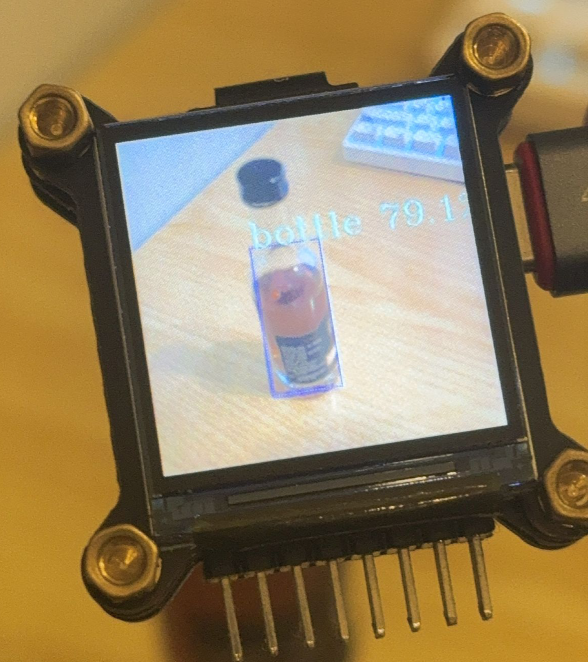
效果展示
]]>
https://gloomyghost.com/live/2024-01-26-20240126.aspx
2024-01-25T16:00:00.000Z
TinyVision V851s 使用 OpenCV + NPU 实现 Mobilenet v2 物体识别。上一篇已经介绍了如何使用 TinyVision 与 OpenCV 开摄像头,本篇将使用已经训练完成并且转换后的模型来介绍对接 NPU 实现物体识别的功能。
<]]>
TinyVision V851s 使用 OpenCV + NPU 实现 Mobilenet v2 目标分类识别
2026-04-25T03:17:29.451Z
柚木 鉉
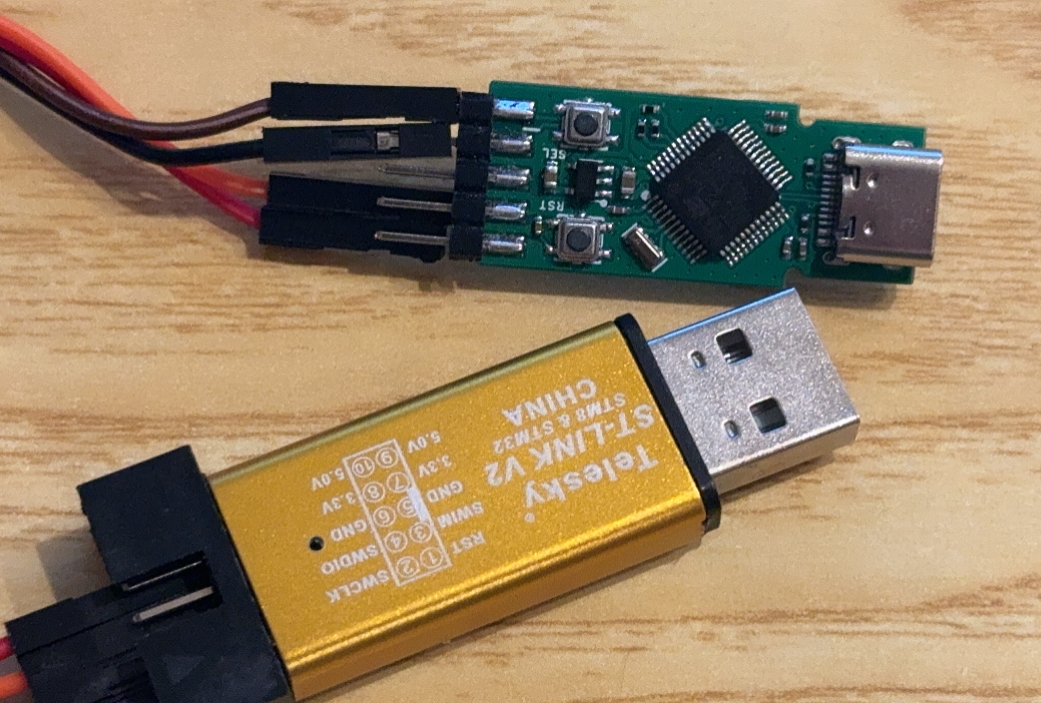
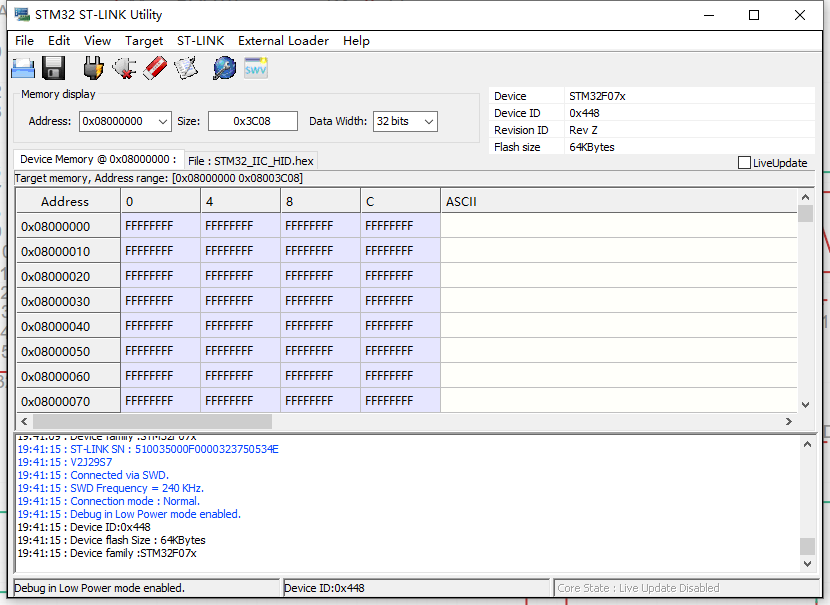
TinyPower 是 AXP 系列的电源模组,AXP系列的 PMU 支持通过 IIC 配置电压,也可以通过刷写 eFUSE 来设置每次启动的默认电压。刷写器 AXP Prog 固件下载 准备:
先通过杜邦线连接上 AXP Prog
打开 STM32 ST-LINK Utility ,连接烧录器
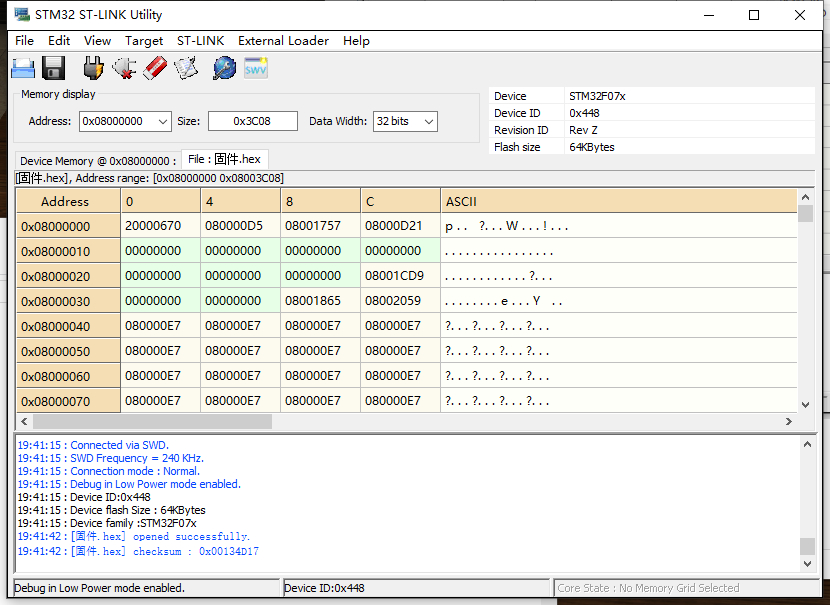
打开固件
开始下载
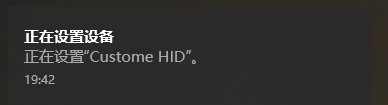
下载完毕,插入 USB 可以看到新设备
]]>
https://gloomyghost.com/live/2024-01-25-20240125.aspx
2024-01-24T16:00:00.000Z
TinyPower 是 AXP 系列的电源模组,AXP系列的 PMU 支持通过 IIC 配置电压,也可以通过刷写 eFUSE 来设置每次启动的默认电压。
TinyPower 电压刷写
2026-04-25T03:17:29.451Z
柚木 鉉
AWOL 版本的 Tina Linux 使用的是 Tina5.0,OpenWrt 升级到了 21.05 版本,相较于商业量产版本的 Tina Linux 新了许多,而且支持更多新软件包。不过可惜的是 MPP 没有移植到 Tina5.0,不过 MPP 使用门槛较高,学习难度大,不是做产品也没必要研究。这里就研究下使用 AWOL 开源版本的 Tina Linux 与 OpenCV 框架开启摄像头拍照捕获视频。准备开发环境 首先准备一台 Ubuntu 20.04 / Ubuntu 18.04 / Ubuntu 16.04 / Ubuntu 14.04 的虚拟机或实体机,其他系统没有测试过出 BUG 不管。
更新系统,安装基础软件包
sudo apt-get update
安装完成后还需要安装 i386 支持,SDK 有几个打包固件使用的程序是 32 位的,如果不安装就等着 Segment fault 吧。
sudo dpkg --add-architecture i386
下载 AWOL Tina Linux BSP 注册一个 AWOL 账号 下载 SDK 需要使用 AWOL 的账号,前往 https://bbs.aw-ol.com/ 注册一个就行。其中需要账号等级为 LV2,可以去这个帖子:https://bbs.aw-ol.com/topic/4158/share/1 水四条回复就有 LV2 等级了。
安装 repo 管理器 BSP 使用 repo 下载,首先安装 repo ,这里建议使用国内镜像源安装
mkdir -p ~/.bin"${HOME} /.bin:${PATH} " chmod a+rx ~/.bin/repo
请注意这里使用的是临时安装,安装完成后重启终端就没有了,需要再次运行下面的命令才能使用,如何永久安装请自行百度。
PATH="${HOME} /.bin:${PATH} "
安装使用 repo 的过程中会遇到各种错误,请百度解决。repo 是谷歌开发的,repo 的官方服务器是谷歌的服务器,repo 每次运行时需要检查更新然后卡死,这是很正常的情况,所以在国内需要更换镜像源提高下载速度。将如下内容复制到你的~/.bashrc 里
echo export REPO_URL='https://mirrors.bfsu.edu.cn/git/git-repo' >> ~/.bashrcsource ~/.bashrc
如果您使用的是 dash、hash、 zsh 等 shell,请参照 shell 的文档配置。环境变量配置一个 REPO_URL 的地址
配置一下 git 身份认证,设置保存 git 账号密码不用每次都输入。
git config --global credential.helper store
新建文件夹保存 SDK 使用 mkdir 命令新建文件夹,保存之后需要拉取的 SDK,然后 cd 进入到刚才新建的文件夹中。
mkdir tina-v853-opencd tina-v853-open
初始化 repo 仓库 使用 repo init 命令初始化仓库,tina-v853-open 的仓库地址是 https://sdk.aw-ol.com/git_repo/V853Tina_Open/manifest.git 需要执行命令:
repo init -u https://sdk.aw-ol.com/git_repo/V853Tina_Open/manifest.git -b master -m tina-v853-open.xml
拉取 SDK 创建开发环境 repo start devboard-v853-tina-for-awol --all
适配 TinyVision 板子 刚才下载到的 SDK 只支持一个板子,售价 1999 的 V853-Vision 开发板,这里要添加自己的板子的适配。
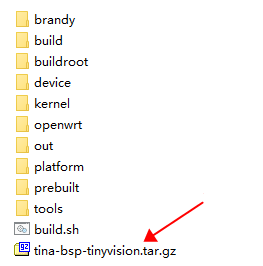
下载支持包:https://github.com/YuzukiTsuru/YuzukiTsuru.GitHub.io/releases/download/2024-01-21-20240121/tina-bsp-tinyvision.tar.gz
或者可以在:https://github.com/YuzukiHD/TinyVision/tree/main/tina 下载到文件,不过这部分没预先下载软件包到 dl 文件夹所以编译的时候需要手动下载。
放到 SDK 的主目录下
运行解压指令
tar xvf tina-bsp-tinyvision.tar.gz
即可使 Tina SDK 支持 TinyVision 板子
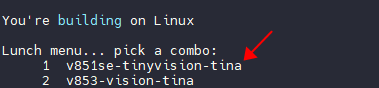
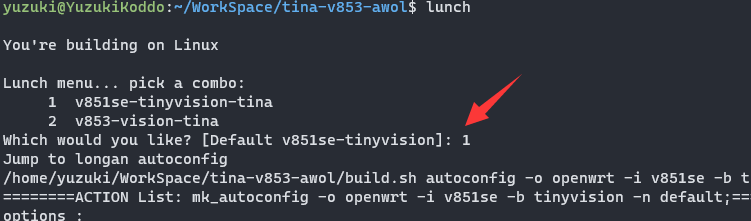
初始化 SDK 环境 每次开发之前都需要初始化 SDK 环境,命令如下
然后按 1 选择 TinyVision
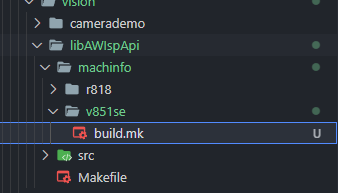
适配 ISP Tina SDK 内置一个 libAWispApi 的包,支持在用户层对接 ISP,但是很可惜这个包没有适配 V85x 系列,这里就需要自行适配。其实适配很简单,SDK 已经提供了 lib 只是没提供编译支持。我们需要加上这个支持。
前往 openwrt/package/allwinner/vision/libAWIspApi/machinfo 文件夹中,新建一个文件夹 v851se ,然后新建文件 build.mk 写入如下配置:
对于 v851s,v853 也可以这样操作,然后 m menuconfig 勾选上这个包
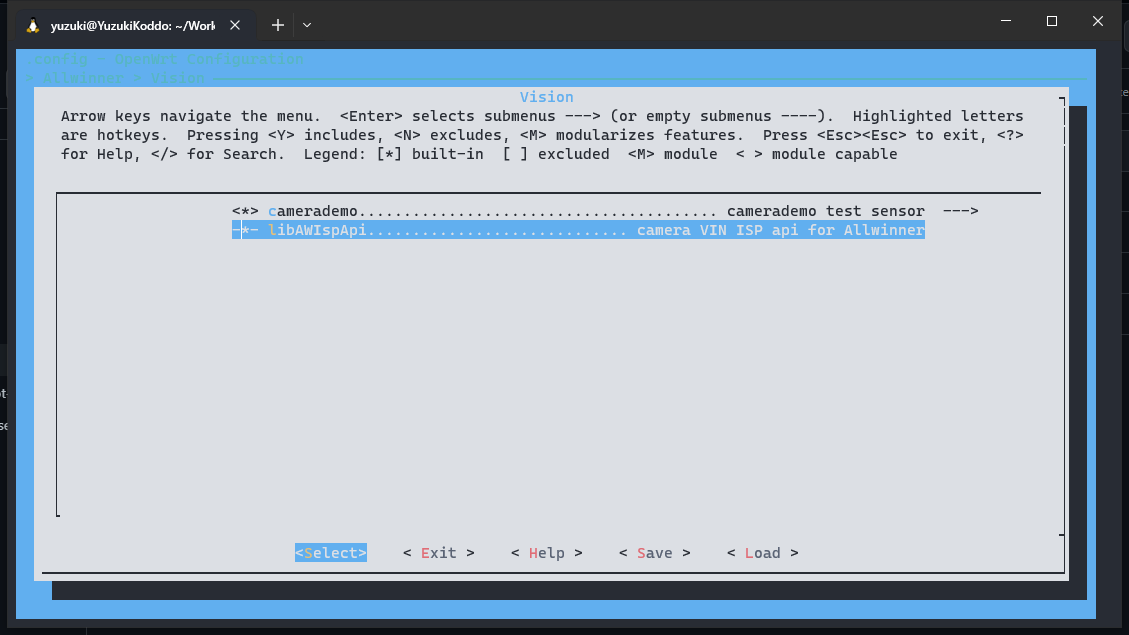
开启 camerademo 测试摄像头 进入 m menuconfig 进入如下页面进行配置。
Allwinner --->
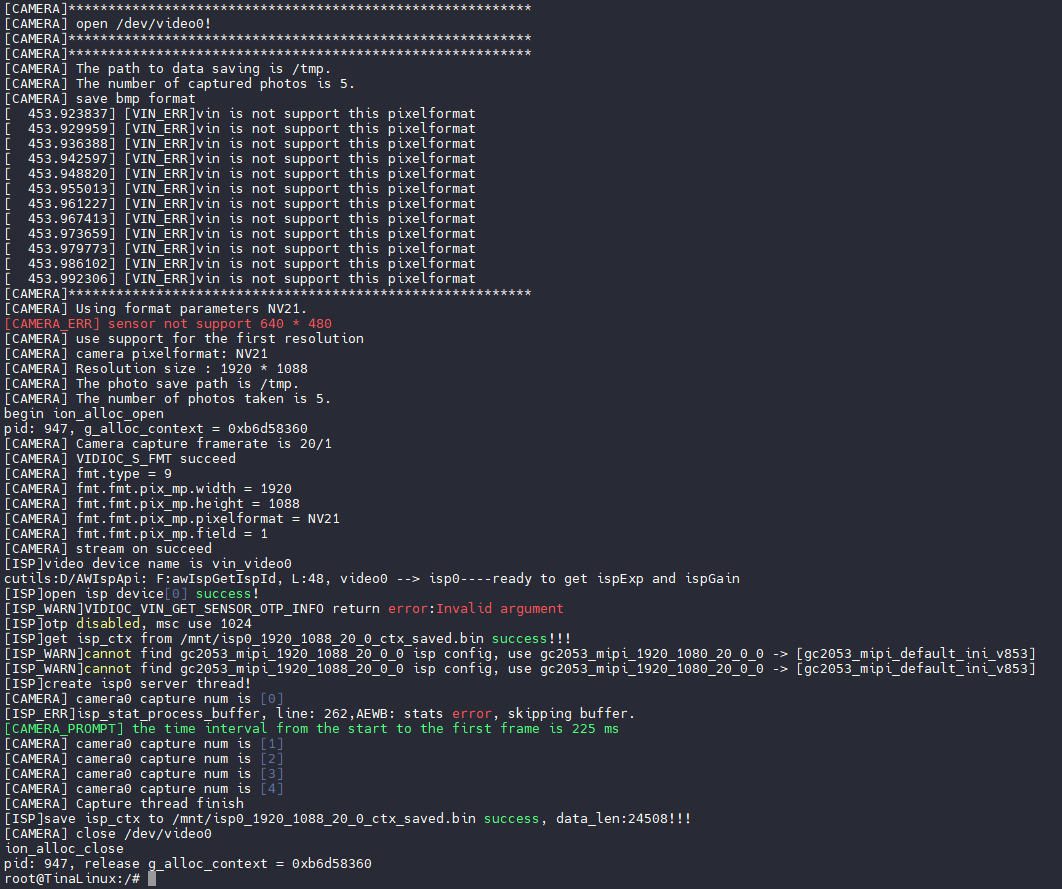
编译系统然后烧录系统,运行命令 camerademo ,可以看到是正常拍摄照片的
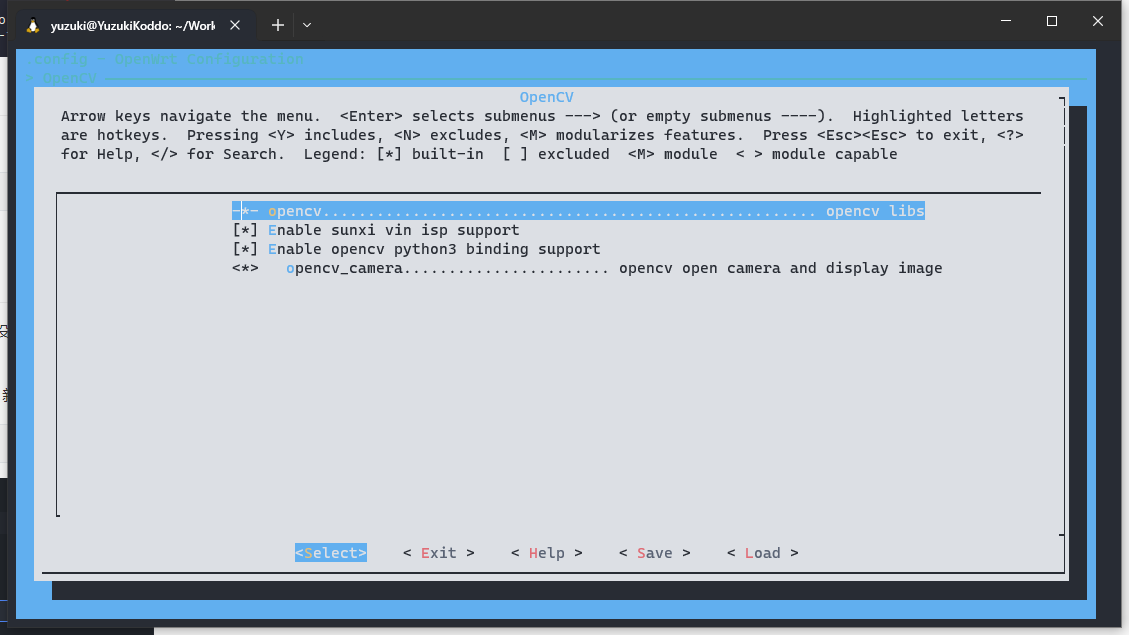
适配 OpenCV 勾选 OpenCV 包 m menuconfig 进入软件包配置,勾选
OpenCV --->
OpenCV 适配过程 本部分的操作已经包含在 tina-bsp-tinyvision.tar.gz 中了,已经适配好了,如果不想了解如何适配 OpenCV 可以直接跳过这部分
OpenCV 的多平面视频捕获支持 一般来说,如果不适配 OpenCV 直接开摄像头,会得到一个报错:
[ 702.464977] [VIN_ERR]video0 has already stream off
这是由于 OpenCV 的 V4L2 实现是使用的 V4L2_CAP_VIDEO_CAPTURE 标准,而 sunxi-vin 驱动的 RAW Sensor 平台使用的是 V4L2_BUF_TYPE_VIDEO_CAPTURE_MPLANE ,导致了默认 OpenCV 的配置错误。
V4L2_CAP_VIDEO_CAPTURE_MPLANE和V4L2_BUF_TYPE_VIDEO_CAPTURE是 Video4Linux2(V4L2)框架中用于视频捕获的不同类型和能力标志。
V4L2_CAP_VIDEO_CAPTURE_MPLANE: 这个标志指示设备支持多平面(multi-plane)视频捕获。在多平面捕获中,图像数据可以分解成多个平面(planes),每个平面包含不同的颜色分量或者图像数据的不同部分。这种方式可以提高效率和灵活性,尤其适用于处理涉及多个颜色分量或者多个图像通道的视频流。V4L2_BUF_TYPE_VIDEO_CAPTURE: 这个类型表示普通的单平面(single-plane)视频捕获。在单平面捕获中,图像数据以单个平面的形式存储,即所有的颜色分量或者图像数据都保存在一个平面中。因此,区别在于支持的数据格式和存储方式。V4L2_CAP_VIDEO_CAPTURE_MPLANE表示设备支持多平面视频捕获,而V4L2_BUF_TYPE_VIDEO_CAPTURE表示普通的单平面视频捕获。
这里就需要通过检查capability.capabilities中是否包含V4L2_CAP_VIDEO_CAPTURE标志来确定是否支持普通的视频捕获类型。如果支持,那么将type设置为V4L2_BUF_TYPE_VIDEO_CAPTURE。
如果不支持普通的视频捕获类型,那么通过检查capability.capabilities中是否包含V4L2_CAP_VIDEO_CAPTURE_MPLANE标志来确定是否支持多平面视频捕获类型。如果支持,那么将type设置为V4L2_BUF_TYPE_VIDEO_CAPTURE_MPLANE。
例如如下修改:
- form.type = V4L2_BUF_TYPE_VIDEO_CAPTURE; - form.fmt.pix.pixelformat = palette; - form.fmt.pix.field = V4L2_FIELD_ANY; - form.fmt.pix.width = width; - form.fmt.pix.height = height; + if (capability.capabilities & V4L2_CAP_VIDEO_CAPTURE) { +form.type = V4L2_BUF_TYPE_VIDEO_CAPTURE; +form.fmt.pix.pixelformat = palette; +form.fmt.pix.field = V4L2_FIELD_NONE; +form.fmt.pix.width = width; +form.fmt.pix.height = height; +} else if (capability.capabilities & V4L2_CAP_VIDEO_CAPTURE_MPLANE) { + form.type = V4L2_BUF_TYPE_VIDEO_CAPTURE_MPLANE; + form.fmt.pix_mp.width = width; + form.fmt.pix_mp.height = height; + form.fmt.pix_mp.pixelformat = palette; + form.fmt.pix_mp.field = V4L2_FIELD_NONE; +}
这段代码是在设置视频捕获的格式和参数时进行了修改。
原来的代码中,直接设置了form.type为V4L2_BUF_TYPE_VIDEO_CAPTURE,表示使用普通的视频捕获类型。然后设置了其他参数,如像素格式(pixelformat)、帧字段(field)、宽度(width)和高度(height)等。
修改后的代码进行了条件判断,根据设备的能力选择合适的视频捕获类型。如果设备支持普通的视频捕获类型(V4L2_CAP_VIDEO_CAPTURE标志被设置),则使用普通的视频捕获类型并设置相应的参数。如果设备支持多平面视频捕获类型(V4L2_CAP_VIDEO_CAPTURE_MPLANE标志被设置),则使用多平面视频捕获类型并设置相应的参数。
对于普通的视频捕获类型,设置的参数与原来的代码一致,只是将帧字段(field)从V4L2_FIELD_ANY改为V4L2_FIELD_NONE,表示不指定特定的帧字段。
对于多平面视频捕获类型,设置了新的参数,如多平面的宽度(pix_mp.width)、高度(pix_mp.height)、像素格式(pix_mp.pixelformat)和帧字段(pix_mp.field)等。
通过这个修改,可以根据设备的能力选择适当的视频捕获类型,并设置相应的参数,以满足不同设备的要求。
OpenCV 的 ISP 支持 OpenCV 默认不支持开启 RAW Sensor,不过现在需要配置为 OpenCV 开启 RAW Sensor 抓图,然后通过 OpenCV 送图到之前适配的 libAWispApi 库进行 ISP 处理。在这里增加一个函数作为 RAW Sensor 抓图的处理。
#ifdef __USE_VIN_ISP__ bool CvCaptureCAM_V4L::RAWSensor () struct v4l2_control ctrl;struct v4l2_queryctrl qc_ctrl;memset (&ctrl, 0 , sizeof (struct v4l2_control));memset (&qc_ctrl, 0 , sizeof (struct v4l2_queryctrl));if (-1 == ioctl (deviceHandle, VIDIOC_QUERYCTRL, &qc_ctrl)){fprintf (stderr, "V4L2: %s QUERY V4L2_CID_SENSOR_TYPE failed\n" , deviceName.c_str ());return false ;if (-1 == ioctl (deviceHandle, VIDIOC_G_CTRL, &ctrl)) {fprintf (stderr, "V4L2: %s G_CTRL V4L2_CID_SENSOR_TYPE failed\n" , deviceName.c_str ());return false ;return ctrl.value == V4L2_SENSOR_TYPE_RAW;#endif
这段代码的功能是检查V4L2摄像头设备的传感器类型是否为RAW格式。它使用了V4L2的ioctl函数来查询和获取传感器类型信息。具体步骤如下:
定义了两个v4l2_control结构体变量ctrl和qc_ctrl,并初始化为零 将ctrl.id和qc_ctrl.id分别设置为V4L2_CID_SENSOR_TYPE,表示要查询的控制和查询ID 使用ioctl函数的VIDIOC_QUERYCTRL命令来查询传感器类型的控制信息,并将结果保存在qc_ctrl中 如果查询失败(ioctl返回-1),则输出错误信息并返回false 使用ioctl函数的VIDIOC_G_CTRL命令来获取传感器类型的当前值,并将结果保存在ctrl中 如果获取失败(ioctl返回-1),则输出错误信息并返回false 检查ctrl.value是否等于V4L2_SENSOR_TYPE_RAW,如果相等,则返回true,表示传感器类型为RAW格式;否则返回false 并且使用了#ifdef __USE_VIN_ISP__指令。这表示只有在定义了__USE_VIN_ISP__宏时,才会编译和执行这段代码
然后在 OpenCV 的 bool CvCaptureCAM_V4L::streaming(bool startStream) 捕获流函数中添加 ISP 处理
#ifdef __USE_VIN_ISP__ RAWSensor ();if (startStream && RawSensor) {int VideoIndex = -1 ;sscanf (deviceName.c_str (), "/dev/video%d" , &VideoIndex);CreateAWIspApi ();-1 ;ispGetIspId (VideoIndex);if (IspId >= 0 )ispStart (IspId);else if (RawSensor && IspId >= 0 && IspPort) {ispStop (IspId);DestroyAWIspApi (IspPort);NULL ;-1 ;#endif
这段代码是在条件编译__USE_VIN_ISP__的情况下进行了修改。
首先,它创建了一个RawSensor对象,并检查startStream和RawSensor是否为真。如果满足条件,接下来会解析设备名称字符串,提取出视频索引号。
然后,它调用CreateAWIspApi()函数创建了一个AWIspApi对象,并初始化变量IspId为-1。接着,通过调用ispGetIspId()函数获取指定视频索引号对应的ISP ID,并将其赋值给IspId。如果IspId大于等于0,表示获取到有效的ISP ID,就调用ispStart()函数启动ISP流处理。
如果不满足第一个条件,即startStream为假或者没有RawSensor对象,那么会检查IspId是否大于等于0并且IspPort对象是否存在。如果满足这些条件,说明之前已经启动了ISP流处理,此时会调用ispStop()函数停止ISP流处理,并销毁IspPort对象。最后,将IspPort置为空指针,将IspId重置为-1。
这段代码主要用于控制图像信号处理(ISP)的启动和停止。根据条件的不同,可以选择在开始视频流捕获时启动ISP流处理,或者在停止视频流捕获时停止ISP流处理,以便对视频数据进行处理和增强。
至于其他包括编译脚本的修改,全局变量定义等操作,可以参考补丁文件 openwrt/package/thirdparty/vision/opencv/patches/0004-support-sunxi-vin-camera.patch
使用 OpenCV 捕获摄像头并且输出到屏幕上 快速测试 这个 DEMO 也已经包含在 tina-bsp-tinyvision.tar.gz 中了,可以快速测试这个 DEMO
运行 m menuconfig
OpenCV --->
源码详解 编写一个程序,使用 OpenCV 捕获摄像头输出并且显示到屏幕上,程序如下:
#include <fcntl.h> #include <fstream> #include <iostream> #include <linux/fb.h> #include <signal.h> #include <stdint.h> #include <sys/ioctl.h> #include <opencv2/opencv.hpp> #define DISPLAY_X 240 #define DISPLAY_Y 240 static cv::VideoCapture cap;struct framebuffer_info {uint32_t bits_per_pixel;uint32_t xres_virtual;struct framebuffer_info get_framebuffer_info (const char * framebuffer_device_path)struct framebuffer_info info;struct fb_var_screeninfo screen_info;int fd = -1 ;open (framebuffer_device_path, O_RDWR);if (fd >= 0 ) {if (!ioctl (fd, FBIOGET_VSCREENINFO, &screen_info)) {return info;static void terminate (int sig_no) printf ("Got signal %d, exiting ...\n" , sig_no);release ();exit (1 );static void install_sig_handler (void ) signal (SIGBUS, terminate);signal (SIGFPE, terminate);signal (SIGHUP, terminate);signal (SIGILL, terminate);signal (SIGINT, terminate);signal (SIGIOT, terminate);signal (SIGPIPE, terminate);signal (SIGQUIT, terminate);signal (SIGSEGV, terminate);signal (SIGSYS, terminate);signal (SIGTERM, terminate);signal (SIGTRAP, terminate);signal (SIGUSR1, terminate);signal (SIGUSR2, terminate);int main (int , char **) const int frame_width = 480 ;const int frame_height = 480 ;const int frame_rate = 30 ;install_sig_handler ();get_framebuffer_info ("/dev/fb0" );open (0 );if (!cap.isOpened ()) {"Could not open video device." << std::endl;return 1 ;"Successfully opened video device." << std::endl;set (cv::CAP_PROP_FRAME_WIDTH, frame_width);set (cv::CAP_PROP_FRAME_HEIGHT, frame_height);set (cv::CAP_PROP_FPS, frame_rate);std::ofstream ofs ("/dev/fb0" ) ;while (true ) {if (frame.depth () != CV_8U) {"Not 8 bits per pixel and channel." << std::endl;else if (frame.channels () != 3 ) {"Not 3 channels." << std::endl;else {transpose (frame, frame);flip (frame, frame, 0 );resize (frame, frame, cv::Size (DISPLAY_X, DISPLAY_Y));int framebuffer_width = fb_info.xres_virtual;int framebuffer_depth = fb_info.bits_per_pixel;size ();switch (framebuffer_depth) {case 16 :cvtColor (frame, framebuffer_compat, cv::COLOR_BGR2BGR565);for (int y = 0 ; y < frame_size.height; y++) {seekp (y * framebuffer_width * 2 );write (reinterpret_cast <char *>(framebuffer_compat.ptr (y)), frame_size.width * 2 );break ;case 32 : {split (frame, split_bgr);push_back (cv::Mat (frame_size, CV_8UC1, cv::Scalar (255 )));merge (split_bgr, framebuffer_compat);for (int y = 0 ; y < frame_size.height; y++) {seekp (y * framebuffer_width * 4 );write (reinterpret_cast <char *>(framebuffer_compat.ptr (y)), frame_size.width * 4 );break ;default :"Unsupported depth of framebuffer." << std::endl;
第一部分,处理 frame_buffer 信息:
#include <fcntl.h> #include <fstream> #include <iostream> #include <linux/fb.h> #include <signal.h> #include <stdint.h> #include <sys/ioctl.h> #include <opencv2/opencv.hpp> #define DISPLAY_X 240 #define DISPLAY_Y 240 static cv::VideoCapture cap; struct framebuffer_info {uint32_t bits_per_pixel; uint32_t xres_virtual; struct framebuffer_info get_framebuffer_info (const char * framebuffer_device_path)struct framebuffer_info info;struct fb_var_screeninfo screen_info;int fd = -1 ;open (framebuffer_device_path, O_RDWR);if (fd >= 0 ) {if (!ioctl (fd, FBIOGET_VSCREENINFO, &screen_info)) {return info;
这段代码定义了一些常量、全局变量以及两个函数,并给出了相应的注释说明。具体注释如下:
#define DISPLAY_X 240:定义显示屏的宽度为240。#define DISPLAY_Y 240:定义显示屏的高度为240。static cv::VideoCapture cap;:定义一个静态的OpenCV视频流捕获对象,用于捕获视频流。struct framebuffer_info:定义了一个帧缓冲信息的结构体。uint32_t bits_per_pixel:每个像素的位数。uint32_t xres_virtual:虚拟屏幕的宽度。struct framebuffer_info get_framebuffer_info(const char* framebuffer_device_path):获取帧缓冲信息的函数。const char* framebuffer_device_path:帧缓冲设备文件的路径。int fd = -1;:初始化文件描述符为-1。fd = open(framebuffer_device_path, O_RDWR);:打开帧缓冲设备文件,并将文件描述符保存在变量fd中。if (fd >= 0):检查文件是否成功打开。if (!ioctl(fd, FBIOGET_VSCREENINFO, &screen_info)):通过ioctl获取屏幕信息,并将信息保存在变量screen_info中。FBIOGET_VSCREENINFO:控制命令,用于获取屏幕信息。&screen_info:屏幕信息结构体的指针。info.xres_virtual = screen_info.xres_virtual;:将屏幕的虚拟宽度保存在帧缓冲信息结构体的字段xres_virtual中。info.bits_per_pixel = screen_info.bits_per_pixel;:将每个像素的位数保存在帧缓冲信息结构体的字段bits_per_pixel中。return info;:返回帧缓冲信息结构体。第二部分,注册信号处理函数,用于 ctrl-c 之后关闭摄像头,防止下一次使用摄像头出现摄像头仍被占用的情况。
static void terminate (int sig_no) printf ("Got signal %d, exiting ...\n" , sig_no);release ();exit (1 );static void install_sig_handler (void ) signal (SIGBUS, terminate); signal (SIGFPE, terminate); signal (SIGHUP, terminate); signal (SIGILL, terminate); signal (SIGINT, terminate); signal (SIGIOT, terminate); signal (SIGPIPE, terminate); signal (SIGQUIT, terminate); signal (SIGSEGV, terminate); signal (SIGSYS, terminate); signal (SIGTERM, terminate); signal (SIGTRAP, terminate); signal (SIGUSR1, terminate); signal (SIGUSR2, terminate);
这段代码定义了两个函数,并给出了相应的注释说明。具体注释如下:
static void terminate(int sig_no):信号处理函数。int sig_no:接收到的信号编号。printf("Got signal %d, exiting ...\n", sig_no);:打印接收到的信号编号。cap.release();:释放视频流捕获对象。exit(1);:退出程序。static void install_sig_handler(void):安装信号处理函数。signal(SIGBUS, terminate);:为SIGBUS信号安装信号处理函数。signal(SIGFPE, terminate);:为SIGFPE信号安装信号处理函数。signal(SIGHUP, terminate);:为SIGHUP信号安装信号处理函数。signal(SIGILL, terminate);:为SIGILL信号安装信号处理函数。signal(SIGINT, terminate);:为SIGINT信号安装信号处理函数。signal(SIGIOT, terminate);:为SIGIOT信号安装信号处理函数。signal(SIGPIPE, terminate);:为SIGPIPE信号安装信号处理函数。signal(SIGQUIT, terminate);:为SIGQUIT信号安装信号处理函数。signal(SIGSEGV, terminate);:为SIGSEGV信号安装信号处理函数。signal(SIGSYS, terminate);:为SIGSYS信号安装信号处理函数。signal(SIGTERM, terminate);:为SIGTERM信号安装信号处理函数。signal(SIGTRAP, terminate);:为SIGTRAP信号安装信号处理函数。signal(SIGUSR1, terminate);:为SIGUSR1信号安装信号处理函数。signal(SIGUSR2, terminate);:为SIGUSR2信号安装信号处理函数。这段代码的功能是安装信号处理函数,用于捕获和处理不同类型的信号。当程序接收到指定的信号时,会调用terminate函数进行处理。
具体而言,terminate函数会打印接收到的信号编号,并释放视频流捕获对象cap,然后调用exit(1)退出程序。
install_sig_handler函数用于为多个信号注册同一个信号处理函数terminate,使得当这些信号触发时,都会执行相同的处理逻辑。
第三部分,主函数:
int main (int , char **) const int frame_width = 480 ;const int frame_height = 480 ;const int frame_rate = 30 ;install_sig_handler (); get_framebuffer_info ("/dev/fb0" ); open (0 ); if (!cap.isOpened ()) {"Could not open video device." << std::endl;return 1 ;"Successfully opened video device." << std::endl;set (cv::CAP_PROP_FRAME_WIDTH, frame_width);set (cv::CAP_PROP_FRAME_HEIGHT, frame_height);set (cv::CAP_PROP_FPS, frame_rate);std::ofstream ofs ("/dev/fb0" ) ; while (true ) {if (frame.depth () != CV_8U) { "Not 8 bits per pixel and channel." << std::endl;else if (frame.channels () != 3 ) { "Not 3 channels." << std::endl;else {transpose (frame, frame); flip (frame, frame, 0 ); resize (frame, frame, cv::Size (DISPLAY_X, DISPLAY_Y)); int framebuffer_width = fb_info.xres_virtual;int framebuffer_depth = fb_info.bits_per_pixel;size ();switch (framebuffer_depth) {case 16 :cvtColor (frame, framebuffer_compat, cv::COLOR_BGR2BGR565);for (int y = 0 ; y < frame_size.height; y++) {seekp (y * framebuffer_width * 2 );write (reinterpret_cast <char *>(framebuffer_compat.ptr (y)), frame_size.width * 2 );break ;case 32 : {split (frame, split_bgr);push_back (cv::Mat (frame_size, CV_8UC1, cv::Scalar (255 )));merge (split_bgr, framebuffer_compat);for (int y = 0 ; y < frame_size.height; y++) {seekp (y * framebuffer_width * 4 );write (reinterpret_cast <char *>(framebuffer_compat.ptr (y)), frame_size.width * 4 );break ;default :"Unsupported depth of framebuffer." << std::endl;return 0 ;
这段代码主要实现了从摄像头获取图像并将其显示在帧缓冲区中。具体流程如下:
定义了常量frame_width、frame_height和frame_rate表示图像的宽度、高度和帧率。 调用install_sig_handler()函数安装信号处理函数。 调用get_framebuffer_info("/dev/fb0")函数获取帧缓冲区信息。 调用cap.open(0)打开摄像头,并进行错误检查。 调用cap.set()函数设置摄像头的参数。 调用std::ofstream ofs("/dev/fb0")打开帧缓冲区。 循环读取摄像头的每一帧图像,对其进行转置、翻转、缩放等操作,然后将其写入帧缓冲区中。 如果读取的图像不是8位每通道像素或者不是3通道,则会输出错误信息。如果帧缓冲区的深度不受支持,则也会输出错误信息。
使用 Python3 操作 OpenCV 勾选 OpenCV-Python3 包 m menuconfig 进入软件包配置,勾选
OpenCV --->
然后编译固件即可,请注意 Python3 编译非常慢,需要耐心等待下。
编写一个 Python 脚本,执行上面的相同操作
import cv2import numpy as np240 240 480 480 30 0 ) if not cap.isOpened():print ("Could not open video device." )1 )print ("Successfully opened video device." )set (cv2.CAP_PROP_FRAME_WIDTH, frame_width)set (cv2.CAP_PROP_FRAME_HEIGHT, frame_height)set (cv2.CAP_PROP_FPS, frame_rate)open ("/dev/fb0" , "wb" ) while True :if frame.dtype != np.uint8 or frame.ndim != 3 :print ("Not 8 bits per pixel and channel." )elif frame.shape[2 ] != 3 :print ("Not 3 channels." )else :0 ) open ("/sys/class/graphics/fb0/bits_per_pixel" , "r" )int (_.read()[:2 ])if framebuffer_depth == 16 :for y in range (frame_size[0 ]):2 )elif framebuffer_depth == 32 :0 ], frame_size[1 ]), 255 , dtype=np.uint8))for y in range (frame_size[0 ]):4 )else :print ("Unsupported depth of framebuffer." )
编译系统 初始化 SDK 环境。
然后就是编译 SDK 输出固件
如果出现错误,请再次运行
以单线程编译解决依赖关系,并且输出全部编译 LOG 方便排查错误。
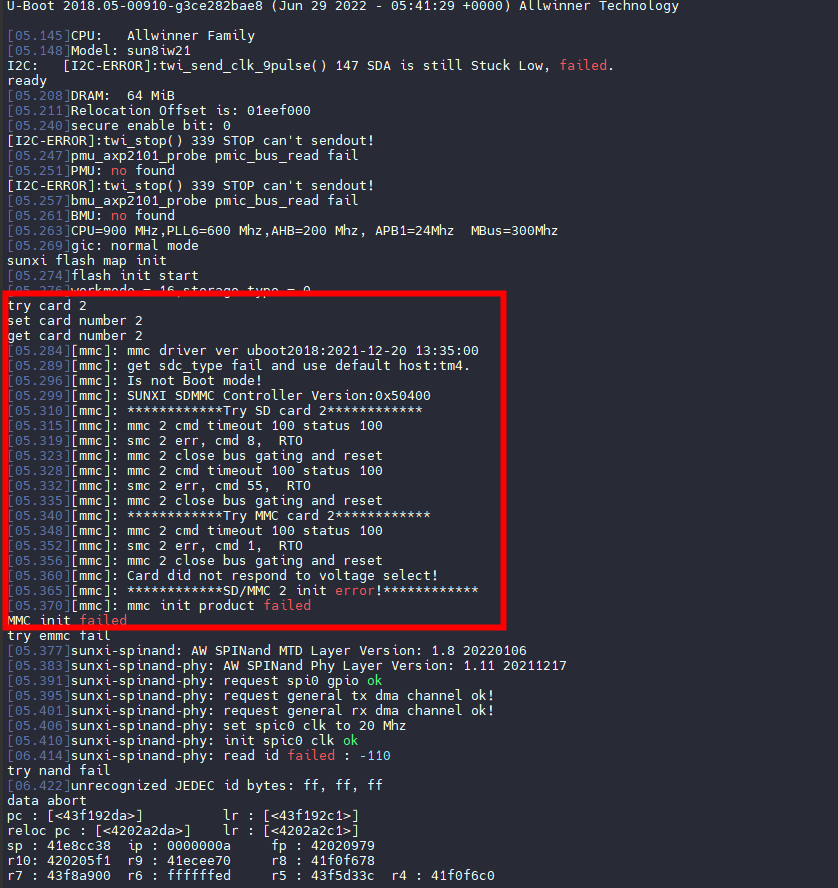
线刷固件 修改 U-boot 支持线刷固件 U-Boot 默认配置的是使用 SDC2 也就是 TinyVision 的 SD-NAND 刷写固件。同时也支持使用 SDC0 也就是 TF 卡烧写固件,但是需要手动配置一下 U-Boot。否则会出现如下问题,U-Boot 去初始化不存在的 SD NAND 导致刷不进系统。
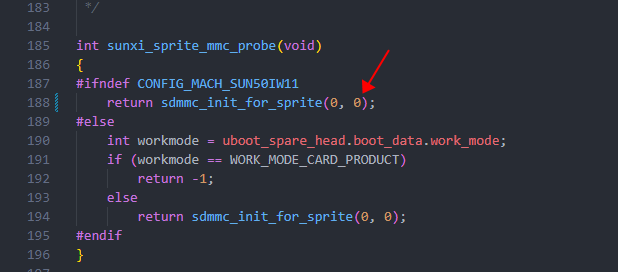
前往文件夹 brandy/brandy-2.0/u-boot-2018/drivers/sunxi_flash/mmc/sdmmc.c
找到第 188 行,将 return sdmmc_init_for_sprite(0, 2); 修改为 return sdmmc_init_for_sprite(0, 0);
修改后需要重新编译固件。插入空白的 TF 卡,如果不是空白的 TF 卡可能出现芯片不进入烧录模式。
出现 try card 0 开始下载到 TF 卡内
]]>
https://gloomyghost.com/live/2024-01-21-20240121.aspx
2024-01-20T16:00:00.000Z
AWOL 版本的 Tina Linux 使用的是 Tina5.0,OpenWrt 升级到了 21.05 版本,相较于商业量产版本的 Tina Linux 新了许多,而且支持更多新软件包。不过可惜的是 MPP 没有移植到 Tina5.0,不过 MPP 使用门槛较高,学习难度大]]>
TinyVision V851 使用 AWOL Tina Linux 支持 OpenCV 开启摄像头
2026-04-25T03:17:29.451Z
柚木 鉉
TinyVision 配套 LCD 模组使用 ST7789V 作为主控,模组大小为1.4寸。Linux 5.15 内核适配 驱动勾选 由于使用的是 SPI0,所以 TinyVision 的 LCD 模块并不支持使用MIPI-DBI进行驱动,这里我们使用普通的SPI模拟时序。
勾选 SPI 驱动 这里我们使用 SPI-NG 驱动,勾选 <*> SPI NG Driver Support for Allwinner SoCs
勾选 Linux FrameBuffer 驱动 前往如下地址,勾选驱动
Device Drivers --->
适配 FBTFT 的设备树接口 进入内核文件夹,找到 kernel/linux-5.15/drivers/staging/fbtft/fbtft-core.c
添加头文件
#include <linux/gpio.h> #include <linux/of_gpio.h>
修改 fbtft_request_one_gpio 函数,如下
static int fbtft_request_one_gpio (struct fbtft_par *par, const char *name, int index, struct gpio_desc **gpiop) struct device *dev =struct device_node *node =int gpio, flags, ret = 0 ;enum of_gpio_flags of_flags ;if (of_find_property(node, name, NULL )) {if (gpio == -ENOENT)return 0 ;if (gpio == -EPROBE_DEFER)return gpio;if (gpio < 0 ) {"failed to get '%s' from DT\n" , name);return gpio;if (ret) {"gpio_request_one('%s'=%d) failed with %d\n" ,return ret;"%s: '%s' = GPIO%d\n" ,return ret;
编写配套屏幕 ST7789v 驱动 进入内核文件夹,找到 kernel/linux-5.15/drivers/staging/fbtft/fb_st7789v.c 修改文件如下:
#include <linux/bitops.h> #include <linux/delay.h> #include <linux/gpio/consumer.h> #include <linux/init.h> #include <linux/kernel.h> #include <linux/interrupt.h> #include <linux/completion.h> #include <linux/module.h> #include <video/mipi_display.h> #include "fbtft.h" #define DRVNAME "fb_st7789v" #define DEFAULT_GAMMA \ "70 2C 2E 15 10 09 48 33 53 0B 19 18 20 25\n" \"70 2C 2E 15 10 09 48 33 53 0B 19 18 20 25" #define HSD20_IPS_GAMMA \ "D0 05 0A 09 08 05 2E 44 45 0F 17 16 2B 33\n" \"D0 05 0A 09 08 05 2E 43 45 0F 16 16 2B 33" #define HSD20_IPS 1 enum st7789v_command {0xB2 ,0xB7 ,0xBB ,0xC2 ,0xC3 ,0xC4 ,0xC5 ,0xD0 ,0xE0 ,0xE1 ,#define MADCTL_BGR BIT(3) #define MADCTL_MV BIT(5) #define MADCTL_MX BIT(6) #define MADCTL_MY BIT(7) #define PANEL_TE_TIMEOUT_MS 33 static struct completion panel_te ;static int irq_te; static irqreturn_t panel_te_handler (int irq, void *data) return IRQ_HANDLED;static int init_display (struct fbtft_par *par) 50 );0x36 ,0x00 );0x3A ,0x05 );0xB2 ,0x1F ,0x1F ,0x00 ,0x33 ,0x33 );0xB7 ,0x35 );0xBB ,0x20 );0xC0 ,0x2C );0xC2 ,0x01 );0xC3 ,0x01 );0xC4 ,0x18 );0xC6 ,0x13 );0xD0 ,0xA4 ,0xA1 );0xE0 ,0xF0 ,0x04 ,0x07 ,0x04 ,0x04 ,0x04 ,0x25 ,0x33 ,0x3C ,0x36 ,0x14 ,0x12 ,0x29 ,0x30 );0xE1 ,0xF0 ,0x02 ,0x04 ,0x05 ,0x05 ,0x21 ,0x25 ,0x32 ,0x3B ,0x38 ,0x12 ,0x14 ,0x27 ,0x31 );0xE4 ,0x1D ,0x00 ,0x00 );0x21 );0x11 );50 );0x29 );200 );return 0 ;static int write_vmem (struct fbtft_par *par, size_t offset, size_t len) struct device *dev =int ret;if (irq_te) {if (ret == 0 )"wait panel TE timeout\n" );switch (par->pdata->display.buswidth) {case 8 :break ;case 9 :break ;case 16 :break ;default :"Unsupported buswidth %d\n" ,0 ;break ;return ret;static int set_var (struct fbtft_par *par) 0 ;if (par->bgr)switch (par->info->var.rotate) {case 0 :break ;case 90 :break ;case 180 :break ;case 270 :break ;default :return -EINVAL;return 0 ;static int set_gamma (struct fbtft_par *par, u32 *curves) int i;int j;int c; static const u8 gamma_par_mask[] = {0xFF , 0x3F , 0x3F , 0x1F , 0x1F , 0x3F , 0x7F , 0x77 , 0x7F , 0x3F , 0x1F , 0x1F , 0x3F , 0x3F , for (i = 0 ; i < par->gamma.num_curves; i++) {for (j = 0 ; j < par->gamma.num_values; j++)0 ], curves[c + 1 ], curves[c + 2 ],3 ], curves[c + 4 ], curves[c + 5 ],6 ], curves[c + 7 ], curves[c + 8 ],9 ], curves[c + 10 ], curves[c + 11 ],12 ], curves[c + 13 ]);return 0 ;static int blank (struct fbtft_par *par, bool on) if (on)else return 0 ;static void set_addr_win (struct fbtft_par *par, int xs, int ys, int xe, int ye) switch (par->info->var.rotate)case 0 :break ;case 90 :80 ;xe+=80 ;break ;case 180 :break ;case 270 :80 ;xe+=80 ;break ;default :break ;8 ) & 0xFF , xs & 0xFF , (xe >> 8 ) & 0xFF , xe & 0xFF );8 ) & 0xFF , ys & 0xFF , (ye >> 8 ) & 0xFF , ye & 0xFF );static void reset (struct fbtft_par *par) if (!par->gpio.reset)return ;1 );10 );0 );200 );1 );10 );1 ); static struct fbtft_display display =8 ,240 ,240 ,2 ,14 ,"sitronix,st7789v" , &display);"spi:" DRVNAME);"platform:" DRVNAME);"spi:st7789v" );"platform:st7789v" );"FB driver for the ST7789V LCD Controller" );"Dennis Menschel" );"GPL" );
编写设备树 &pio {
Linux 4.9 内核适配 驱动勾选 由于使用的是 SPI0,所以 TinyVision 的 LCD 模块并不支持使用MIPI-DBI进行驱动,这里我们使用普通的SPI模拟时序。
勾选 SPI 驱动 这里我们使用 SPI-NG 驱动,勾选 <*> SPI NG Driver Support for Allwinner SoCs
勾选 Linux FrameBuffer 驱动 前往如下地址,勾选驱动
Device Drivers --->
适配 FBTFT 的设备树接口 进入内核文件夹,找到 lichee/linux-4.9/drivers/staging/fbtft/fbtft-core.c
添加头文件
#include <linux/sunxi-gpio.h>
修改驱动注册接口
static int fbtft_request_one_gpio (struct fbtft_par *par, const char *name, int index, int *gpiop) struct device *dev =struct device_node *node =int gpio, flags, ret = 0 ;struct gpio_config gpio_of_flags ;if (of_find_property(node, name, NULL )) {enum of_gpio_flags *)&gpio_of_flags);if (gpio == -ENOENT)return 0 ;if (gpio == -EPROBE_DEFER)return gpio;if (gpio < 0 ) {"failed to get '%s' from DT\n" , name);return gpio;if (ret) {"gpio_request_one('%s'=%d) failed with %d\n" ,return ret;if (gpiop)"%s: '%s' = GPIO%d\n" ,return ret;static int fbtft_request_gpios_dt (struct fbtft_par *par) int i;int ret;if (!par->info->device->of_node)return -EINVAL;"reset" , 0 , &par->gpio.reset);if (ret)return ret;"dc" , 0 , &par->gpio.dc);if (ret)return ret;"rd" , 0 , &par->gpio.rd);if (ret)return ret;"wr" , 0 , &par->gpio.wr);if (ret)return ret;"cs" , 0 , &par->gpio.cs);if (ret)return ret;"latch" , 0 , &par->gpio.latch);if (ret)return ret;for (i = 0 ; i < 16 ; i++) {"db" , i,if (ret)return ret;"led" , i,if (ret)return ret;"aux" , i,if (ret)return ret;return 0 ;
编写配套屏幕 ST7789v 驱动 #include <linux/bitops.h> #include <linux/delay.h> #include <linux/init.h> #include <linux/kernel.h> #include <linux/module.h> #include <linux/gpio.h> #include <video/mipi_display.h> #include "fbtft.h" #define DRVNAME "fb_st7789v" #define DEFAULT_GAMMA \ "70 2C 2E 15 10 09 48 33 53 0B 19 18 20 25\n" \"70 2C 2E 15 10 09 48 33 53 0B 19 18 20 25" #define HSD20_IPS_GAMMA \ "D0 05 0A 09 08 05 2E 44 45 0F 17 16 2B 33\n" \"D0 05 0A 09 08 05 2E 43 45 0F 16 16 2B 33" enum st7789v_command {0xB2 ,0xB7 ,0xBB ,0xC2 ,0xC3 ,0xC4 ,0xC5 ,0xD0 ,0xE0 ,0xE1 ,#define MADCTL_BGR BIT(3) #define MADCTL_MV BIT(5) #define MADCTL_MX BIT(6) #define MADCTL_MY BIT(7) static int init_display (struct fbtft_par *par) 50 );0x36 ,0x00 );0x3A ,0x05 );0xB2 ,0x1F ,0x1F ,0x00 ,0x33 ,0x33 );0xB7 ,0x35 );0xBB ,0x20 );0xC0 ,0x2C );0xC2 ,0x01 );0xC3 ,0x01 );0xC4 ,0x18 );0xC6 ,0x13 );0xD0 ,0xA4 ,0xA1 );0xE0 ,0xF0 ,0x04 ,0x07 ,0x04 ,0x04 ,0x04 ,0x25 ,0x33 ,0x3C ,0x36 ,0x14 ,0x12 ,0x29 ,0x30 );0xE1 ,0xF0 ,0x02 ,0x04 ,0x05 ,0x05 ,0x21 ,0x25 ,0x32 ,0x3B ,0x38 ,0x12 ,0x14 ,0x27 ,0x31 );0xE4 ,0x1D ,0x00 ,0x00 );0x21 );0x11 );50 );0x29 );200 );return 0 ;return 0 ;static int set_var (struct fbtft_par *par) 0 ;if (par->bgr)switch (par->info->var.rotate) {case 0 :break ;case 90 :break ;case 180 :break ;case 270 :break ;default :return -EINVAL;return 0 ;static int set_gamma (struct fbtft_par *par, unsigned long *curves) int i;int j;int c; const u8 gamma_par_mask[] = {0xFF , 0x3F , 0x3F , 0x1F , 0x1F , 0x3F , 0x7F , 0x77 , 0x7F , 0x3F , 0x1F , 0x1F , 0x3F , 0x3F , for (i = 0 ; i < par->gamma.num_curves; i++) {for (j = 0 ; j < par->gamma.num_values; j++)0 ], curves[c + 1 ], curves[c + 2 ],3 ], curves[c + 4 ], curves[c + 5 ],6 ], curves[c + 7 ], curves[c + 8 ],9 ], curves[c + 10 ], curves[c + 11 ],12 ], curves[c + 13 ]);return 0 ;static int blank (struct fbtft_par *par, bool on) if (on)else return 0 ;static void set_addr_win (struct fbtft_par *par, int xs, int ys, int xe, int ye) switch (par->info->var.rotate)case 0 :break ;case 90 :80 ;xe+=80 ;break ;case 180 :break ;case 270 :80 ;xe+=80 ;break ;default :break ;8 ) & 0xFF , xs & 0xFF , (xe >> 8 ) & 0xFF , xe & 0xFF );8 ) & 0xFF , ys & 0xFF , (ye >> 8 ) & 0xFF , ye & 0xFF );static void reset (struct fbtft_par *par) if (par->gpio.reset == -1 )return ;"%s()\n" , __func__);1 );20 );0 );20 );1 );120 );static struct fbtft_display display =8 ,240 ,240 ,2 ,14 ,"sitronix,st7789v" , &display);"spi:" DRVNAME);"platform:" DRVNAME);"spi:st7789v" );"platform:st7789v" );"FB driver for the ST7789V LCD Controller" );"Dennis Menschel" );"GPL" );
编写设备树 &pio {
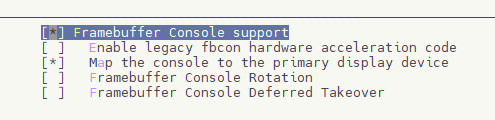
显示 Linux 终端 前往驱动勾选如下选项
Device Drivers --->
然后在 bootargs 添加一行 console=tty0 即可显示。
]]>
https://gloomyghost.com/live/2024-01-20-20240120.aspx
2024-01-19T16:00:00.000Z
TinyVision 配套 LCD 模组使用 ST7789V 作为主控,模组大小为1.4寸。
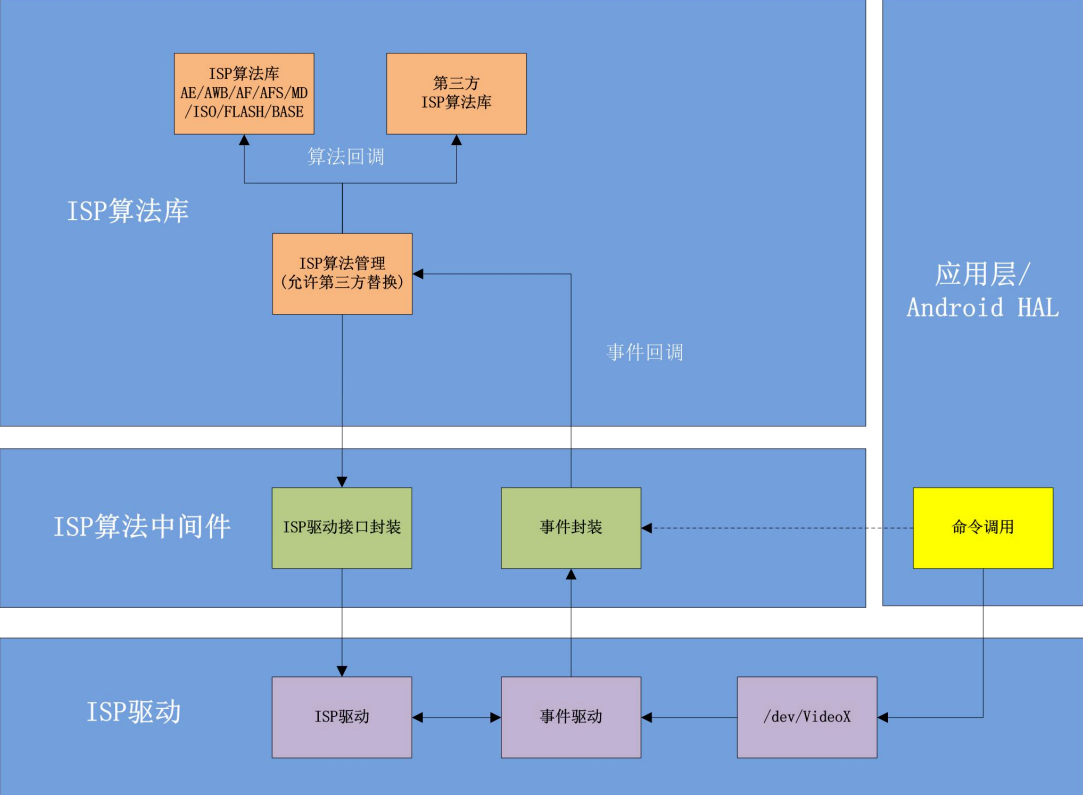
TinyVision 的 ISP 调试,通过 ISP 调试可以调整摄像头的各项参数,画质。ISP 模块主要用于处理 image sensor 输出的 RAW 数据,其主要功能包括:黑电平校正、坏点校正、镜头阴影校正、2D/3D 降噪、色彩增强、数字宽动态、3A 等。
ISP 算法包含硬件算法和软件算法库两部分:硬件算法集成在 SoC 中,称为 Tiger ISP,软件算法服务于 ISP 硬件算法,故称为 ISP Server。
资源下载:https://github.com/YuzukiHD/YuzukiHD.github.io/releases/tag/20240114
准备阶段 使用 PhoenixCard 在TF卡烧录以下固件:
如果没有安装 PhoenixCard 请使用 dd ,win32diskmgr 烧录下面这个固件
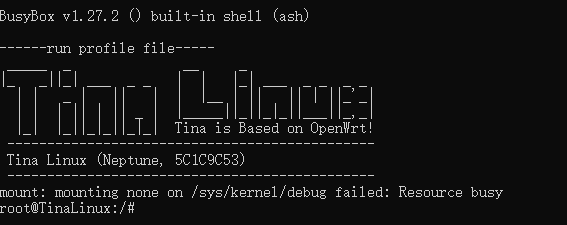
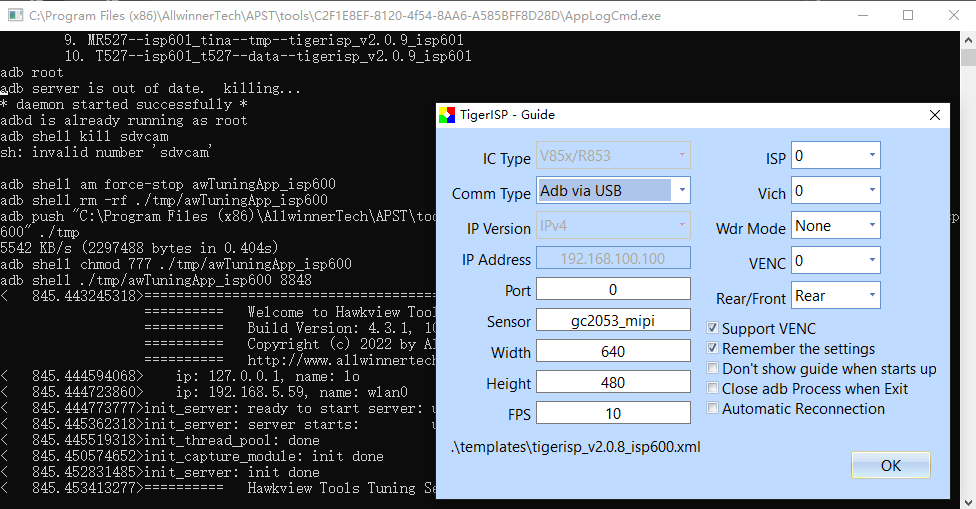
板子接入摄像头,USB 接入电脑。上电启动,使用 adb shell 查看是否启动完成
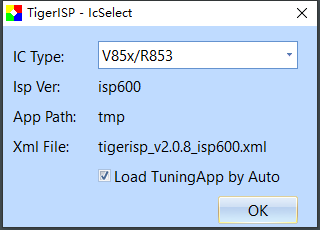
TigerISP 初设置 开启 TigerISP,选择 V85x IC
配置 Adb via USB ,其他如图配置即可
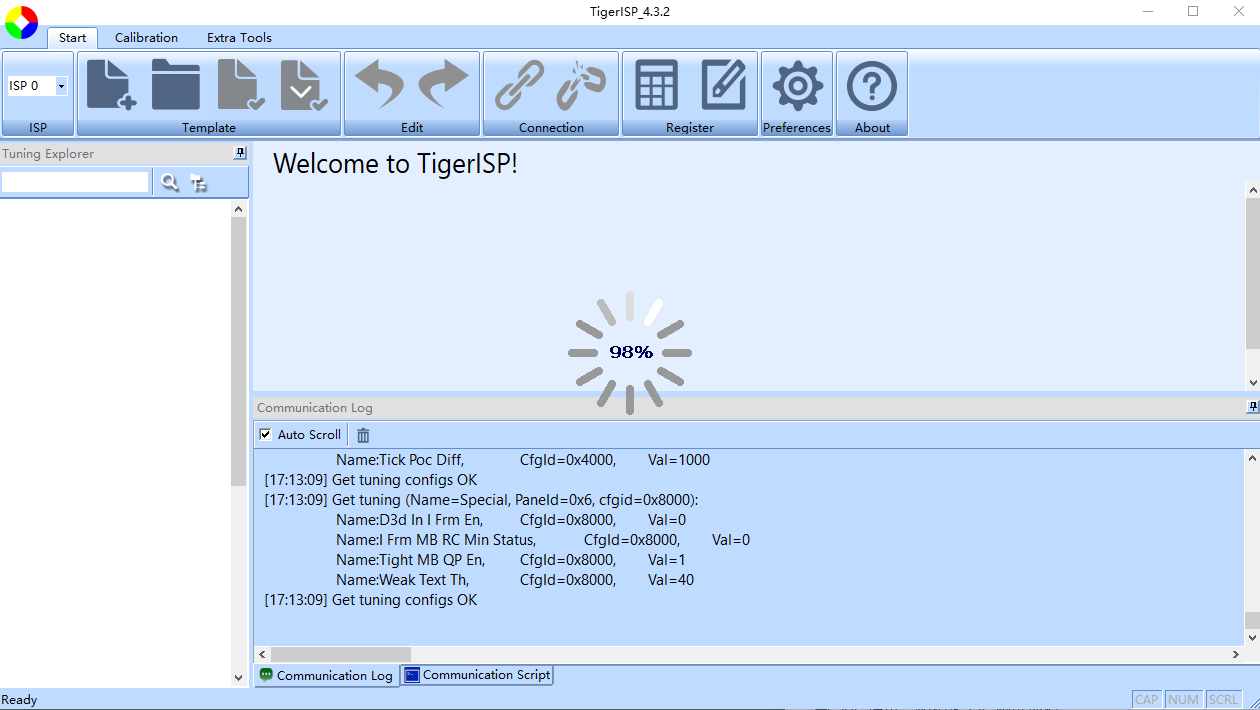
与 SoC 通讯,初始化 ISP 调试环境
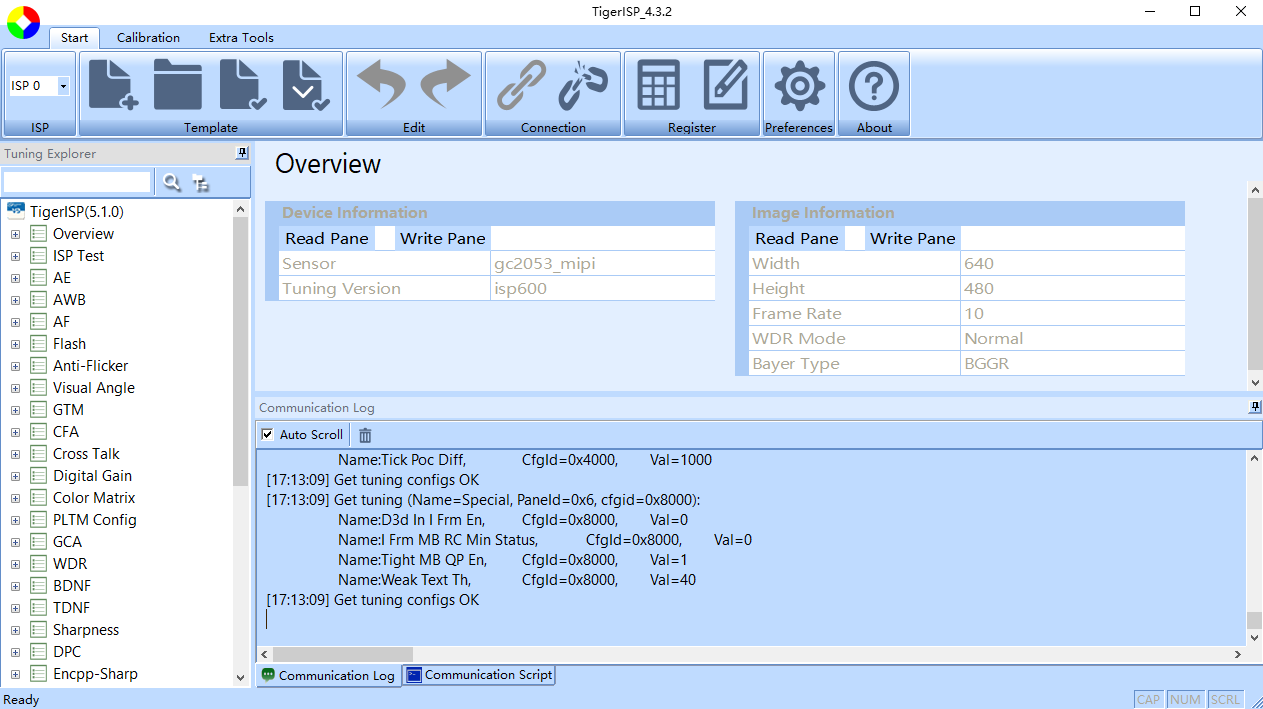
初始化完成后,可以开始调试 ISP
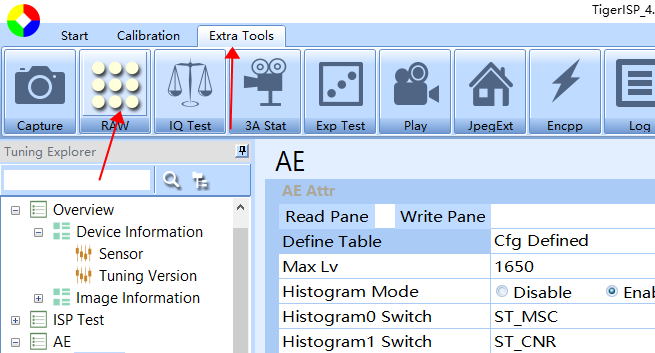
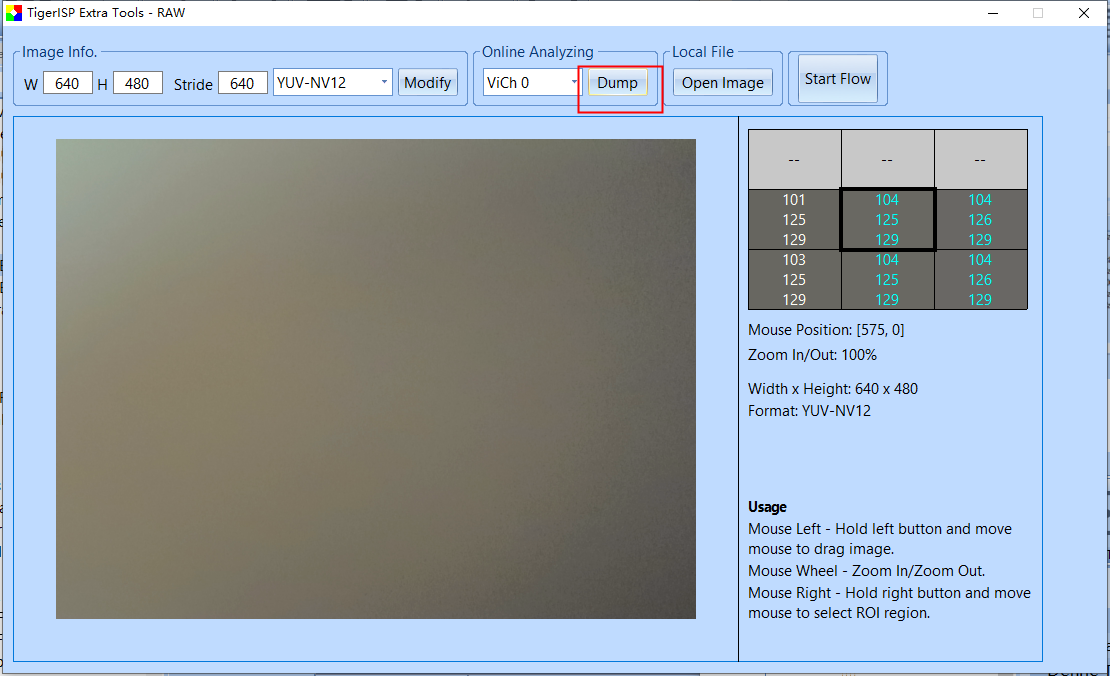
先测试一下摄像头是否正常,点击 Extra Tools,进入 RAW
点击 Online Analyzing 的 dump 选项
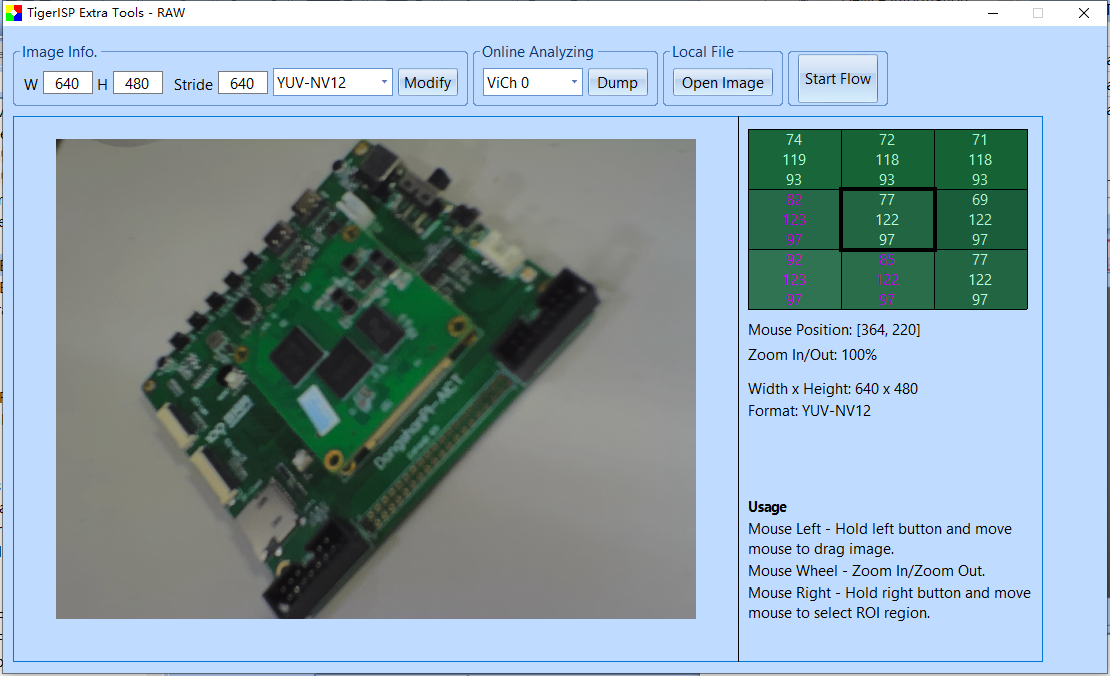
即可开启摄像头,通过窗口查看拍摄到的内容
]]>
https://gloomyghost.com/live/2024-01-14-20240114.aspx
2024-01-13T16:00:00.000Z
TinyVision 的 ISP 调试,通过 ISP 调试可以调整摄像头的各项参数,画质。
ISP 模块主要用于处理 image sensor 输出的 RAW 数据,其主要功能包括:黑电平校正、坏点校正、镜头阴影校正、2D/3D 降噪、色彩增强、数字宽动态、3]]>
TinyVision 使用 TigerISP 调整摄像头 ISP
2026-04-25T03:17:29.450Z
柚木 鉉
TinyVision 使用GPIO引出WIFI模块,配套的WIFI模块主控芯片为 AIC8800D80文章中的资源下下载地址:https://github.com/YuzukiHD/YuzukiHD.github.io/releases/tag/20240112
Linux 4.9 内核驱动移植 Linux 4.9 BSP 内核驱动 下载驱动后获得驱动的 tar.gz 压缩包
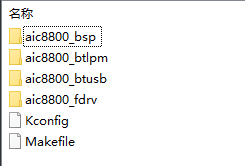
解压后找到如下驱动与文件夹
进入内核,找到 linux-4.9/drivers/net/wireless 文件夹中,新建文件夹aic8800 并且把上面的驱动与文件夹放入刚刚创建好的 aic8800 中。
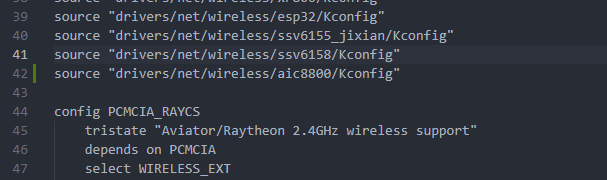
修改 linux-4.9/drivers/net/wireless/Kconfig ,增加一行
source "drivers/net/wireless/aic8800/Kconfig"
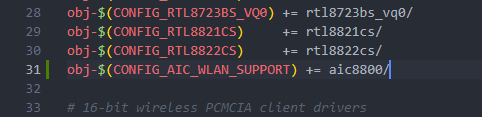
修改 linux-4.9/drivers/net/wireless/Makefile ,增加一行
obj-$(CONFIG_AIC_WLAN_SUPPORT) += aic8800/
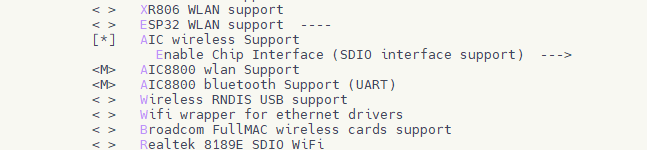
进入内核配置页,找到并勾选如下选项。
Device Drivers --->
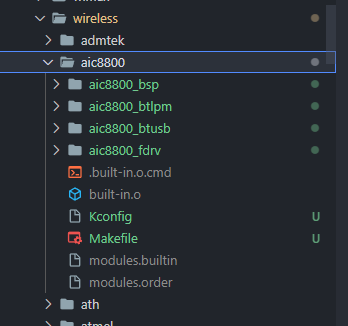
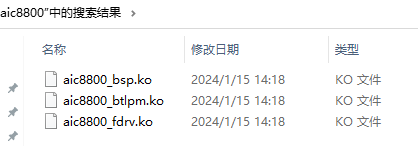
编译后可以找到对应的驱动程序
其加载顺序是
insmod aic8800_bsp.ko
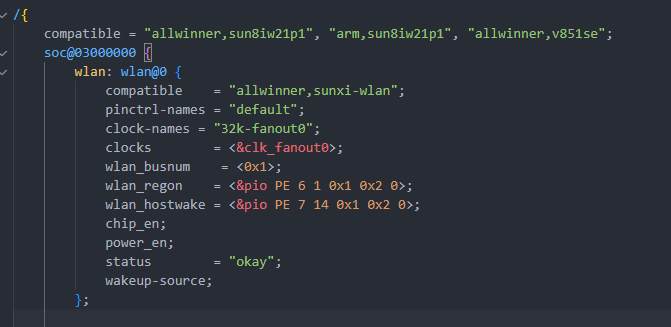
Linux 4.9 BSP 内核设备树 设备树配置如下,参考电路原理图,REG_ON 为 PE6,HOSTWAKE 为 PE7
wlan: wlan@0 { compatible = "allwinner,sunxi-wlan" ; pinctrl-names = "default" ; clock-names = "32k-fanout0" ; clocks = <&clk_fanout0 > ; busnum = <0x1 > ; regon = <&pio PE 6 1 0x1 0x2 0 > ; hostwake = <&pio PE 7 14 0x1 0x2 0 > ; en ; en ; status = "okay" ; wakeup-source ; };
Tina SDK 移植 Tina SDK 基于OpenWrt 提供了一些自动化方案,可以参考 OpenWrt 的方法来移植这些驱动。
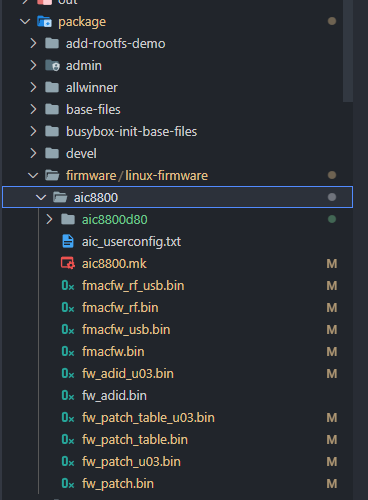
WIFI 固件移植 下载得到 aic8800-firmware.tar.gz 这里面包含着 WIFI 使用的固件
解压后拷贝到 package/firmware/linux-firmware/aic8800 即可
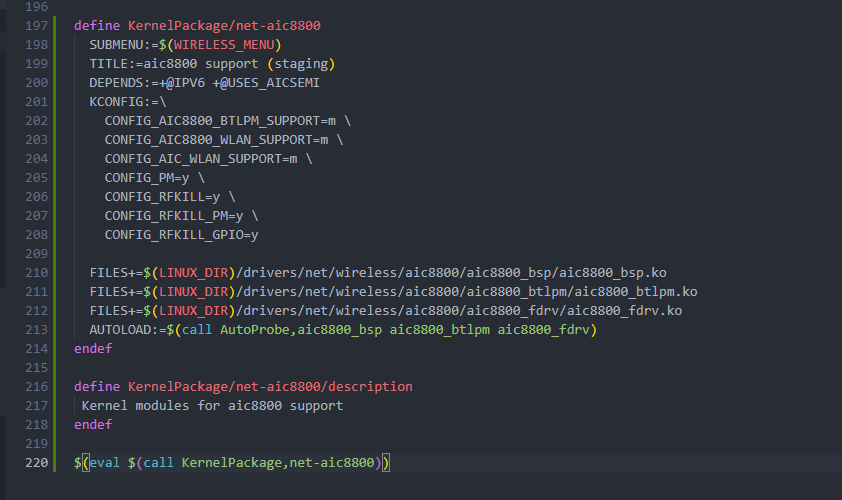
然后找到 target/allwinner/v851se-common/modules.mk 文件,在末尾添加如下内容
define KernelPackage/net-aic8800$(WIRELESS_MENU) $(LINUX_DIR) /drivers/net/wireless/aic8800/aic8800_bsp/aic8800_bsp.ko$(LINUX_DIR) /drivers/net/wireless/aic8800/aic8800_btlpm/aic8800_btlpm.ko$(LINUX_DIR) /drivers/net/wireless/aic8800/aic8800_fdrv/aic8800_fdrv.ko$(call AutoProbe,aic8800_bsp aic8800_btlpm aic8800_fdrv) endef define KernelPackage/net-aic8800/descriptionendef $(eval $(call KernelPackage,net-aic8800) )
通过这些内容可以使 Tina 自动去内核文件夹将 ko 打包进文件系统。
配置自动装载模块 修改文件:target/allwinner/v851se-tinyvision/busybox-init-base-files/etc/init.d/rc.modules 增加如下内容,每次开机的时候就会自动装载模块
#!/bin/sh4.9 .191 /aic8800_bsp.ko4.9 .191 /aic8800_fdrv.ko4.9 .191 /aic8800_btlpm.ko
配置网络进程 新建文件 target/allwinner/v851se-tinyvision/busybox-init-base-files/etc/init.d/S50wifidaemon 写入如下内容,每次开机装载模块后便初始化WIFI和配置WIFI模式
#!/bin/sh
配置 WIFI 固件 进入 Tina 配置页面,打开如下功能
Allwinner --->
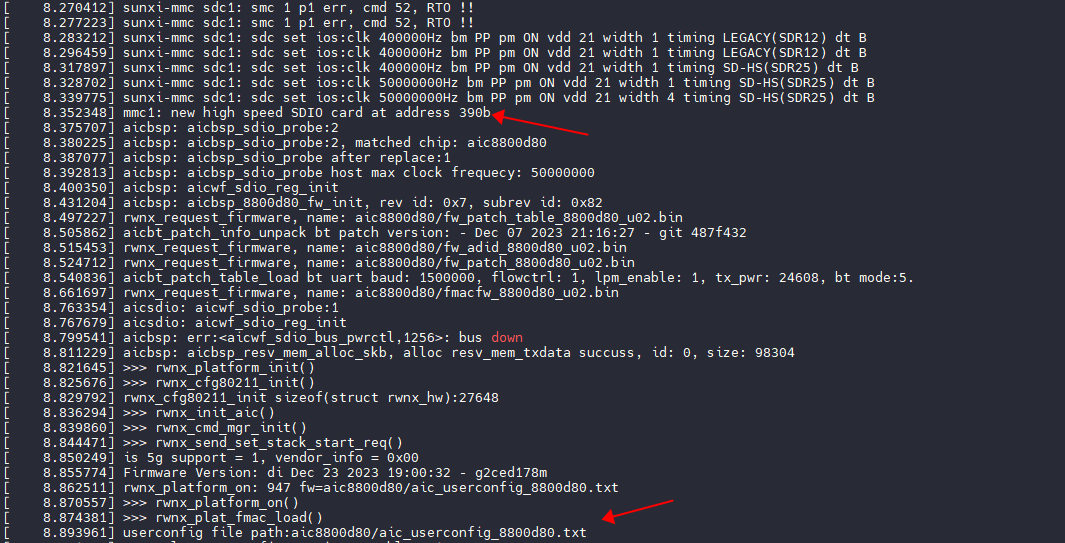
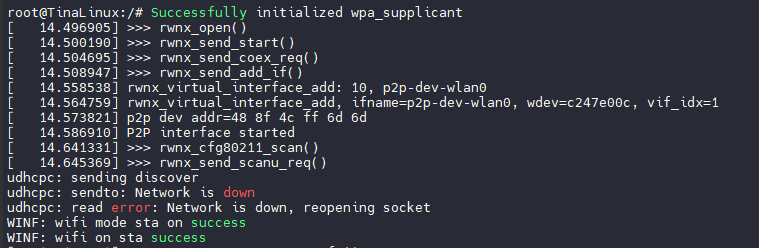
测试 上电启动,可以看到 LOG 正常挂载 WIFI
可以看到正常初始化进程
Linux 5.15 内核驱动移植 Linux 5.15 内核驱动 下载驱动后获得驱动的 tar.gz 压缩包
解压后找到如下驱动与文件夹
由于 Linux 5.15 需要保证内核的主线化,不可将非主线的第三方驱动放置于内核文件夹中,所以将驱动放置于 bsp 文件夹中。
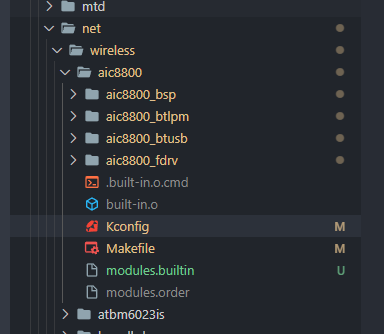
进入bsp,找到 bsp/drivers/net/wireless 文件夹中,新建文件夹aic8800 并且把上面的驱动与文件夹放入刚刚创建好的 aic8800 中。
修改 bsp/drivers/net/wireless/Kconfig ,增加一行
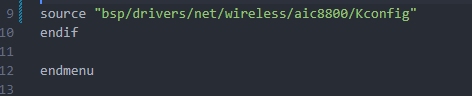
source "bsp/drivers/net/wireless/aic8800/Kconfig"
修改 bsp/drivers/net/wireless/Makefile ,增加一行
obj-$(CONFIG_AIC_WLAN_SUPPORT) += aic8800/
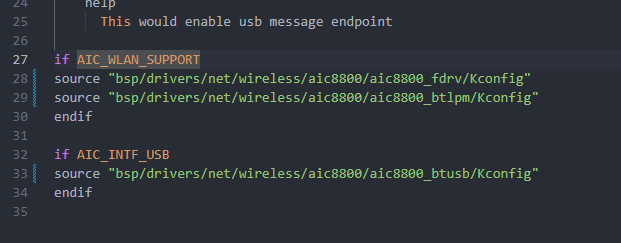
修改 bsp/drivers/net/wireless/aic8800/Kconfig,修改为 bsp 的索引
if AIC_WLAN_SUPPORT
进入内核配置页,找到并勾选如下选项。
[*] Networking support --->
Linux 5.15 内核设备树 &rfkill {
编译时可以看到生成的对应的 ko 模块
测试 由于 Linux 5.15 不绑定 Tina,所以这里直接使用现成的 debian rootfs 来做测试。
使用上面编译出来的内核与ko驱动,并且将固件放置于 rootfs 对应的 /lib/firmware/ 文件夹中
]]>
https://gloomyghost.com/live/2024-01-12-20240112.aspx
2024-01-11T16:00:00.000Z
TinyVision 使用GPIO引出WIFI模块,配套的WIFI模块主控芯片为 AIC8800D80
文章中的资源下下载地址:
构建 SyterKit 作为 BootloaderSyterKit 是一个纯裸机框架,用于 TinyVision 或者其他 v851se/v851s/v851s3/v853 等芯片的开发板,SyterKit 使用 CMake 作为构建系统构建,支持多种应用与多种外设驱动。同时 SyterKit 也具有启动引导的功能,可以替代 U-Boot 实现快速启动
获取 SyterKit 源码 SyterKit 源码位于GitHub,可以前往下载。
git clone https://github.com/YuzukiHD/SyterKit.git
从零构建 SyterKit 构建 SyterKit 非常简单,只需要在 Linux 操作系统中安装配置环境即可编译。SyterKit 需要的软件包有:
对于常用的 Ubuntu 系统,可以通过如下命令安装
sudo apt-get update
然后新建一个文件夹存放编译的输出文件,并且进入这个文件夹
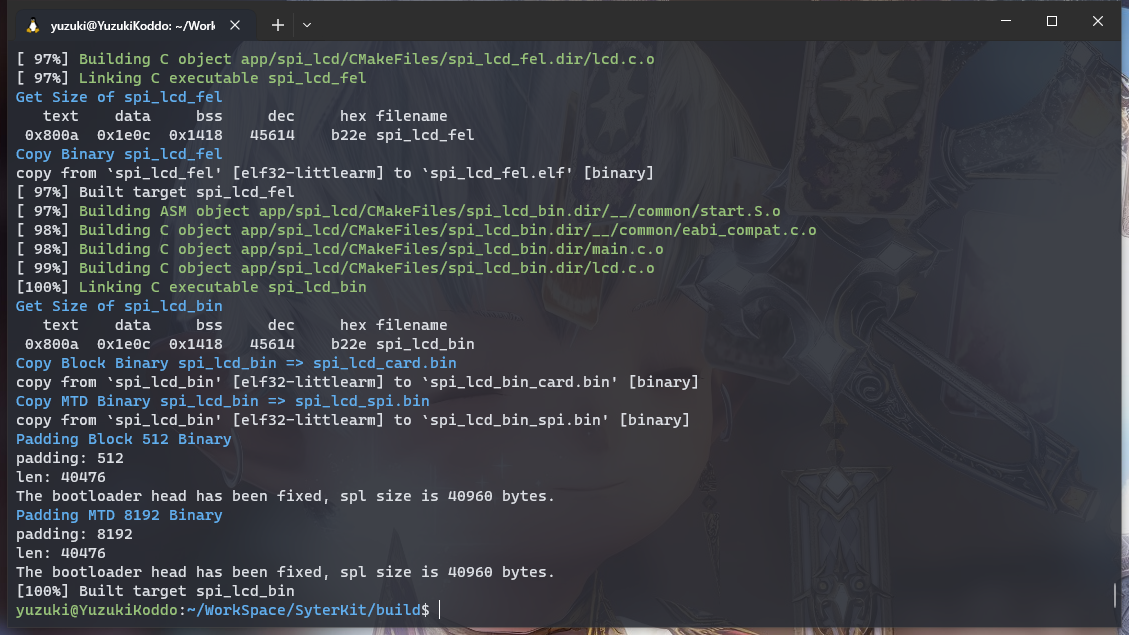
然后运行命令编译 SyterKit
编译后的可执行文件位于 build/app 中,这里包括 SyterKit 的多种APP可供使用。
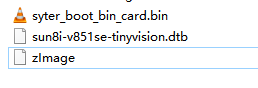
这里我们使用的是 syter_boot 作为启动引导。进入 syter_boot 文件夹,可以看到这些文件
由于 TinyVision 是 TF 卡启动,所以我们需要用到 syter_boot_bin_card.bin
编译 Linux-6.1 内核 由于 Debian 12 配套的内核是 Linux 6.1 LTS,所以这里我们选择构建 Linux 6.1 版本内核。
搭建编译环境 安装一些必要的安装包
sudo apt-get update && sudo apt-get install -y gcc-arm-none-eabi gcc-arm-linux-gnueabihf g++-arm-linux-gnueabihf build-essential libncurses5-dev zlib1g-dev gawk flex bison quilt libssl-dev xsltproc libxml-parser-perl mercurial bzr ecj cvs unzip lsof
获取内核源码 内核源码托管在 Github 上,可以直接获取到,这里使用 --depth=1 指定 git 深度为 1 加速下载。
git clone http://github.com/YuzukiHD/TinyVision --depth=1
然后进入内核文件夹
配置内核选项 应用 defconfig
CROSS_COMPILE=arm-linux-gnueabihf- make ARCH=arm tinyvision_defconfig
进入 menuconfig 配置选项
CROSS_COMPILE=arm-linux-gnueabihf- make ARCH=arm menuconfig
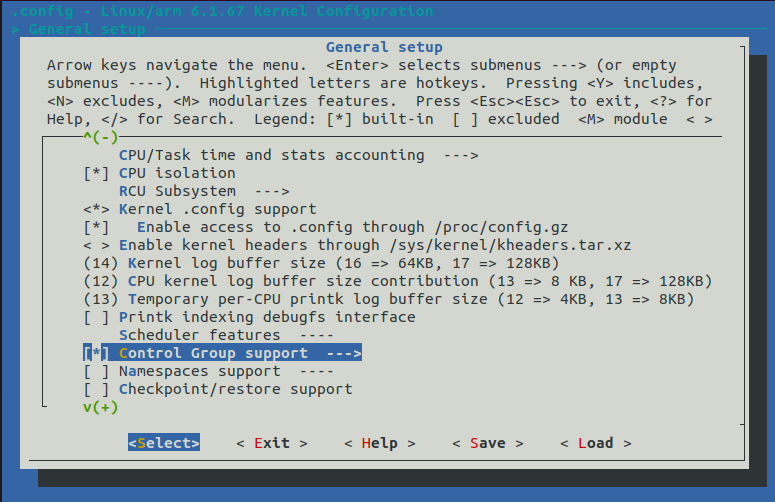
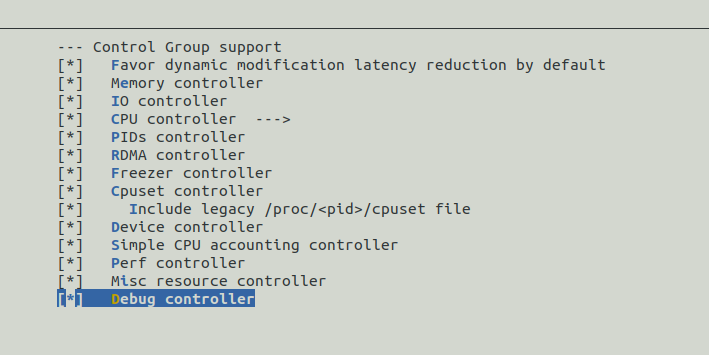
进入 General Setup ->,选中 Control Group Support
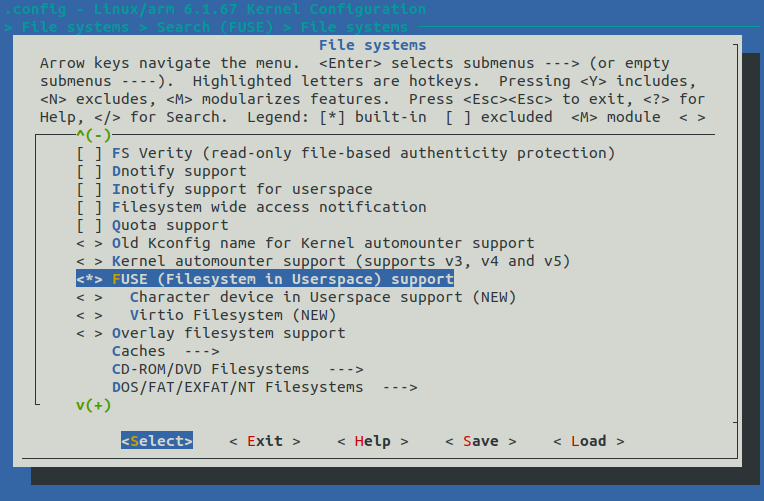
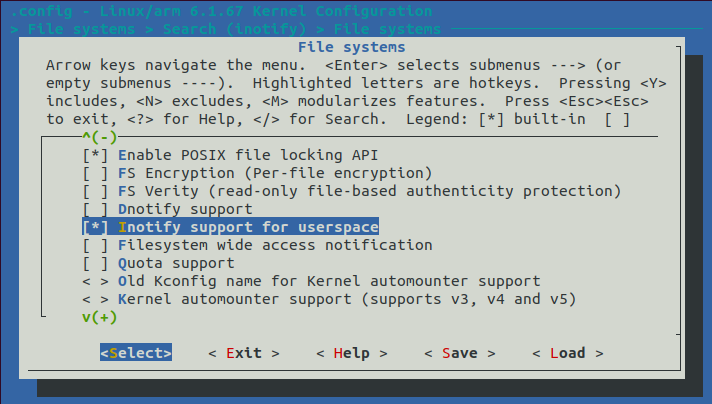
前往 File Systems 找到 FUSE (Filesystem in Userspace) support
前往 File Systems 找到 Inotify support for userspace
编译内核
CROSS_COMPILE=arm-linux-gnueabihf- make ARCH=arm
使用 debootstrap 构建 debian rootfs 准备环境,依赖 下载安装依赖环境
sudo apt install debootstrap qemu qemu-user-static qemu-system qemu-utils qemu-system-misc binfmt-support dpkg-cross debian-ports-archive-keyring --no-install-recommends
生成目标镜像,配置环境,这里我们生成一个 1024M 的镜像文件用于存放 rootfs
dd if=/dev/zero of=rootfs.img bs=1M count=1024
开始构建基础 rootfs 这里我们选择最新的 debian12 (bookwarm) 作为目标镜像,使用清华源来构建,输出到目标目录 rootfs_data 文件夹中。新版本的 debootstrap 只需要运行一次即可完成两次 stage 的操作,相较于老版本方便许多。
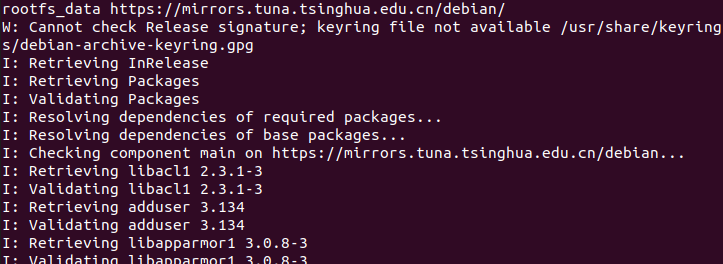
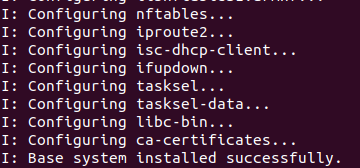
sudo debootstrap --arch=armhf bookworm rootfs_data https://mirrors.tuna.tsinghua.edu.cn/debian/
看到 I: Base system installed successfully. 就是构建完成了
等待构建完成后,使用chroot进入到目录,这里编写一个挂载脚本方便挂载使用,新建文件 ch-mount.sh 并写入以下内容:
#!/bin/bash function mnt echo "MOUNTING" sudo mount -t proc /proc ${2} procsudo mount -t sysfs /sys ${2} syssudo mount -o bind /dev ${2} devsudo mount -o bind /dev/pts ${2} dev/ptssudo chroot ${2} function umnt echo "UNMOUNTING" sudo umount ${2} procsudo umount ${2} syssudo umount ${2} dev/ptssudo umount ${2} devif [ "$1 " == "-m" ] && [ -n "$2 " ] ;then $1 $2 elif [ "$1 " == "-u" ] && [ -n "$2 " ];then $1 $2 else echo "" echo "Either 1'st, 2'nd or both parameters were missing" echo "" echo "1'st parameter can be one of these: -m(mount) OR -u(umount)" echo "2'nd parameter is the full path of rootfs directory(with trailing '/')" echo "" echo "For example: ch-mount -m /media/sdcard/" echo "" echo 1st parameter : ${1} echo 2nd parameter : ${2} fi
然后赋予脚本执行的权限
使用 ./ch-mount.sh -m rootfs_data 挂载 使用 ./ch-mount.sh -u rootfs_data 卸载 执行挂载,可以看到进入了 debian 的 rootfs
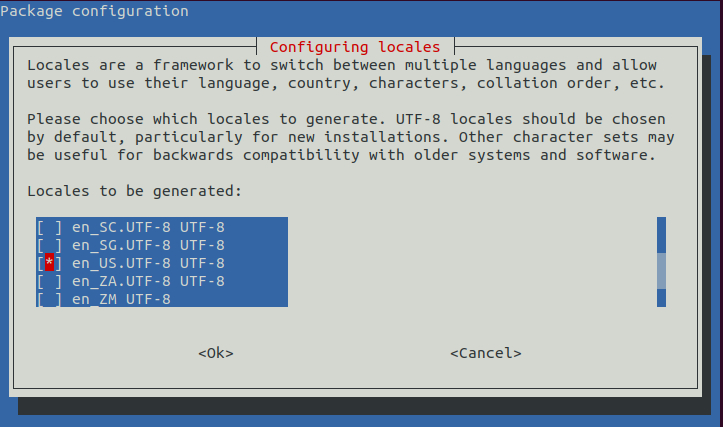
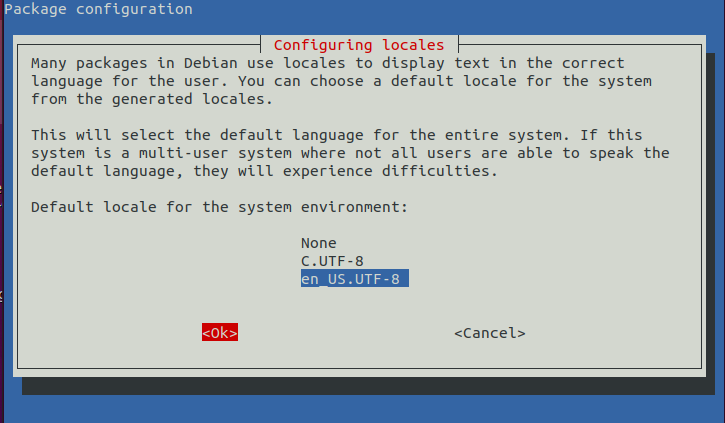
配置系统字符集,选择 en_US 作为默认字符集
export LC_ALL=en_US.UTF-8
选择一个就可以
直接 OK 下一步
安装 Linux 基础工具
apt install sudo ssh openssh-server net-tools ethtool wireless-tools network-manager iputils-ping rsyslog alsa-utils bash-completion gnupg busybox kmod wget git curl --no-install-recommends
安装编译工具
apt install build-essential
安装 Linux nerd 工具
apt install vim nano neofetch
设置本机入口 ip 地址
cat <<EOF > /etc/hosts
配置网卡
mkdir -p /etc/network
配置 DNS 地址
cat >/etc/resolv.conf <<EOF
配置分区
cat >/etc/fstab <<EOF
配置 root 密码
配置主机名
echo TinyVision > /etc/hostname
退出 chroot
取消挂载 chroot
./ch-mount.sh -u rootfs_data/
拷贝 rootfs 到镜像中 sudo cp -raf rootfs_data/* rootfs
取消挂载
至此 debian rootfs 就制作好了。
打包固件 编译完成 bootloader,内核,rootfs 后,还需要打包固件成为可以 dd 写入的固件,这里我们使用 genimage 工具来生成构建。
生成刷机镜像 编译内核后,可以在文件夹 arch/arm/boot/dts/allwinner 生成sun8i-v851se-tinyvision.dtb ,在文件夹arch/arm/boot 生成 zImage ,把他们拷贝出来。
然后将 sun8i-v851se-tinyvision.dtb 改名为 sunxi.dtb ,这个设备树名称是定义在 SyterKit 源码中的,如果之前修改了 SyterKit 的源码需要修改到对应的名称,SyterKit 会去读取这个设备树。
然后编写一个 config.txt 作为配置文件
[configs]
安装 GENIMAGE 这里我们使用 genimage 作为打包工具
sudo apt-get install libconfuse-dev #安装genimage依赖库
编译后运行试一试,这里正常
使用 GENIMAGE 打包固件 编写 genimage.cfg 作为打包的配置
image boot.vfat {
由于genimage的脚本比较复杂,所以编写一个 genimage.sh 作为简易使用的工具
#!/usr/bin/env bash die cat <<EOF >&2 Error: $@ Usage: ${0} -c GENIMAGE_CONFIG_FILE EOF exit 1"$(getopt -n "${0##*/} " -o c: -- "$@ " ) " || exit $?eval set -- "$opts " "${BUILD_DIR} /genimage.tmp" while true ; do case "$1 " in "${2} " ;shift 2 ;;shift 1;break ;;"unknown option '${1} '" ;;esac done "${GENIMAGE_CFG} " ] || die "Missing argument" trap 'rm -rf "${ROOTPATH_TMP}"' EXIT"$(mktemp -d) " "$(mktemp -d) " rm -rf "${GENIMAGE_TMP} " "${ROOTPATH_TMP} " \"${GENIMAGE_TMP} " \"${BINARIES_DIR} " \"${BINARIES_DIR} " \"${GENIMAGE_CFG} "
准备完成,文件如下所示
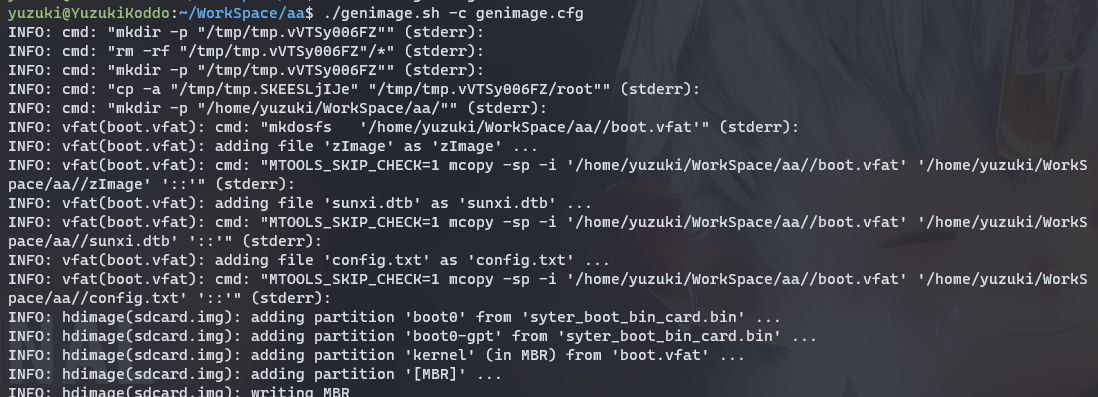
运行命令进行打包
chmod 777 genimage.sh
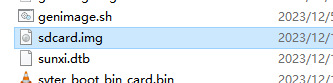
打包完成,可以找到 sdcard.img
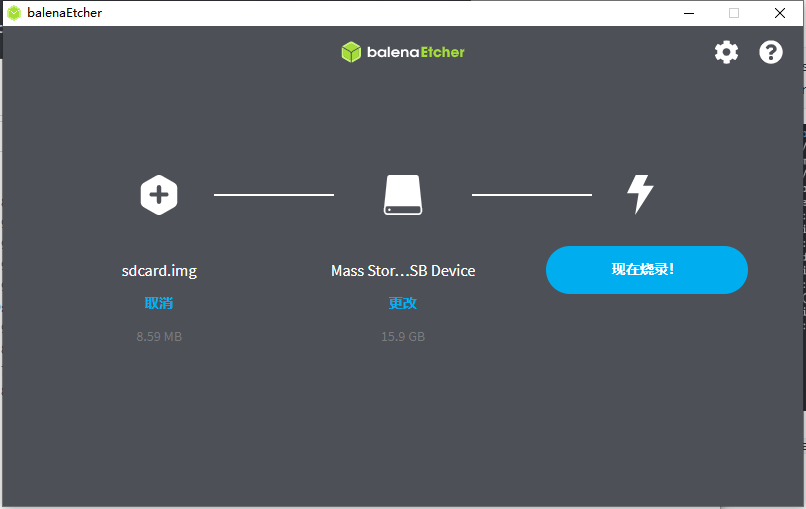
使用软件烧录固件到TF卡上
]]>
https://gloomyghost.com/live/2023-12-20-20231220.aspx
2023-12-19T16:00:00.000Z
SyterKitSyterKit 是一个纯裸机框架,用于 TinyVision 或者其他 v851se/v851s/v851s3/v853 等芯片的开发板,SyterKit 使用 CMake 作为构建系统构建,支持多种应用与多种外设驱动。同时 SyterKit 也具有启动引导的功能,可以替代 U-Boot 实现快速启动
获取 SyterKit 源码 SyterKit 源码位于GitHub,可以前往下载。
git clone https://github.com/YuzukiHD/SyterKit.git
从零构建 SyterKit 构建 SyterKit 非常简单,只需要在 Linux 操作系统中安装配置环境即可编译。SyterKit 需要的软件包有:
对于常用的 Ubuntu 系统,可以通过如下命令安装
sudo apt-get update
然后新建一个文件夹存放编译的输出文件,并且进入这个文件夹
然后运行命令编译 SyterKit
编译后的可执行文件位于 build/app 中,这里包括 SyterKit 的多种APP可供使用。
这里我们使用的是 syter_boot 作为启动引导。进入 syter_boot 文件夹,可以看到这些文件
由于 TinyVision 是 TF 卡启动,所以我们需要用到 syter_boot_bin_card.bin
移植 Linux 6.7 主线 有了启动引导,接下来是移植 Linux 6.7 主线,前往 https://kernel.org/ 找到 Linux 6.7,选择 tarball 下载
下载后解压缩
tar xvf linux-6.7-rc5.tar.gz
进入 linux 6.7 目录,开始移植相关驱动。
搭建 Kernel 相关环境 Kernel 编译需要一些软件包,需要提前安装。
sudo apt-get update && sudo apt-get install -y gcc-arm-none-eabi gcc-arm-linux-gnueabihf g++-arm-linux-gnueabihf build-essential libncurses5-dev zlib1g-dev gawk flex bison quilt libssl-dev xsltproc libxml-parser-perl mercurial bzr ecj cvs unzip lsof
安装完成后可以尝试编译一下,看看能不能编译通过,先应用配置文件
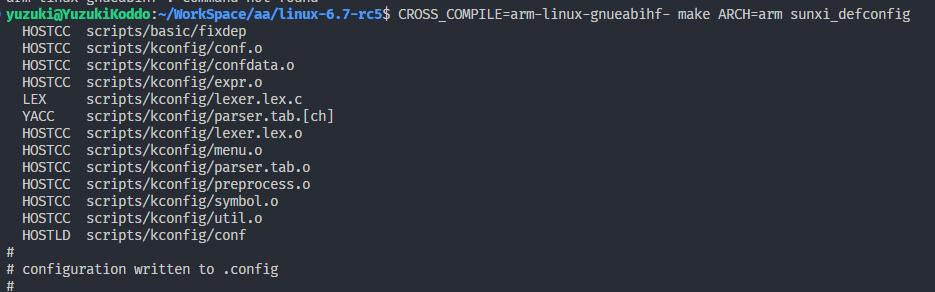
CROSS_COMPILE=arm-linux-gnueabihf- make ARCH=arm sunxi_defconfig
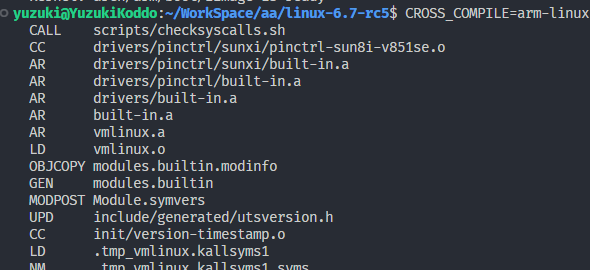
然后尝试编译
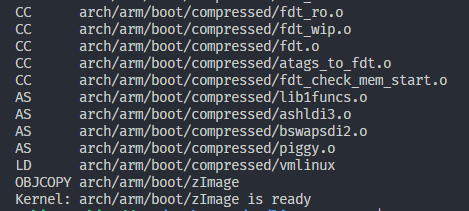
CROSS_COMPILE=arm-linux-gnueabihf- make ARCH=arm
可以用 -j32 来加速编译,32 指的是使用32线程编译,一般cpu有几个核心就设置几线程
CROSS_COMPILE=arm-linux-gnueabihf- make ARCH=arm -j32
正常编译
移植 clk 驱动 这里提供已经适配修改后的驱动:https://github.com/YuzukiHD/TinyVision/tree/main/kernel/linux-6.7-driver 可以直接使用。
也可以参考 https://github.com/YuzukiHD/TinyVision/tree/main/kernel/bsp/drivers/clk 中的驱动移植。
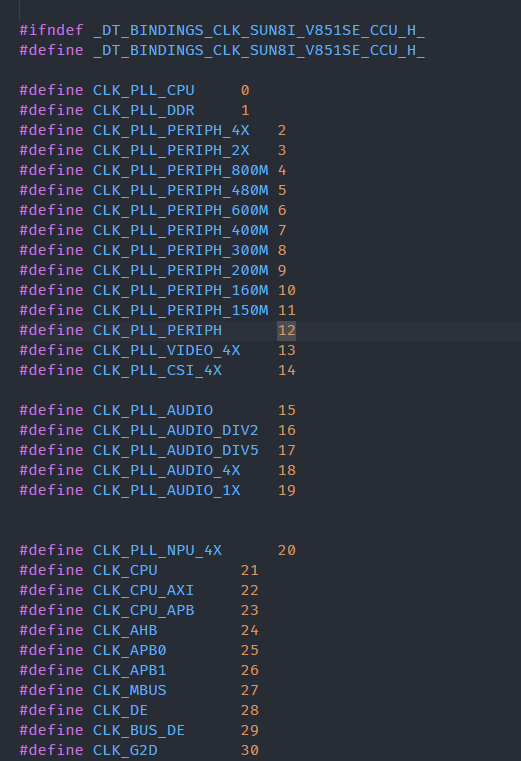
进入文件夹 include/dt-bindings/clock/ 新建文件 sun8i-v851se-ccu.h ,将 CLK 填入
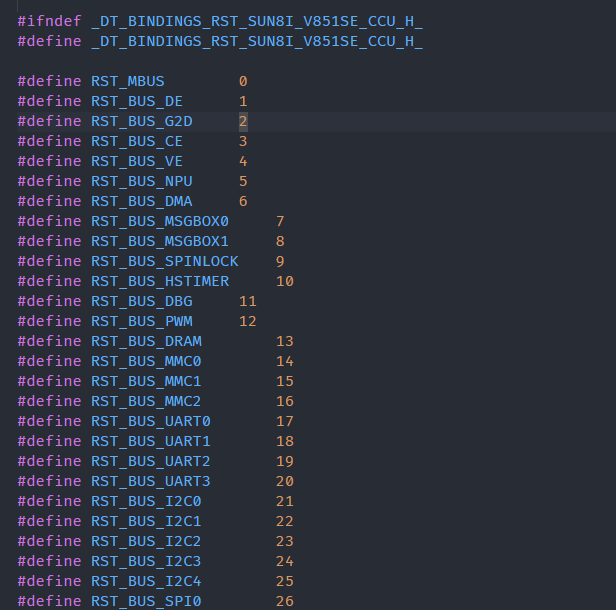
进入 include/dt-bindings/reset 新建文件 sun8i-v851se-ccu.h 将 RST 填入
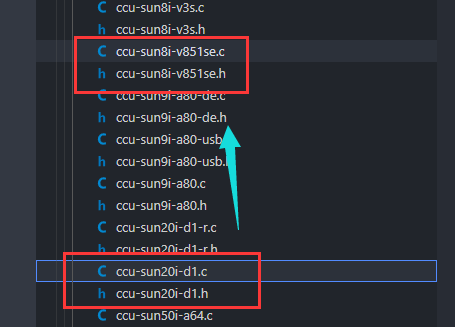
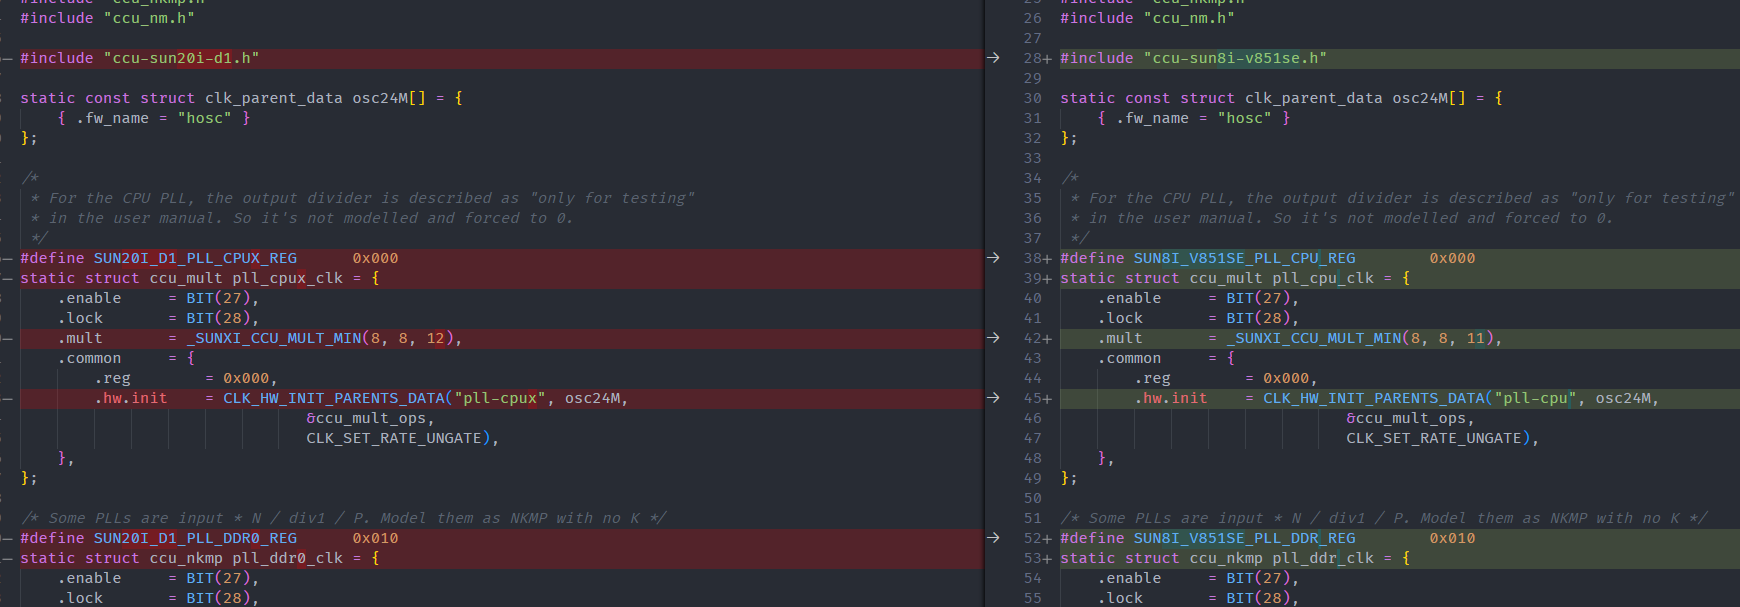
进入 drivers/clk/sunxi-ng 找到 sunxi-ng clk 驱动,复制文件ccu-sun20i-d1.c 和 ccu-sun20i-d1.h 文件并改名为 ccu-sun8i-v851se.c ,ccu-sun8i-v851se.h 作为模板。
将文件中的 SUN20I_D1 改为 SUN8I_V851SE
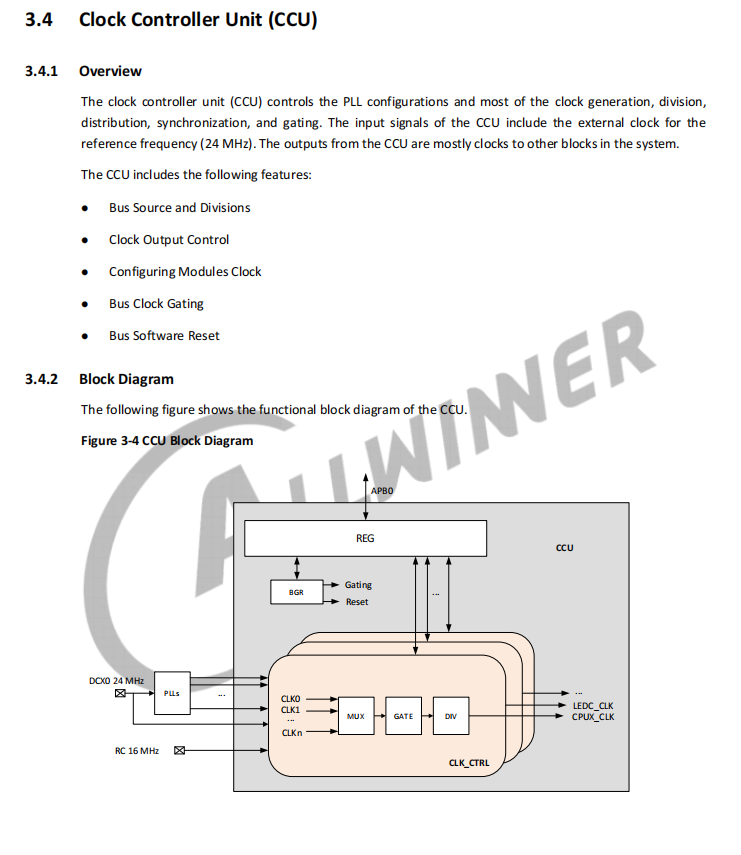
打开芯片数据手册V851SX_Datasheet_V1.2.pdf ,找到 CCU 章节
对照手册编写驱动文件适配 V851se 平台。
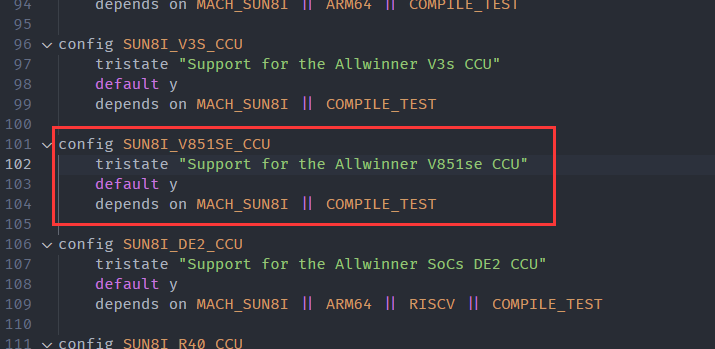
然后找到 drivers/clk/sunxi-ng/Kconfig 文件,增加刚才编写的驱动的 Kconfig 说明
config SUN8I_V851SE_CCU
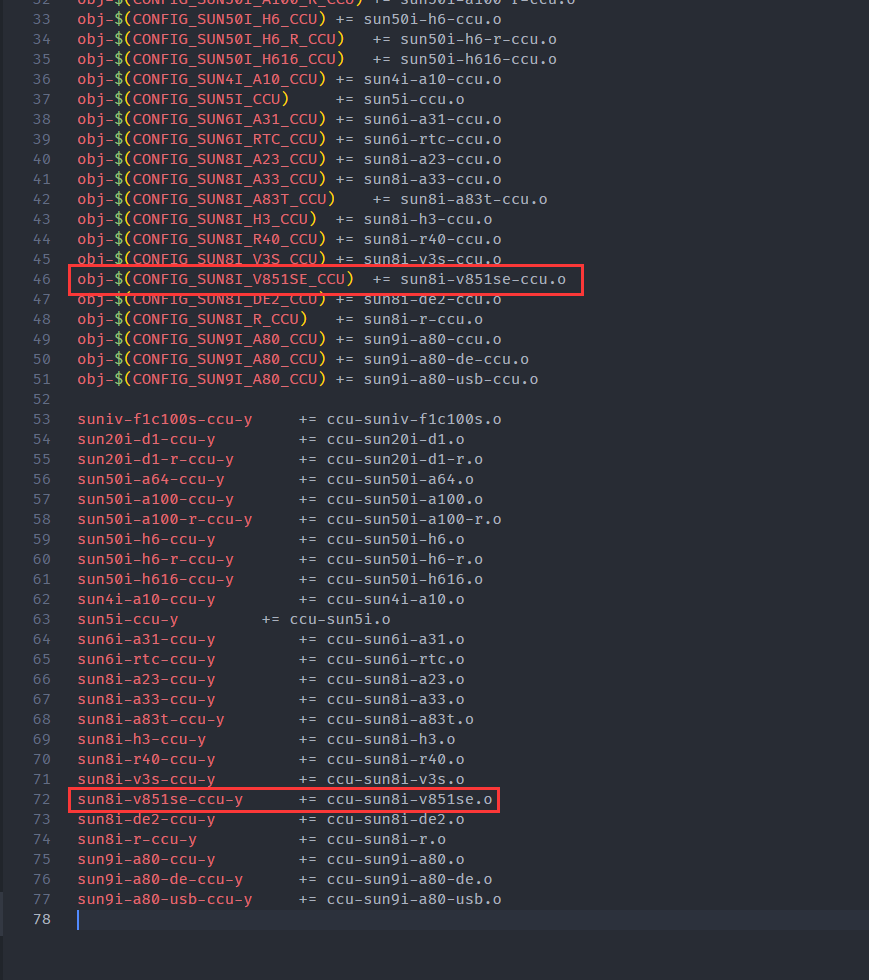
同时打开 drivers/clk/sunxi-ng/Makefile
obj-$(CONFIG_SUN8I_V851SE_CCU)+= sun8i-v851se-ccu.o
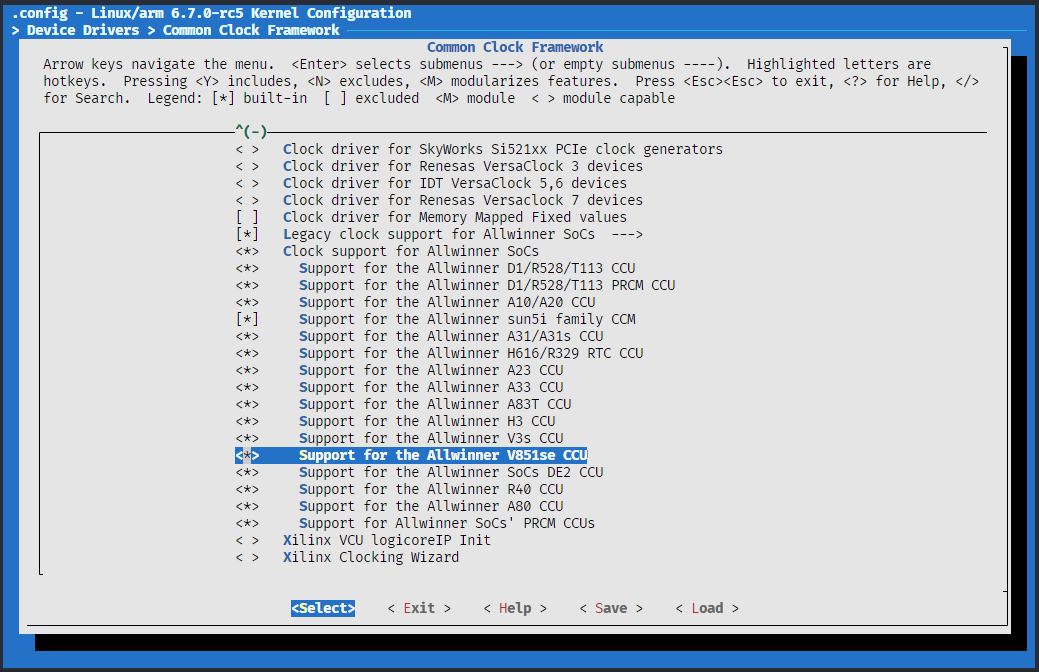
来检查一下是否移植成功,先查看 menuconfig,找到 Device Drivers > Common Clock Framework,查看是否有 V851se 平台选项出现
CROSS_COMPILE=arm-linux-gnueabihf- make ARCH=arm menuconfig
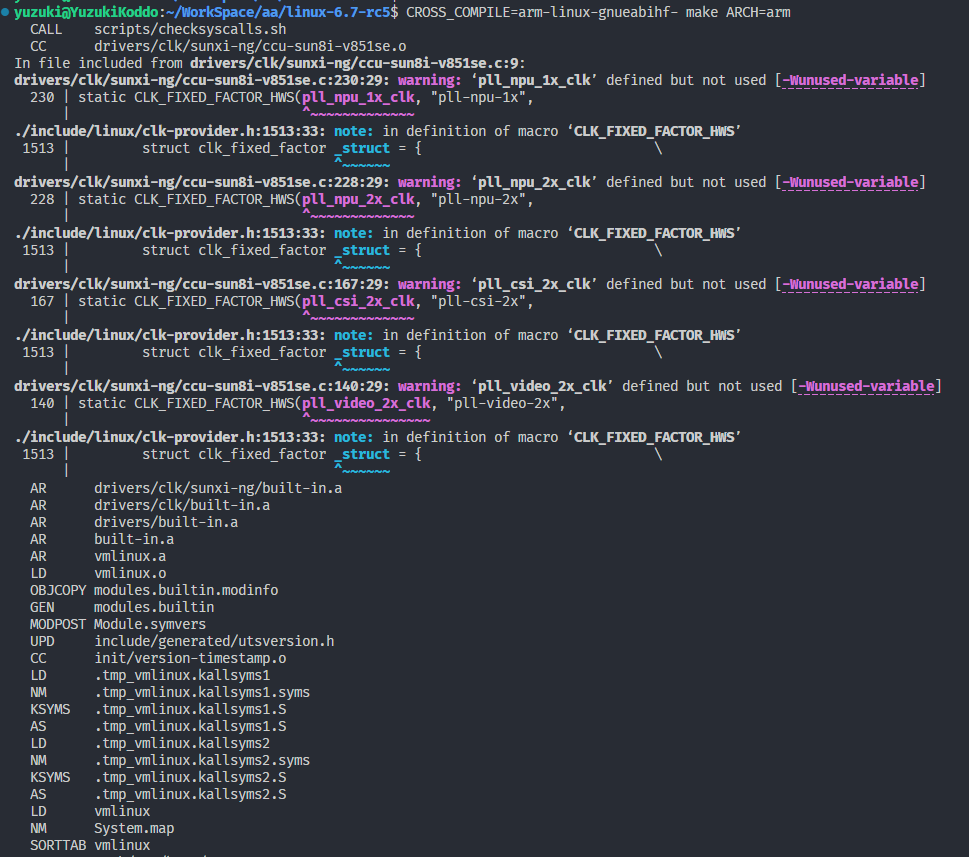
编译测试,有几处未使用的变量的警告,无视即可。
CROSS_COMPILE=arm-linux-gnueabihf- make ARCH=arm
正常编译成功
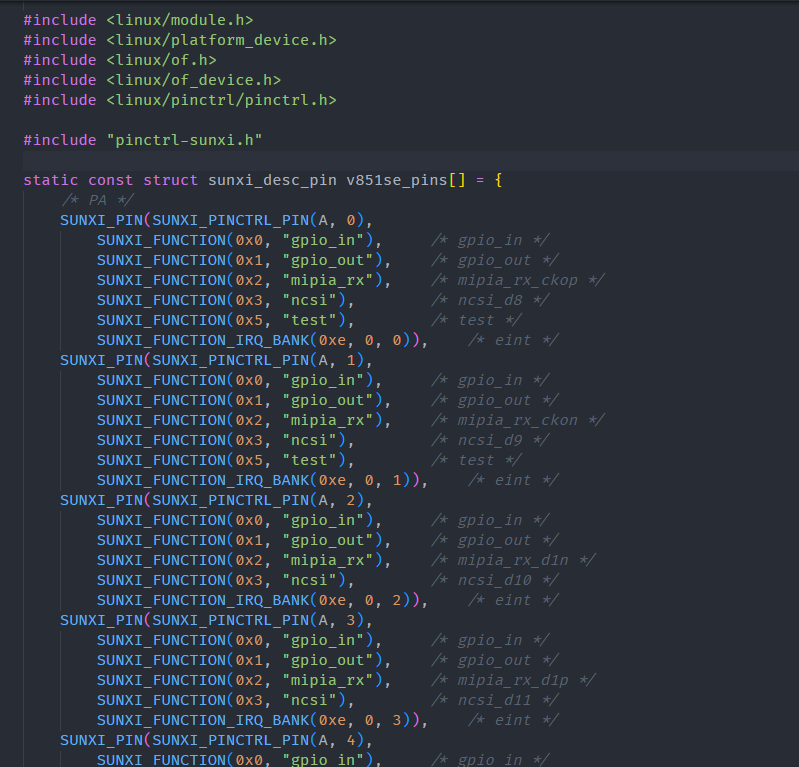
移植 pinctrl 驱动 这里提供已经适配修改后的驱动:https://github.com/YuzukiHD/TinyVision/tree/main/kernel/linux-6.7-driver 可以直接使用。
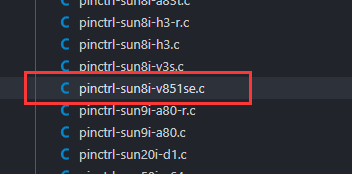
前往drivers/pinctrl/sunxi/ 新建文件 pinctrl-sun8i-v851se.c
打开 V851SE_PINOUT_V1.0.xlsx 对照填入PIN的值与功能。
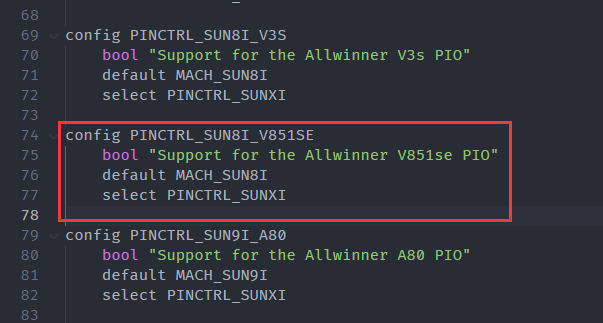
同样的,修改 drivers/pinctrl/sunxi/Kconfig 增加选项
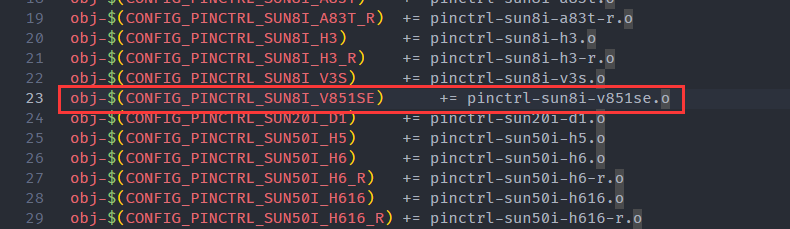
修改 drivers/pinctrl/sunxi/Makefile 增加路径
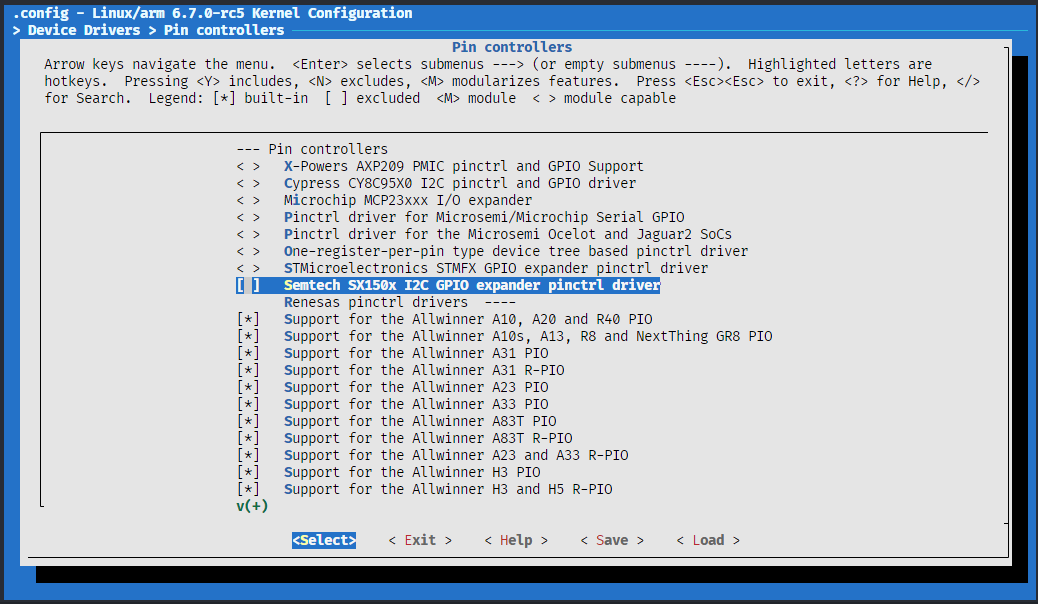
来检查一下是否移植成功,先查看 menuconfig,找到 > Device Drivers > Pin controllers,查看是否有 V851se 平台选项出现
CROSS_COMPILE=arm-linux-gnueabihf- make ARCH=arm menuconfig
编译测试,编译通过
CROSS_COMPILE=arm-linux-gnueabihf- make ARCH=arm
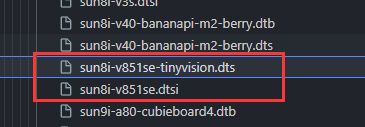
编写设备树 这里提供已经适配修改后的驱动:https://github.com/YuzukiHD/TinyVision/tree/main/kernel/linux-6.7-driver/dts 可以直接使用。
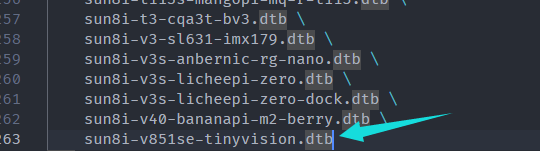
这部分直接给结果了,把上面适配的设备树放到/home/yuzuki/WorkSpace/aa/linux-6.7-rc5/arch/arm/boot/dts/allwinner/ ,修改 /home/yuzuki/WorkSpace/aa/linux-6.7-rc5/arch/arm/boot/dts/allwinner/Makefile
sun8i-v851se-tinyvision.dtb
生成刷机镜像 编译内核后,可以在文件夹 arch/arm/boot/dts/allwinner 生成sun8i-v851se-tinyvision.dtb ,在文件夹arch/arm/boot 生成 zImage ,把他们拷贝出来。
然后将 sun8i-v851se-tinyvision.dtb 改名为 sunxi.dtb ,这个设备树名称是定义在 SyterKit 源码中的,如果之前修改了 SyterKit 的源码需要修改到对应的名称,SyterKit 会去读取这个设备树。
然后编写一个 config.txt 作为配置文件
[configs]
安装 genimage 这里我们使用 genimage 作为打包工具
sudo apt-get install libconfuse-dev #安装genimage依赖库
编译后运行试一试,这里正常
使用 genimage 打包固件 编写 genimage.cfg 作为打包的配置
image boot.vfat {
由于genimage的脚本比较复杂,所以编写一个 genimage.sh 作为简易使用的工具
#!/usr/bin/env bash die cat <<EOF >&2 Error: $@ Usage: ${0} -c GENIMAGE_CONFIG_FILE EOF exit 1"$(getopt -n "${0##*/} " -o c: -- "$@ " ) " || exit $?eval set -- "$opts " "${BUILD_DIR} /genimage.tmp" while true ; do case "$1 " in "${2} " ;shift 2 ;;shift 1;break ;;"unknown option '${1} '" ;;esac done "${GENIMAGE_CFG} " ] || die "Missing argument" trap 'rm -rf "${ROOTPATH_TMP}"' EXIT"$(mktemp -d) " "$(mktemp -d) " rm -rf "${GENIMAGE_TMP} " "${ROOTPATH_TMP} " \"${GENIMAGE_TMP} " \"${BINARIES_DIR} " \"${BINARIES_DIR} " \"${GENIMAGE_CFG} "
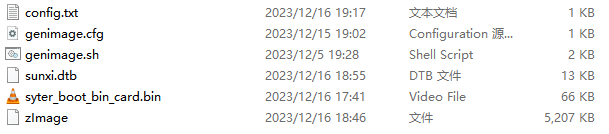
准备完成,文件如下所示
运行命令进行打包
chmod 777 genimage.sh
打包完成,可以找到 sdcard.img
使用软件烧录固件到TF卡上
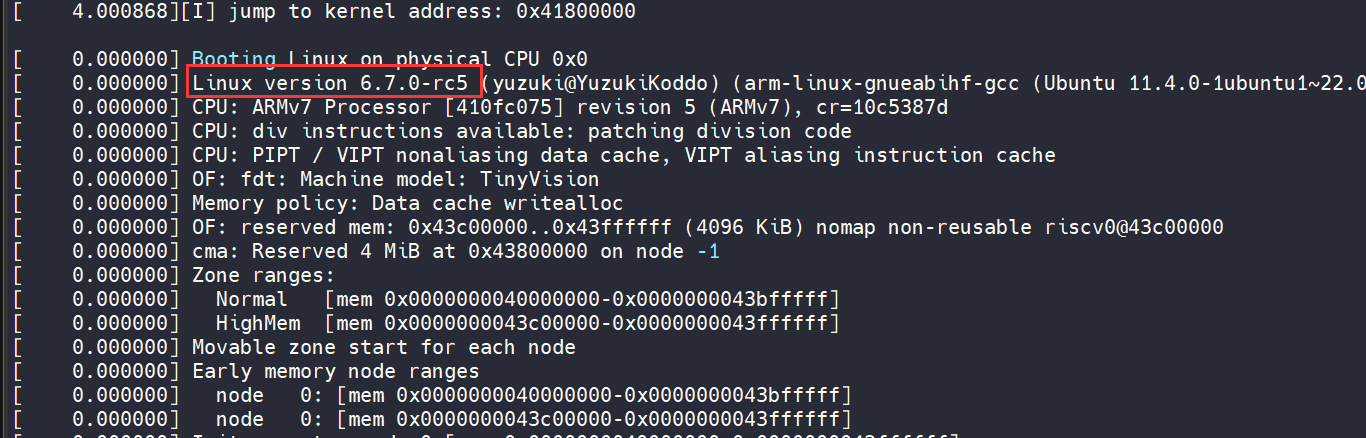
测试 插卡,上电,成功启动系统
可以看到 Linux 版本是 6.7.0
]]>
https://gloomyghost.com/live/2023-12-16-20231216.aspx
2023-12-15T16:00:00.000Z
SyterKitSyterKit 是]]>
TinyVision 使用 SyterKit 启动 Linux 6.7 主线内核
2026-04-25T03:17:29.450Z
柚木 鉉
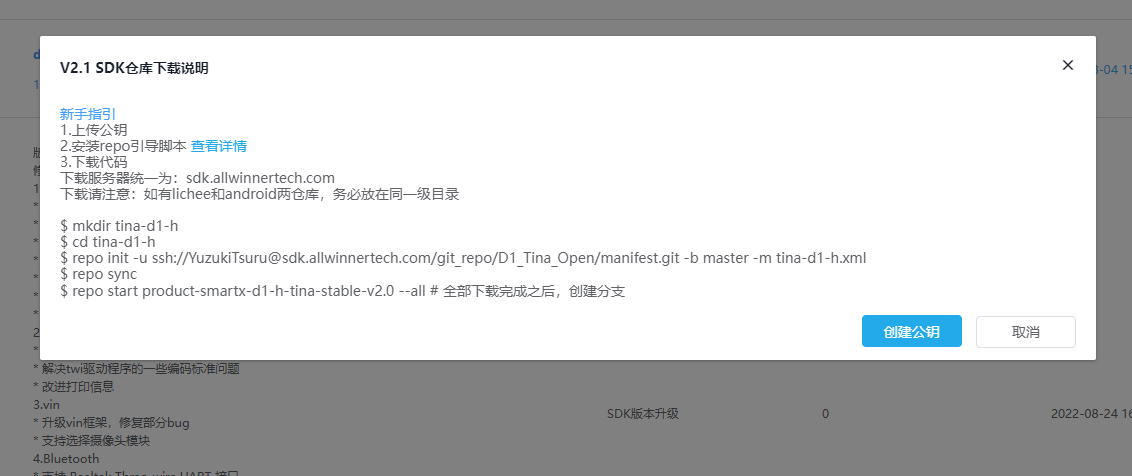
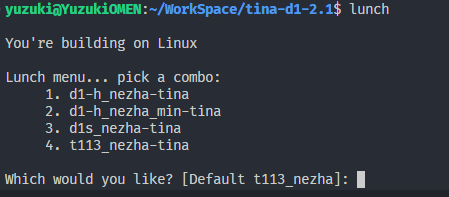
拿到了 T113 的片子,先焊接上去然后准备下SDK,拉取了全新的D1-H 2.1SDK
然后去 https://github.com/YuzukiHD/TinaAddons 找到 T113 的补丁打进去
git clone https://github.com/YuzukiHD/TinaAddons.git
然后就能找到 T113 平台了
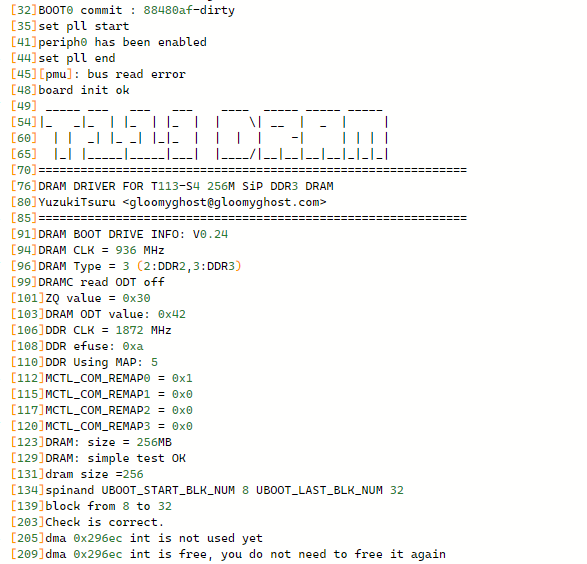
修改 DRAM 驱动,支持T113 驱动:https://github.com/YuzukiHD/TinyKasKit/blob/master/lib-dram-for-t113-s4.tar.gz
把这个驱动放到 lichee/brandy-2.0/spl/drivers/dram/sun8iw20p1
烧录~启动,识别了256M 内存
问题来了,卡OPTEE
M/TC: OP-TEE version: 963b7e95 (gcc version 5.3.1 20160412 (Linaro GCC 5.3-2016.05)) #1 Wed Jul 28 12:51:52 UTC 2021 arm
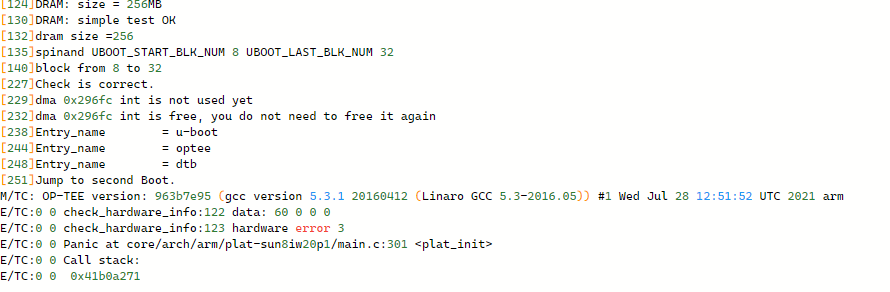
那就先跳过 OPTEE 吧,在 device/config/chips/t113/configs/nezha/ 新建一个 boot_package.cfg
写入以下内容
[package]
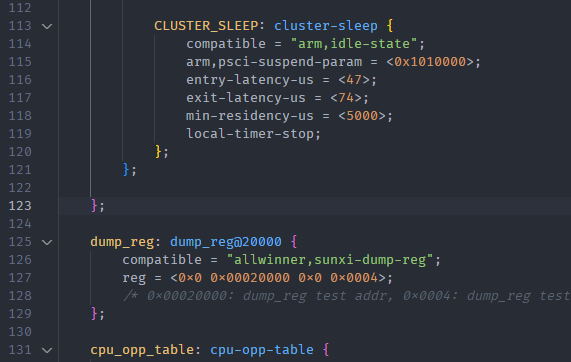
然后找到 lichee/linux-5.4/arch/arm/boot/dts/sun8iw20p1.dtsi 中的 psci 节点把他删了
psci {
启动了,256M 可用内存
启用SMP 由于上面关闭了optee和pcsi,所以是不能用双核的,为了开启双核需要加下配置代码
打开 lichee/linux-5.4/arch/arm/mach-sunxi/platsmp.c 文件,在末尾加入下列内容
static int sun8i_t113_smp_boot_secondary (unsigned int cpu, struct task_struct *idle) void __iomem *cpucfg_membase = ioremap(0x09010000 , 0x10 );void __iomem *cpuexec_membase[] = {ioremap(0x070005C4 , 0x10 ),ioremap(0x070005C8 , 0x10 )};if (cpu != 1 )return 0 ;return 0 ;static const struct smp_operations sun8i_t113_smp_ops __initconst ="allwinner,sun8iw20p1" , &sun8i_t113_smp_ops);
配置smp,设置boot地址和rst地址并且启动即可
]]>
https://gloomyghost.com/live/2023-03-13-20230313.aspx
2023-03-12T16:00:00.000Z
拿到了 T113 的片子,先焊接上去
然后准备下SDK,拉取了全新的D1-H 2.1SDK
HIFI5 DSP基于 Cadence Xtensa HIFI5 DSP 进行开发,该DSP 具有:
以 72 位元累加器支援每循环 8 个32x32 位元乘数累加器(multiplier-accumulators,MACs) 在特定条件下,支援每循环 16 个 16x16 位元 MACs 5 个超长指令集(VLIW) 插槽架构,能够每循环发出 2 个 128 位元负载 备有向量浮点运算单元,提供高达每循环 16 个单精密度 IEEE 浮点运算 MAC 关于 XCC 与 Xtensa Xplorer 《xtensa_xcc_compiler_ug.pdf》 中这样介绍:
Xtensa C 和 C++编译器(XCC)是针对所有Xtensa处理器的高级优化编译器。XCC扩充了标准Xtensa GNU软件开发工具链、汇编器、链接器、调试器、库和二进制实用程序。虽然XCC的操作类似于标准GNUC和C++编译器(GCC),但XCC通过改进的优化和代码生成技术提供了对TIE(Tensilica指令扩展语言)的支持,以及卓越的执行性能和更小的编译代码大小。
而 Xtensa Xplorer IDE 是基于 Eclipse 的 IDE,方便调试。
既然 XCC 基于 GCC,那可不可以抛弃专有的 TIE,SIMD 加速指令,将HIFI5 作为一个单纯的 Xtensa LX7 来使用。
自行编译 GCC for HIFI5 为了编译交叉编译工具链,我们需要两个工具:
config-overlay 是一个tar文件,其中包含各种工具链工具(如binutils、gcc和gdb)所需的处理器配置相关文件的修改版本。而 crosstool-ng 作为编译交叉编译工具链的脚本。
由于 HIFI5 使用的是 Xtensa LX7,我们可以寻找相同的 esp32-s3 的配置文件 ,也可以去奇妙的 FTP 上下载 HIFI5 使用的 xtensa-config-overlay.tar.gz,这里给一个下载的链接
转换 overlay 然后需要将这个overlay文件转换成对应的结构树,使用脚本 make-overlay.sh
wget https://raw.githubusercontent.com/foss-xtensa/xtensa-config/master/make-overlay.sh; chmod a+x make-overlay.sh
运行脚本,参数:./make-overlay.sh <core-name> <source-configuration-overlay> <result-directory>
./make-overlay.sh hifi5-dsp xtensa-config-overlay.tar.gz .
然后就会生成转换好了的 xtensa_hifi5-dsp.tar.gz
编译交叉编译工具链 首先安装 crosstool-ng 工具,参考官方文档 https://crosstool-ng.github.io/docs/install/,并且把转换后的 xtensa_hifi5-dsp.tar.gz 放到 /root/xtensa-hifi5-dsp 文件夹下
然后配置 ct-ng menuconfig 选择下列选项,这里使用的是 esp 所提供的 newlib 作为 clib
Target options --->
然后编译即可 ct-ng build
~# ct-ng build
等待编译完成即可
]]>
https://gloomyghost.com/live/2023-03-09-20230309.aspx
2023-03-08T16:00:00.000Z
HIFI5 DSP基于 Ca]]>
自行编译 HIFI5 DSP 使用的 GCC 编译器
2026-04-25T03:17:29.450Z
柚木 鉉
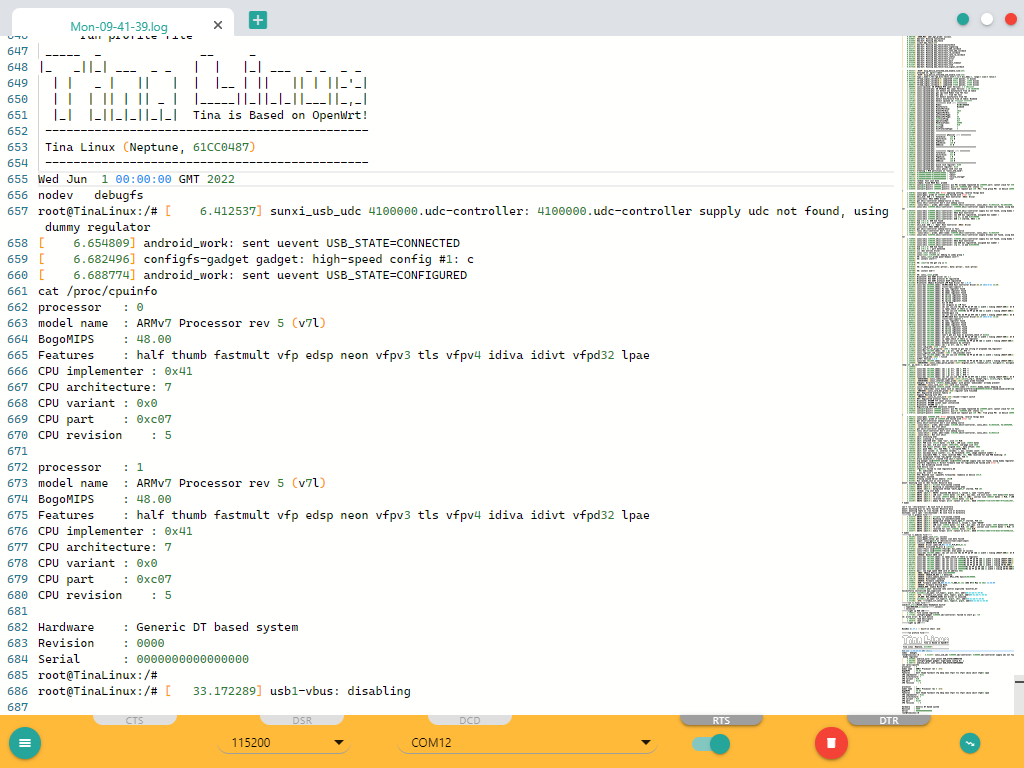
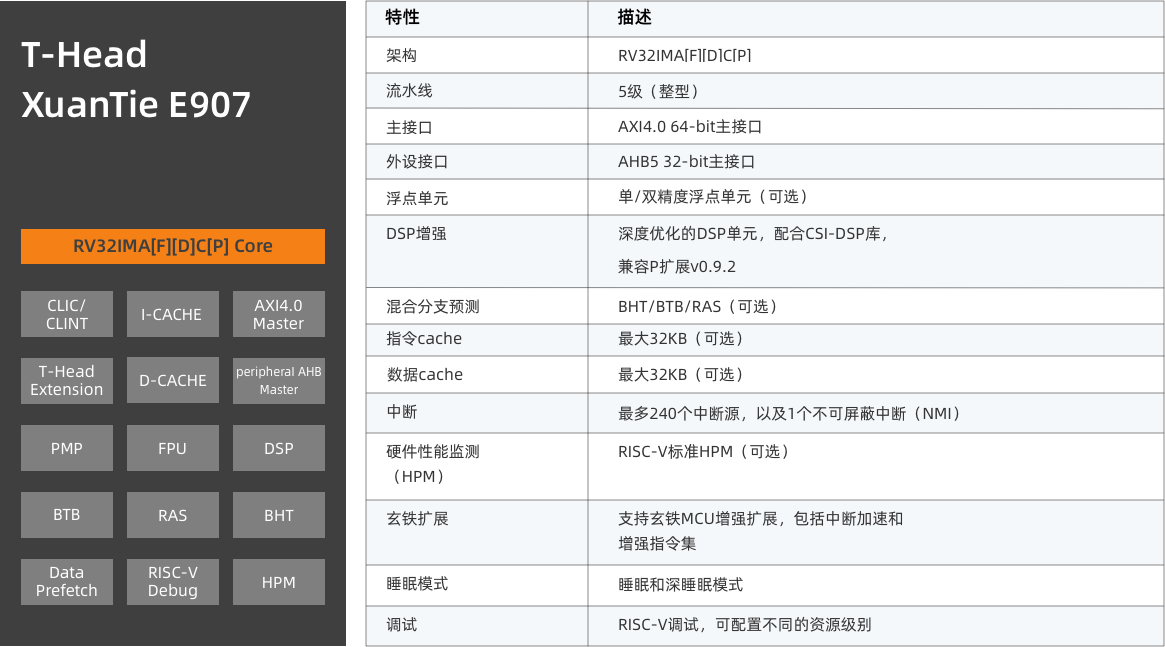
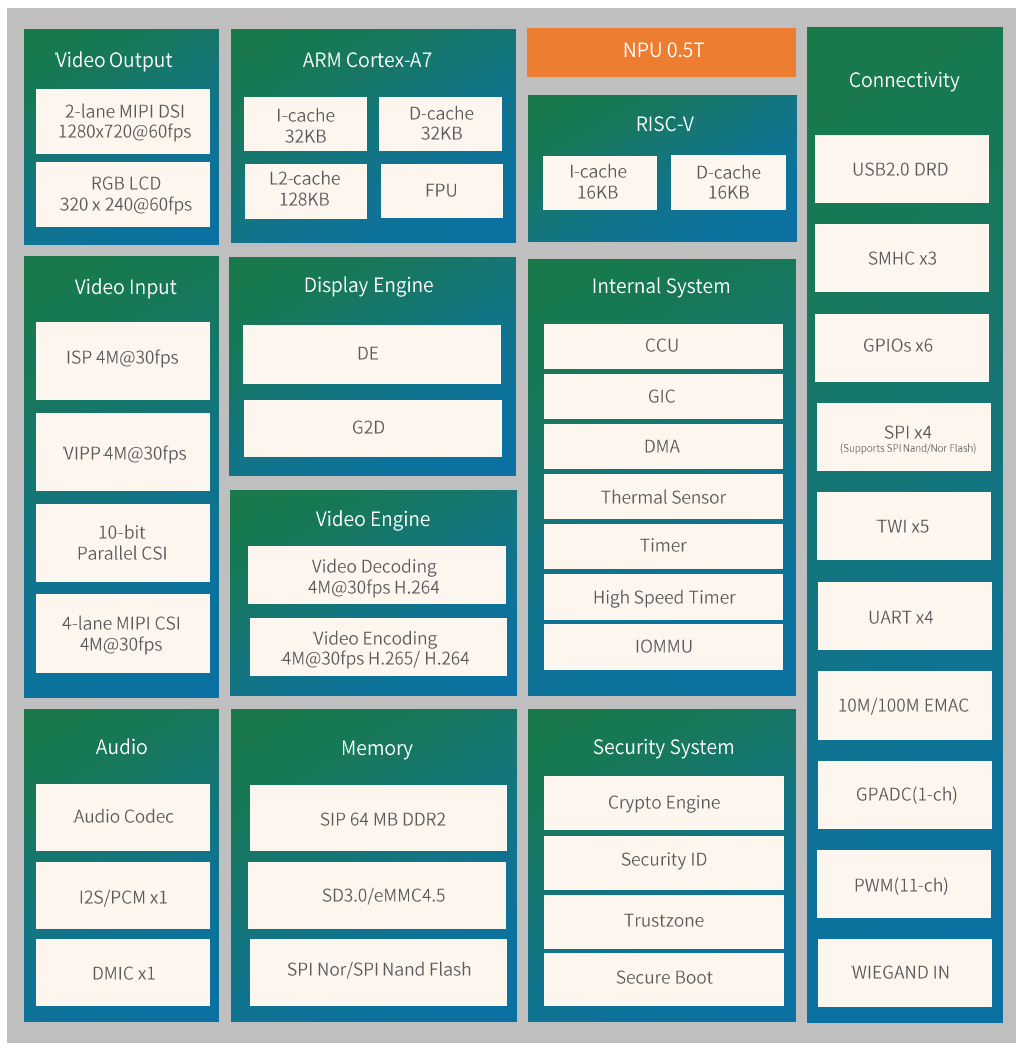
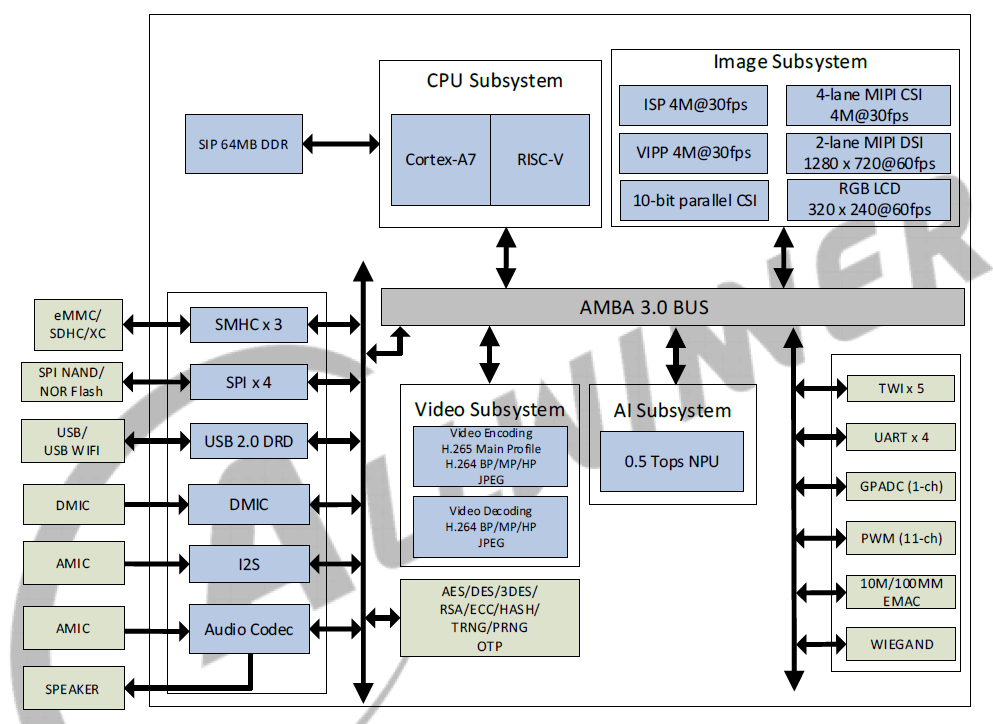
v85x 平台包括了 V853, V853s, V851s, V851se。 s后缀代表芯片内封了DDR内存,e后缀代表芯片内封 ephy。拥有 Cortex-A7 core@900MHz, RISC-V@600MHz 和一个 0.5TOPS(VIP9000PICO_PID0XEE, 567MACS, 576 x 348M x 2 ≈ 500GOPS) 的 NPU。其中的 RISC-V 小核心为 平头哥玄铁E907E907 平台 玄铁E907 是一款完全可综合的高端 MCU 处理器。它兼容 RV32IMAC 指令集,提供可观的整型性能提升以及高能效的浮点性能。E907 的主要特性包括:单双精度浮点单元,以及快速中断响应。
在V85x平台中使用的E907为RV32IMAC,不包括 P 指令集。
V85x 平台框图 V851s
芯片架构图
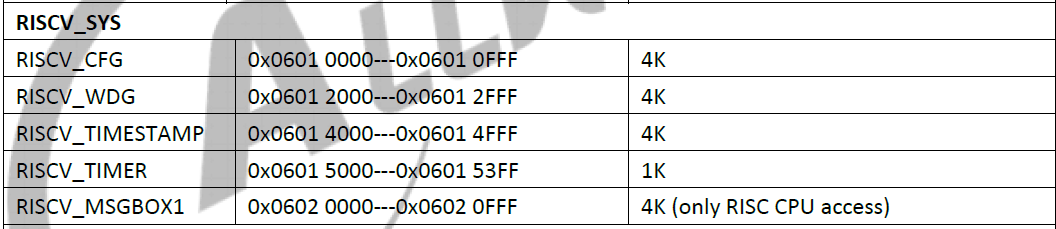
相关内存分布
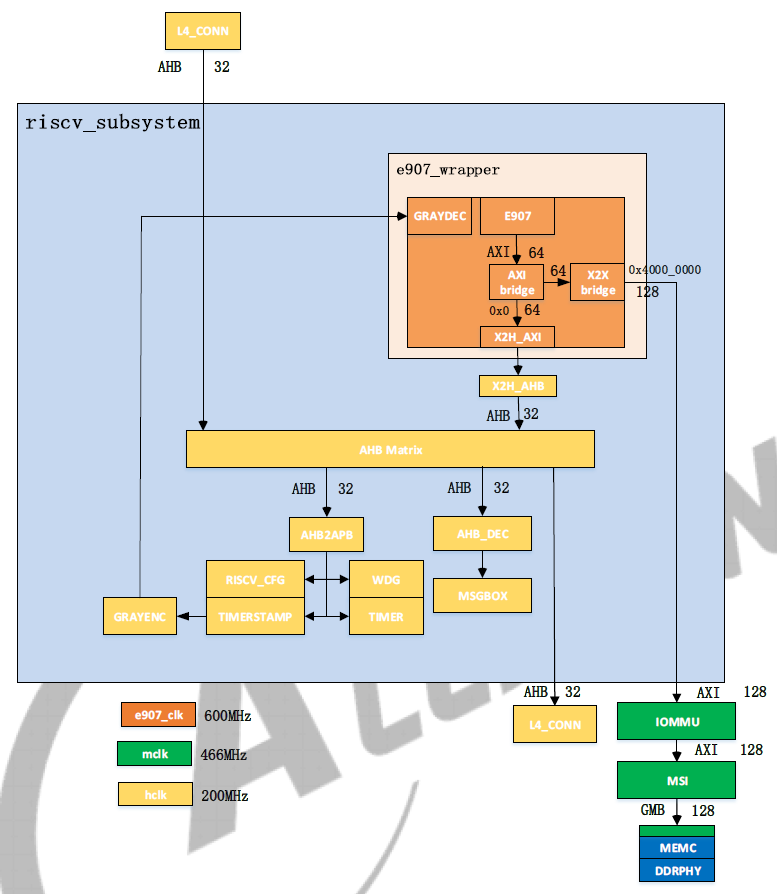
E907 子系统框图
具体的寄存器配置项这里就不过多介绍了,具体可以参考数据手册《V851S&V851SE_Datasheet_V1.0.pdf 》
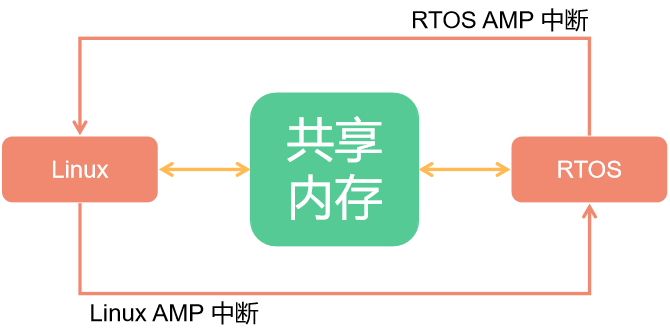
V853 的异构系统通讯在硬件上使用的是 MSGBOX,在软件层面上使用的是 AMP 与 RPMsg 通讯协议。其中 A7 上基于 Linux 标准的 RPMsg 驱动框架,E907基于 OpenAMP 异构通信框架。
AMP 与 RPMsg V853 所带有的 A7 主核心与 E907 辅助核心是完全不同的两个核心,为了最大限度的发挥他们的性能,协同完成某一任务,所以在不同的核心上面运行的系统也各不相同。这些不同架构的核心以及他们上面所运行的软件组合在一起,就成了 AMP 系统 (Asymmetric Multiprocessing System, 异构多处理系统)。
由于两个核心存在的目的是协同的处理,因此在异构多处理系统中往往会形成 Master - Remote 结构。主核心启动后启动从核心。当两个核心上的系统都启动完成后,他们之间就通过 IPC(Inter Processor Communication)方式进行通信,而 RPMsg 就是 IPC 中的一种。
在AMP系统中,两个核心通过共享内存的方式进行通信。两个核心通过 AMP 中断来传递讯息。内存的管理由主核负责。
软件适配 这部分使用BSP开发包即可,配置设备树如下:
reserved-memory { // 配置预留内存区间
内存划分 在设备树配置小核心使用的内存,包括小核自己使用的内存,设备通信内存,回环内存等等,这里E907 运行在 DRAM 内。内存起始地址可以在数据手册查到。
通常来说我们把内存地址设置到末尾,例如这里使用的 V851s,拥有 64MByte 内存,则内存范围为 0x40000000 - 0x44000000,这里配置到 0x43c00000 即可。对于 V853s 拥有 128M 内存则可以设置到 0x47C00000,以此类推。对于交换区内存则可以配置在附近。
reserved-memory { // 配置预留内存区间
然后需要配置下 e907 的链接脚本,找到 e907_rtos/rtos/source/projects/v851-e907-lizard/kernel.lds 将 ORIGIN 配置为上面预留的内存。
MEMORY
然后配置小核的 defconfig 位于 e907_rtos/rtos/source/projects/v851-e907-lizard/configs/defconfig 配置与其对应即可。
CONFIG_DRAM_PHYBASE=0x43c00000
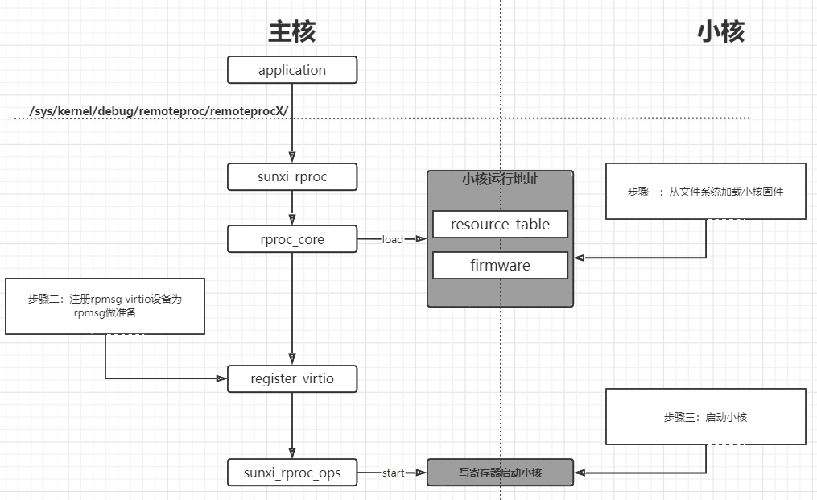
配置启动小核 配置启动小核的流程如下,这里只讨论使用 linux 启动小核的情况,不讨论快启相关。
加载固件调用 firmware 接口获取文件系统中的固件 解析固件的 resource_table 段,该段有如下内容声明需要的内存(Linux 为其分配,设备树配置) 声明使用的 vdev(固定为一个) 声明使用的 vring(固定为两个) 将固件加载到指定地址 注册 rpmsg virtio 设备提供 vdev->ops(基于 virtio 接口实现的) 与 rpmsg_bus 驱动匹配,完成 rpmsg 初始化 启动小核调用 rproc->ops->start 1. 加载固件 驱动位于 kernel/linux-4.9/drivers/remoteproc/sunxi_rproc_firmware.c
首先调用 sunxi_request_firmware 函数
int sunxi_request_firmware (const struct firmware **fw, const char *name, struct device *dev) int ret, index;struct firmware *fw_p =NULL ;if (ret < 0 ) {"Can't finded boot_package head\n" );return -ENODEV;if (ret < 0 ) {"failed to read boot_package item\n" );goto out;if (ret < 0 ) {"failed to read Firmware\n" );goto out;return ret;
驱动会从固件的特定位置读取,使用函数 sunxi_find_firmware_storage,这里会去固定的位置查找固件,位置包括 lib/firmware,/dev/mtd0. /dev/mtd1, /dev/mmcblk0 等位置。对于Linux启动我们只需要放置于 lib/firmware 即可。
static int sunxi_find_firmware_storage (void ) struct firmware_head_info *head ;int i, len, ret;loff_t pos;const char *path;sizeof (*head);if (!head)return -ENOMEM;for (i = 0 ; i < ARRAY_SIZE(firmware_storages); i++) {if (flag != ret)continue ;"try to open %s\n" , path);if (ret < 0 )"open %s failed,ret=%d\n" , path, ret);if (ret != len)continue ;if (head->magic == FIRMWARE_MAGIC) {return i;return -ENODEV;
2. 配置时钟 配置clk与小核的 boot 选项,驱动位于kernel/linux-4.9/drivers/remoteproc/sunxi_rproc_boot.c 可以自行参考
struct sunxi_core *sunxi_remote_core_find (const char *name) ;int sunxi_core_init (struct sunxi_core *core) ;void sunxi_core_deinit (struct sunxi_core *core) ;int sunxi_core_start (struct sunxi_core *core) ;int sunxi_core_is_start (struct sunxi_core *core) ;int sunxi_core_stop (struct sunxi_core *core) ;void sunxi_core_set_start_addr (struct sunxi_core *core, u32 addr) ;void sunxi_core_set_freq (struct sunxi_core *core, u32 freq) ;
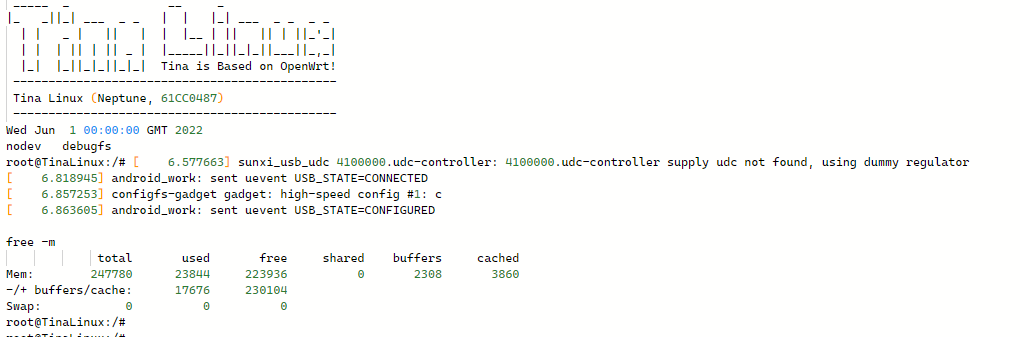
使用 debugfs 加载固件 由于已经对外注册了接口,这里只需要使用命令即可启动小核心。假设小核的elf名字叫e907.elf 并且已经放置进 lib/firmware 文件夹
echo e907.elf > /sys/kernel/debug/remoteproc/remoteproc0/firmware
E907 小核开发 这里提供了一个 RTOS 以供开发使用,此 RTOS 基于 RTT 内核。地址 https://github.com/YuzukiHD/Yuzukilizard/tree/master/Software/BSP/e907_rtos
同时,docker 镜像内也已包含此开发包,可以直接使用。
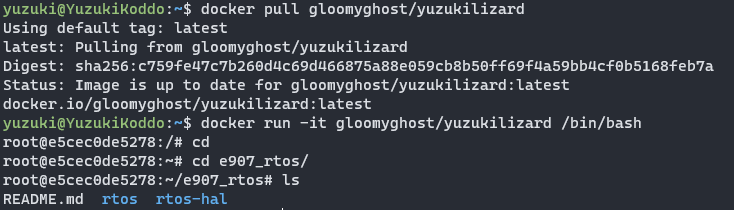
搭建开发环境 使用 docker 直接拉取 gloomyghost/yuzukilizard 即可
docker pull gloomyghost/yuzukilizard
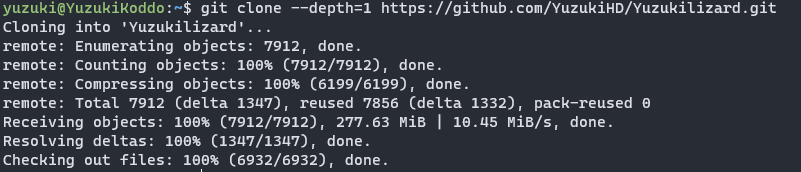
独立搭建开发环境 使用 git 命令下载(不可以直接到 Github 下载 zip,会破坏超链接与文件属性)
git clone --depth=1 https://github.com/YuzukiHD/Yuzukilizard.git
然后复制到当前目录下
cp -rf Yuzukilizard/Software/BSP/e907_rtos/ . && cd e907_rtos
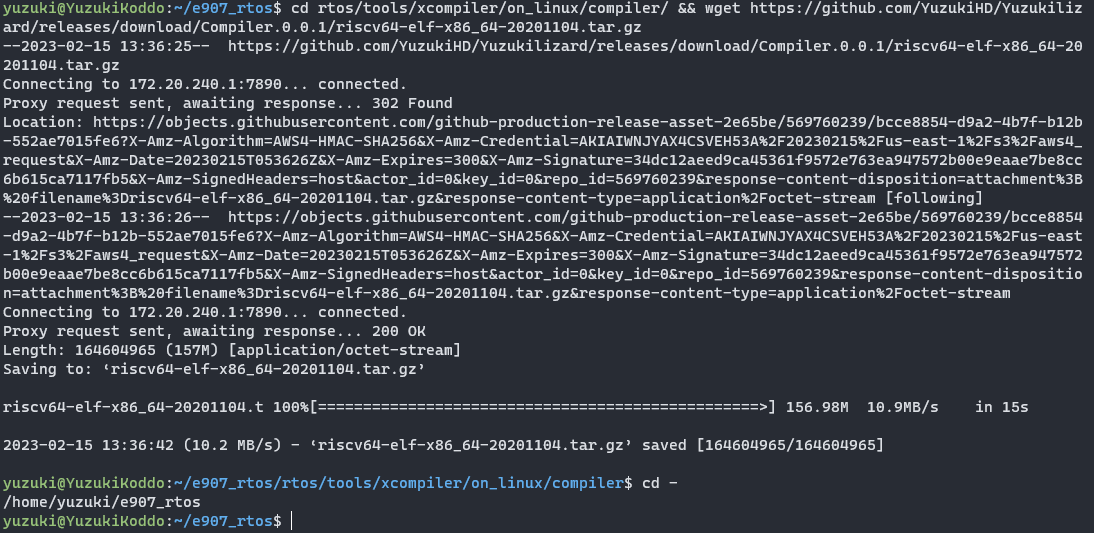
下载编译工具链到指定目录
cd rtos/tools/xcompiler/on_linux/compiler/ && wget https://github.com/YuzukiHD/Yuzukilizard/releases/download/Compiler.0.0.1/riscv64-elf-x86_64-20201104.tar.gz && cd -
编译第一个 elf 系统 进入 rtos/source 文件夹
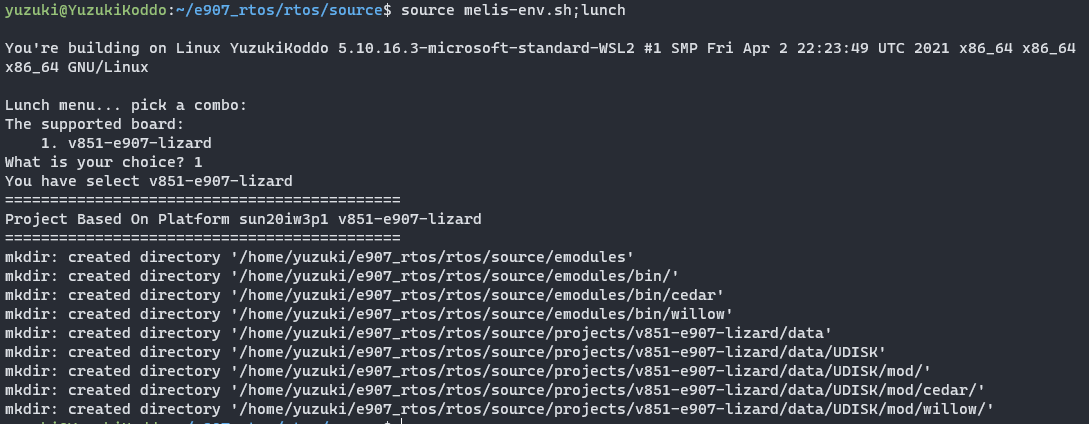
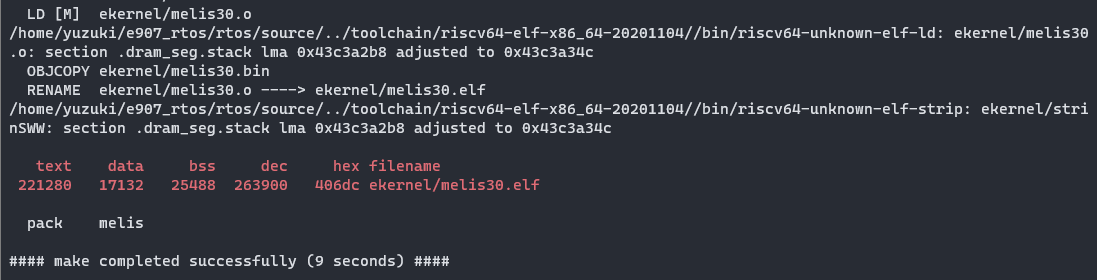
应用环境变量并加载方案
source melis-env.sh;lunch
然后直接编译即可,他会自动解压配置工具链。编译完成后可以在 ekernel/melis30.elf 找到固件。
配置小核系统 小核的编译框架与 kernel 类似,使用 kconfig 作为配置项。使用 make menuconfig 进入配置页。
其余使用与标准 menuconfig 相同这里不过多赘述。
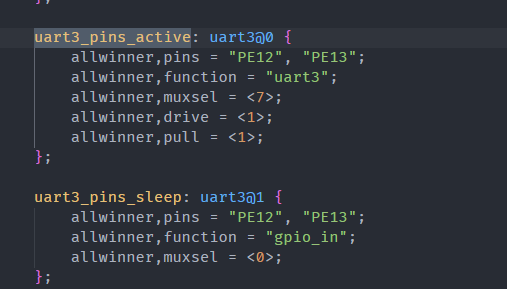
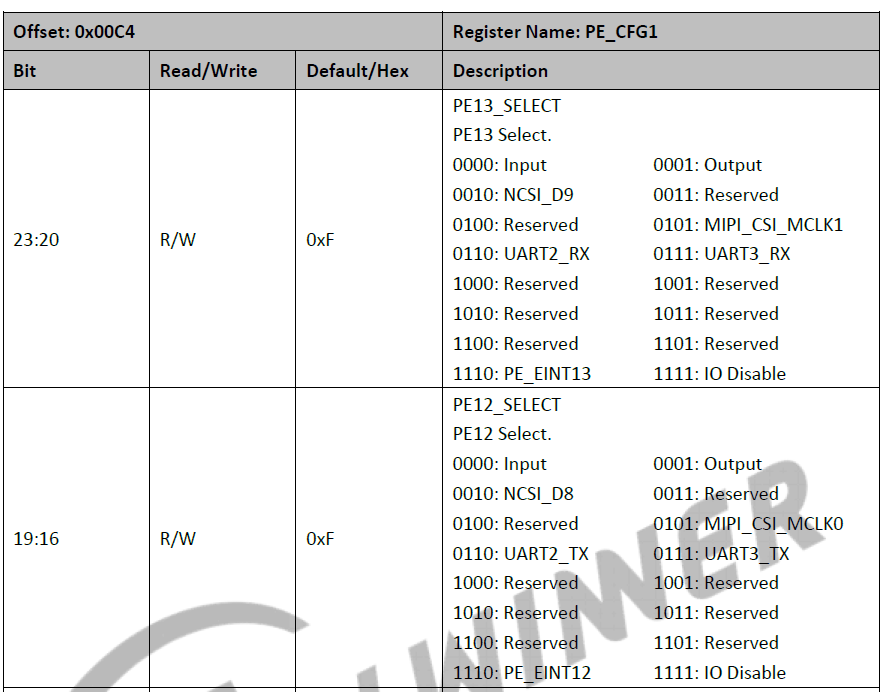
小核使用 小核使用 UART 输出 console 首先配置小核的 PINMUX 编辑文件 e907_rtos/rtos/source/projects/v851-e907-lizard/configs/sys_config.fex 这里使用 UART3 , 引脚为PE12, PE13 , mux 为 7
[uart3]
然后配置使用 uart3 作为输出,运行 make menuconfig 居进入配置
Kernel Setup --->
到 linux 中配置设备树,将设备树配置相应的引脚与 mux
如果设备树不做配置引脚和 mux,kernel会很贴心的帮你把没使用的 Pin 设置 io_disable 。由于使用的是 iommu 操作 UART 设备,会导致 io 不可使用。如下所示。
此外,还需要将 uart3 的节点配置 disable,否则 kernel 会优先占用此设备。
&uart3 {
如果配置 okay 会出现以下提示。
uart: create mailbox fail
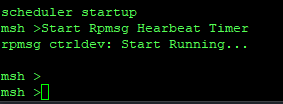
启动小核固件后就可以看到输出了
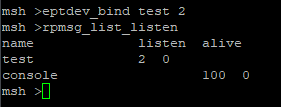
核心通讯 建立通讯节点 启动小核后,使用 eptdev_bind test 2 建立两个通讯节点的监听,可以用 rpmsg_list_listen 命令查看监听节点。
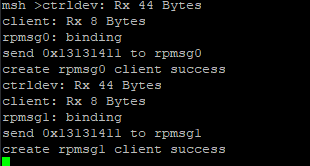
然后在 Linux 内创建通讯节点,由于我们上面启用了两个监听所以这里也开两个节点
echo test > /sys/class/rpmsg/rpmsg_ctrl0/open
然后就可以在 /dev/ 下看到通讯节点 /dev/rpmsg0,/dev/rpmsg1
也可以在小核控制台看到节点的建立
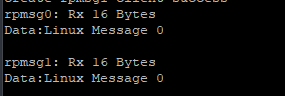
核心通讯 Linux -> e907 可以直接操作 Linux 端的节点,使用 echo 写入数据
echo "Linux Message 0" > /dev/rpmsg0
小核即可收到数据
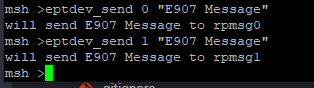
e907 -> Linux 使用命令 eptdev_send 用法 eptdev_send <id> <data>
eptdev_send 0 "E907 Message"
在 Linux 侧直接可以读取出来
cat /dev/rpmsg0
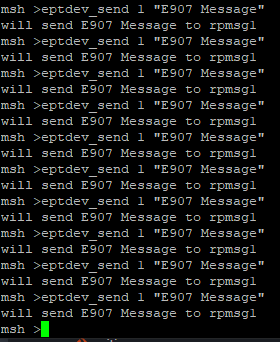
可以一直监听,例如多次发送数据
Linux 侧获得的数据也会增加
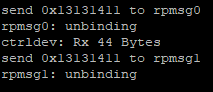
关闭通讯 Linux 侧关闭,操作控制节点,echo <id> 给节点即可
echo 0 > /sys/class/rpmsg/rpmsg_ctrl0/close
同时 E907 也会打印链接关闭
rpmsg 需知 端点是 rpmsg 通信的基础;每个端点都有自己的 src 和 dst 地址,范围(1 - 1023,除了0x35) rpmsg 每次发送数据最大为512 -16 字节;(数据块大小为 512,头部占用 16 字节)rpmsg 使用 name server 机制,当 E907 创建的端点名,和 linux 注册的 rpmsg 驱动名一rpmsg bus 总线会调用其 probe 接口。所以如果需要 Linux 端主动发起创建端e907,则需要借助上面提到的 rpmsg_ctrl 驱动。rpmsg 是串行调用回调的,故建议 rpmsg_driver 的回调中不要调用耗时长的函数,避免影rpmsg 驱动的运行自定义小核 APP 小核的程序入口位于 e907_rtos/rtos/source/projects/v851-e907-lizard/src/main.c
#include <stdio.h>
可以自定义小核所运行的程序。
自定义小核命令 SDK 提供了 FINSH_FUNCTION_EXPORT_ALIAS 绑定方法,具体为
FINSH_FUNCTION_EXPORT_ALIAS(<函数名称>, <命令>, <命令的描述>)
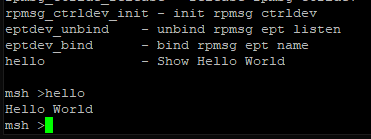
例如编写一个 hello 命令,功能是输出 Hello World,描述为 Show Hello World
int hello_cmd (int argc, const char **argv) printf ("Hello World\n" );
即可在小核找到命令与输出。
]]>
https://gloomyghost.com/live/2023-02-15-20230215.aspx
2023-02-14T16:00:00.000Z
v85x 平台包括了 V853, V853s, V851s, V851se。 s后缀代表芯片内封了DDR内存,e后缀代]]>
V85x E907 小核开发与使用
2026-04-25T03:17:29.450Z
柚木 鉉
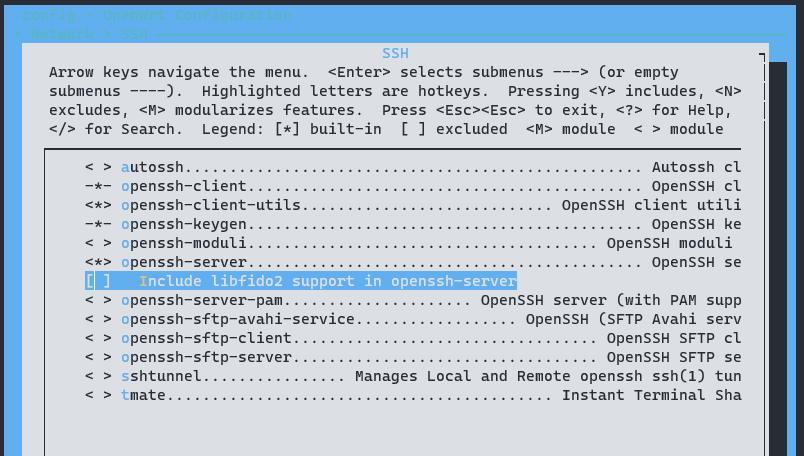
勾选 ssh 包,添加相关编译选项make menuconfig 进入 ROOTFS 配置界面,找到并勾选
--> network
由于包的冲突,需要关闭 libfido2
和 libudev-zero
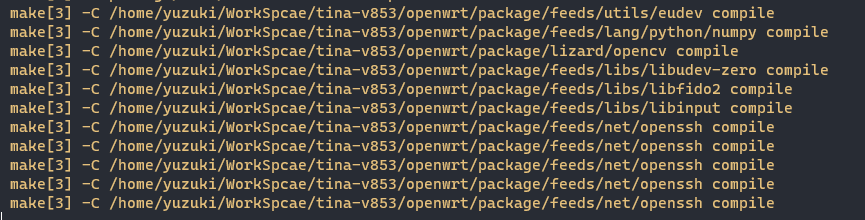
之后编译系统并刷写
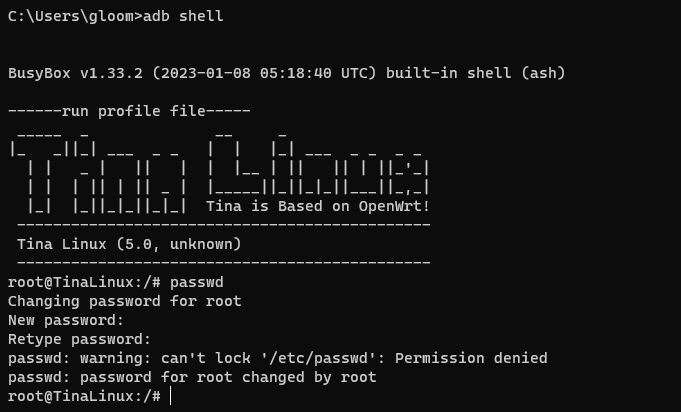
配置 ROOT 用户密码 使用 passwd 命令给 root 账号添加密码,一般新烧的系统 root 账号是没有设定密码的。
(可以把这个passwd文件复制出来,放到 busybox-init-base-files 的对应位置,以后可以作为密码使用)
删除初始随机密码 由于 OpenWRT 的特性,默认密码会保存到 /etc/shadow 中。否则远程登录时使用的是 shadow 里的密码,但该密码不清楚是什么内容,并且该密码与 /etc/passwd 中的密码有覆盖现象
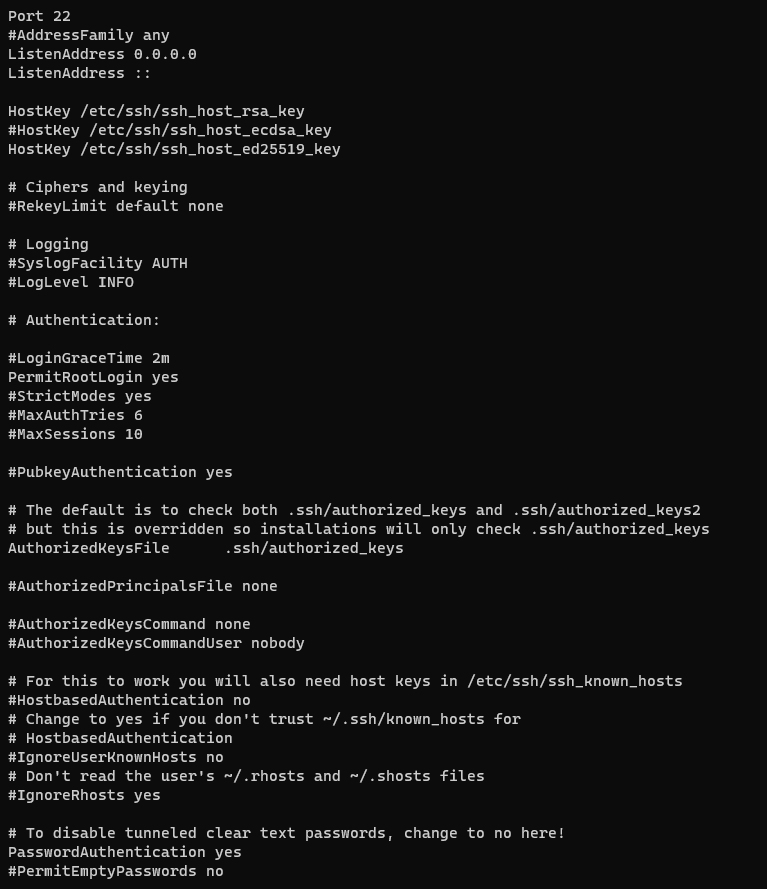
配置 ROOT 登陆权限 修改 /etc/ssh/sshd_config 文件,添加 PermitRootLogin yes 配置项(该配置项是允许 ssh 以root 账号登录)
]]>
https://gloomyghost.com/live/2023-01-18-20230118.aspx
2023-01-17T16:00:00.000Z